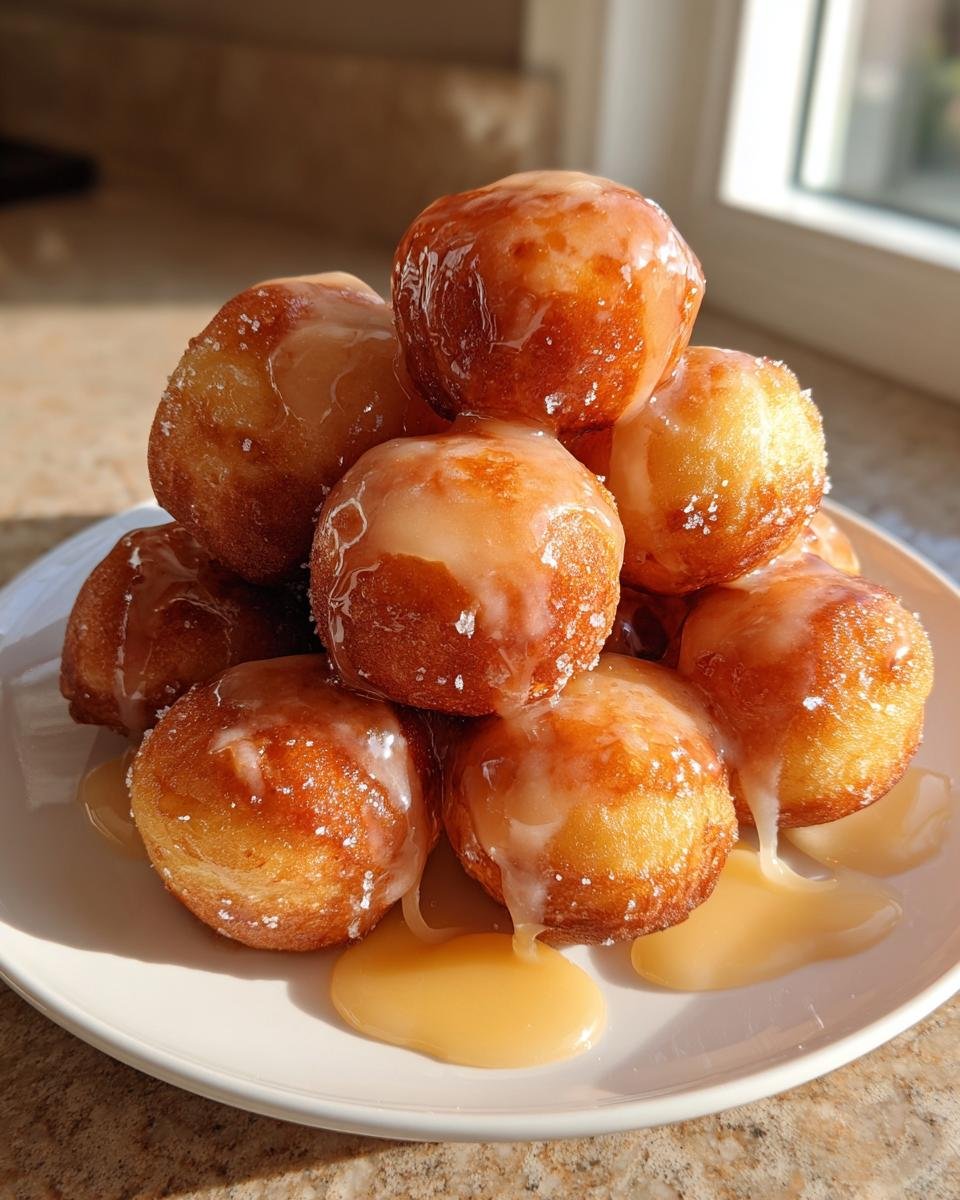
Oh my goodness, who doesn’t adore the smell of fresh donuts right out of the fryer? That warm, sweet scent just takes me right back to childhood fairs. Forget spending all morning rolling out dough; I’ve finally cracked the code for tiny, perfect little sweet bites that satisfy that craving instantly. We’re talking about my recipe for Maple Glazed Donut Holes, and trust me, they are an absolute dream. I remember the first time I made the glaze—it was way too thin and drippy! But after a couple of tries, I hit that sweet spot where the glaze sets up just right, giving you the perfect sticky-sweet maple coat over pillowy fried dough.
Why You Will Love These Maple Glazed Donut Holes
I know you’re busy, so let me tell you right off the bat why this recipe is going to sneak its way into your regular rotation. Seriously, these are faster than running to the donut shop! Plus, frying donut holes is just way more fun than making a big, intimidating sheet of donuts. You get all the flavor and none of the drama. If you enjoy making these, you absolutely have to check out my recipe for mini powdered sugar donuts next!
- They genuinely come together in under 30 minutes total—prep and fry time combined!
- The batter is simple; no yeast involved, which means no waiting around for hours.
- That rich, unmistakable flavor of real maple syrup that you just can’t beat.
- Perfect for brunch when you need a crowd-pleasing sweet surprise fast.
- They are totally snackable because they’re small, but somehow they taste way fancier.
- The glaze sets up beautifully when dipped while the holes are still perfectly warm.
Quick Preparation Time for Maple Glazed Donut Holes
I timed myself last week just to be sure! From the moment I pulled out the mixing bowls to pulling the last batch out of the oil, it took barely 25 minutes total. We’re talking 15 minutes of prep, and then maybe 10 minutes of frying time. That’s right, you can have real, fresh fried dough on your plate before the kettle even finishes boiling for coffee. It’s magic, I tell you!

Perfectly Sweet Maple Glaze Texture
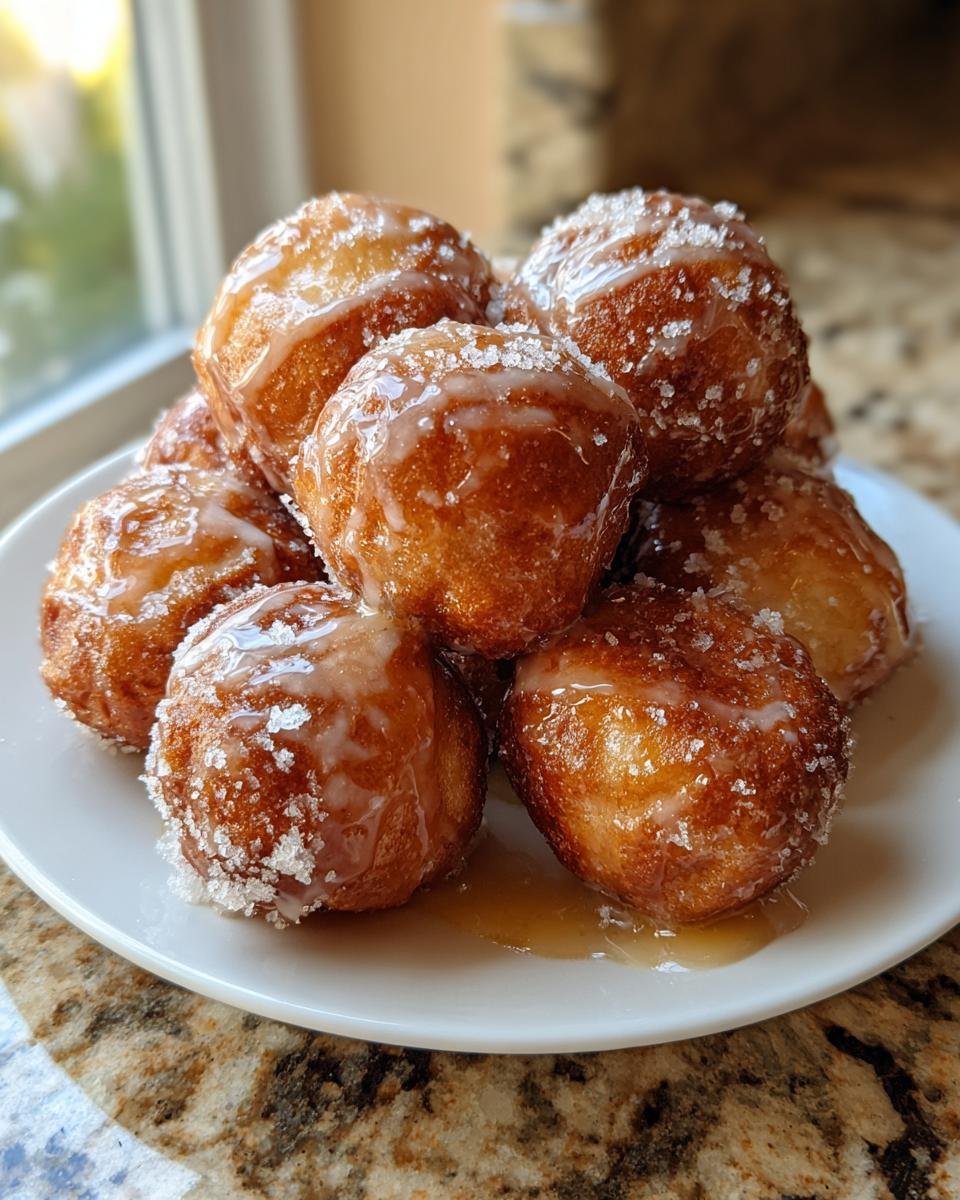
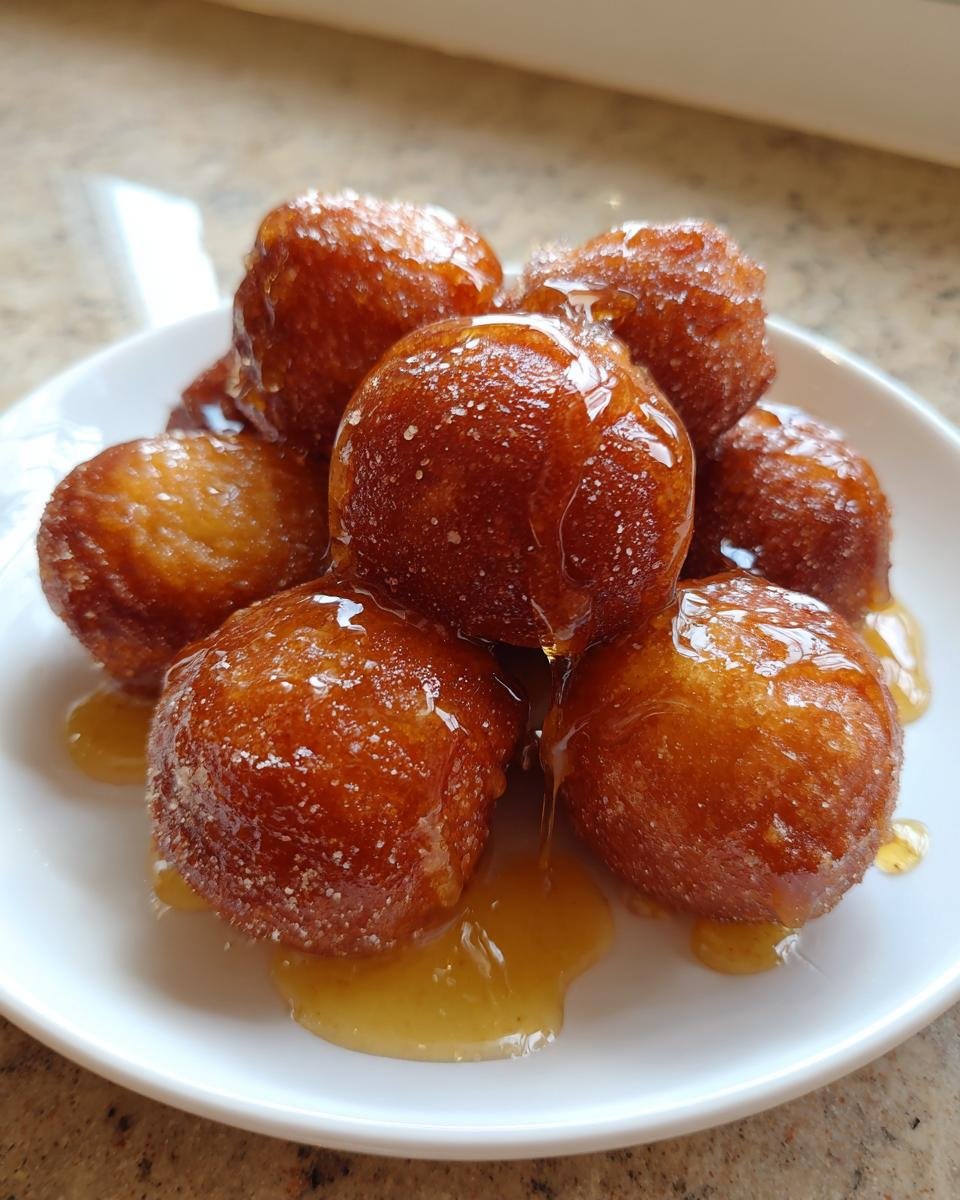
This is where a lot of recipes mess up. If the glaze is too thin, it just runs off and pools at the bottom of your plate. Too thick, and it gets clumpy and overwhelming. We are aiming for utter perfection here! Whisk it until it’s like a thick, smooth ribbon when you lift the whisk—it needs to coat the warm donut holes nicely without being gloopy. When you dip those golden balls in, you want a thin, shiny sheath of maple goodness that sets up beautifully as they cool on the rack. That’s the secret to a satisfying bite!
Essential Ingredients for Perfect Maple Glazed Donut Holes
Okay, let’s talk about what you need to pull off these incredible little treats. The beauty of these donut holes is that they use pantry staples, which means you probably have most of this stuff waiting for you right now! But listen closely, because the type of maple syrup you use genuinely changes the outcome of the glaze. If you’re making these for guests, definitely grab the good stuff—our rich maple chocolate chip banana bread recipe taught us that pure maple syrup makes all the difference in boosting that woodsy sweetness.
Dry Ingredients for the Maple Glazed Donut Holes Batter
First up, we need our structure builders! You’ll need one cup of all-purpose flour. Don’t pack that cup, just spoon it lightly into the measuring cup. Mix that in a bowl with about half a cup of granulated sugar for sweetness, along with our rising agents: one teaspoon of baking powder and just a tiny pinch—a quarter teaspoon—of salt to wake up all those sweet flavors. Keep these dry things separate for now.
Wet Ingredients and Fats
In a different bowl, we’ll get our moisture going. Whisk up half a cup of milk with one large egg—make sure it’s large! Add one teaspoon of vanilla extract for that familiar comforting backdrop flavor. And don’t forget the fat for richness; two tablespoons of butter, and it absolutely has to be melted before you add it in, otherwise it lumps up everything. So simple!
Components for the Signature Maple Glaze
Now for the star of the show, the glaze! You need a full cup of powdered sugar—none of that granulated stuff here, we need smooth! Then, the maple syrup. I insist on using pure, real maple syrup—skip the imitation stuff—we need about two tablespoons of that liquid gold. Just a splash more milk, maybe one tablespoon, is all we need to get the glaze moving until it’s the perfect drizzling consistency.
Expert Tips for Frying Maple Glazed Donut Holes
Frying is fun, but messy if you don’t respect the oil! This is the part where we separate the decent donut holes from the absolutely spectacular ones. If you’re new to frying at home, don’t panic! It sounds scary, but when dealing with donut holes, you’re only dealing with small bits of batter. My biggest piece of advice is checking out this guide on making perfect fluffy donuts—the frying tips in there are gold and directly apply here.
Achieving the Correct Oil Temperature for Maple Glazed Donut Holes
Listen closely: temperature is your boss here. You absolutely must hit 350 degrees Fahrenheit, which is 175 degrees Celsius. If your oil is too cool, your amazing batter just drinks up the grease, and you end up with sad, heavy, soaked little dough balls. Yuck! Conversely, if it’s too hot—say, over 375°F—the outside will turn dark brown in about thirty seconds, but the inside will be a gooey, raw mess. I always use a candy or deep-fry thermometer because guessing just leads to tears and wasted batter.
Handling the Frying Process Safely
Safety first, always remember that! I generally use my big, heavy-bottomed Dutch oven on the stove if I don’t feel like pulling out the full deep fryer. It holds the heat so much better than a flimsy pan. You only need about two inches of vegetable oil, which is less than you might think. Make sure you absolutely fry these in small batches—maybe six or seven at a time. If you crowd the pot, the temperature plummets immediately, and we head right back to the greasy problem we were just trying to avoid. Be patient; let the oil recover between dips!
Step-by-Step Instructions for Maple Glazed Donut Holes
If you’ve followed along so far, gathering your ingredients and setting your oil temperature, you are practically done! This process moves really fast once you start mixing, which is exactly why we need to have everything lined up. Mixing up the dough is easy, but the actual frying takes focus because you don’t want to walk away for even a second. I highly recommend watching a quick video tutorial if you are nervous about frying for the first time—I always watch one before I make my sweet Sinaloan doughnuts just to get myself in the right zone!
Mixing the Dough for Maple Glazed Donut Holes
We always start by bringing our separated ingredients together. Take that bowl of dry stuff—flour, sugar, baking powder, and salt—and give it a quick whisk just to incorporate everything evenly. Then, grab your wet ingredients—the milk, egg, and vanilla—and mix those separately until they look happily unified. Now, pour the wet into the dry. This is the most important moment: mix it only until you see the flour streaks *just* disappear. Seriously, stop mixing! Overmixing develops the gluten, and you end up with dense, chewy donuts instead of light, airy ones. Finally, stir in those two tablespoons of melted butter, but gently!
Frying and Draining the Donut Holes
Now for the fun, noisy part! Once your oil is steady at 350°F, use two spoons or a small cookie scoop to carefully drop the batter right into the hot fat. Don’t drop huge clumps in; I like using rounded teaspoons so they stay nice and small. Fry them in small batches, maybe 6 or 7 at a time, turning them with a slotted spoon every 30 seconds or so. You are looking for them to be a gorgeous, deep golden brown on all sides, which usually takes only about 2 to 3 minutes tops. When they look perfect, lift them out immediately with that slotted spoon and let them rest on paper towels to drain off all that extra oil. They need just a few minutes to cool slightly before glazing.
Preparing and Applying the Maple Glaze
While those beautiful little guys are cooling just a touch, you can whisk together your glaze ingredients: powdered sugar, maple syrup, and that last little bit of milk. Whisk aggressively until everything melts together and the texture is smooth, shiny, and thick enough to stick nicely to the spoon. Remember, you need to dip these while they are still warm. That slight residual heat helps the glaze melt just enough to adhere perfectly. Dip them quickly—top, bottom, sides—and then place them immediately onto a wire rack set over parchment paper. Give them five minutes to set, and you’re done!
Ingredient Notes and Substitutions for Maple Glazed Donut Holes
I always get questions about what happens if you don’t have exactly what the recipe calls for, especially when you’re dealing with something as crucial as frying oil or specialty sweeteners. Don’t stress if your pantry looks slightly different than mine! These notes are just to help you troubleshoot or optimize your Maple Glazed Donut Holes based on what you have on hand. Trust me, I’ve tried substitutes in a pinch, and knowing the trade-offs is key to keeping that flavor profile exactly where we want it.
Maple Syrup Quality Matters
This is a non-negotiable swap for me if you want that authentic, deep maple flavor—use 100% pure maple syrup! If you only have pancake syrup lying around (the stuff with corn syrup), you can technically use it because the powdered sugar is doing most of the heavy lifting in the glaze structure. But please know, the flavor will be flatter and way less woodsy and complex. It just won’t sing the way the real stuff does, so I always recommend splurging on the pure bottle for this recipe!
Oil Recommendations for Frying
Vegetable oil is my go-to for frying because it’s neutral and inexpensive, and it really lets the maple flavor shine through. But if you have canola oil or peanut oil in your pantry, go for it! The main thing you need when frying is a high smoke point. You need the oil to create a good, immediate crust on the dough without breaking down. Just check that label, make sure it’s a refined oil that can handle the 350°F heat, and you’re good to go for getting those beautiful golden donut holes.
Storing and Reheating Your Maple Glazed Donut Holes
Okay, I know it’s ambitious to think you’ll have any leftovers, because these things disappear instantly! But if, by some miracle, you have a few dangling around the next day—don’t fret about them getting stale. Since they are glazed, the best bet is just keeping them out on the counter in a truly airtight container. I wouldn’t put them in the fridge because the moisture makes them taste weirdly dense the next day.
If you must store them longer than a day, pop them in a freezer bag, press out the air, and they’ll be fine for about a month. When you want one later, just let it thaw on the counter for about 20 minutes. You can gently warm them in the microwave for about 5 seconds, but seriously, they are tastiest enjoyed close to when they were made!
Serving Suggestions for Maple Glazed Donut Holes
Now that you have these perfect little bundles of joy, how should you serve them up? They are incredible on their own, obviously, but pairing them with the right drink just elevates the whole experience. When that rich sweetness hits your tongue, you need something to cut through it or maybe something warm and cozy to lean into that maple flavor.
For me, the ultimate pairing is coffee, but not just any coffee! I love making a big batch of my cinnamon maple vanilla latte recipe to go alongside these. The spices in the latte—cinnamon especially—work so beautifully with the pure maple glaze. It feels like a fancy café morning, even if you’re eating them standing up in your kitchen, which is how I usually end up eating mine!
If you want something less caffeinated, plain cold milk is a classic for a reason—it perfectly balances the fried flavor. For brunch settings, though, I sometimes dust a few extras with powdered sugar and set them next to some fresh mixed berries. The tartness of strawberries or raspberries adds a lovely pop of freshness against the deep sweetness of the glaze. Honestly, though, just having them warm on a platter usually does the trick—they never last long enough for me to get too fancy!
Frequently Asked Questions About Maple Glazed Donut Holes
I get so many questions every time I post pictures of these little gems online! It seems everyone wants to know if they can cheat on the frying part or how to nail that perfect maple glaze consistency. It’s smart to ask these things ahead of time so you aren’t stopping halfway through the process, right? I’ve gathered the most common questions here to make sure your batch of Maple Glazed Donut Holes turns out absolutely flawless. You know, if you love these, you should definitely take a look at my recipe for mini powdered sugar donuts—it uses a similar base dough!
Can I bake these donut holes instead of frying them?
That’s the big question for anyone trying to avoid oil! You certainly *can* bake the batter in a mini donut pan, and they will still be tasty cake bites. However, you lose that essential light, airy texture that comes from deep frying. The magic of a true donut hole is that crispy exterior giving way to the pillow inside—baking just doesn’t achieve that same effect. Stick to the frying method for the authentic experience we’re after!
How can I make the maple glaze thicker or thinner?
This fix is super easy, but timing matters! If you dip your warm donut holes and the glaze just vanishes right off them, it’s too thin. Just whisk in maybe a half teaspoon more powdered sugar at a time until it feels slightly heavier. If it seems too stiff and you can barely dip the donut hole without it clumping, then you need just a couple of drops more milk. Remember, you can always adjust it after you try the first dip! It’s fiddly, but worth it.
What is the best way to keep maple glazed donut holes fresh?
I’ll be honest, these are best eaten the day you make them! They lose their delicate texture if stored too long. If you have leftovers, keep them in an airtight container right on your counter where they are room temperature for up to two days. The only catch is humidity: sometimes the maple glaze can feel a little sticky on day two, but the flavor is still totally worth it. If you want the absolute best flavor, though, try them warmed up alongside a batch of my Sinaloan doughnuts!
Estimated Nutritional Information for Maple Glazed Donut Holes
So, I know these are pure fun food, but sometimes you just want a rough idea of what you’re diving into, right? Since we deep-fry these little beauties, the fat content is a bit higher than if we baked them, but wow is it worth it for the texture!
This information is based on a serving size of four donut holes, which seems reasonable, though I rarely stop at just four! Please remember these numbers are just estimates based on standard ingredient calculations. Don’t treat this like a strict diet plan; these are treats! But for reference, here is what the numbers generally shake out to be for one serving:
- Serving Size: 4 donut holes
- Calories: Around 250 calories
- Sugar: This comes in pretty high at about 25g, which is expected since we are dipping them in pure maple glaze!
- Fat: About 12g total fat per serving.
- Protein: We get a small lift here, around 3g.
- Carbohydrates: Roughly 33g.
See? Nothing too shocking for a weekend morning indulgence! The sugar is what gets you, but that’s the joy of a glazed donut, isn’t it? Just enjoy them warm—that’s the most important nutritional advice I can give you for these Maple Glazed Donut Holes!
Print
Maple Glazed Donut Holes
- Total Time: 25 min
- Yield: 20 donut holes 1x
- Diet: Vegetarian
Description
Small, sweet donut holes coated in a simple maple glaze.
Ingredients
- 1 cup all-purpose flour
- 1/2 cup granulated sugar
- 1 teaspoon baking powder
- 1/4 teaspoon salt
- 1/2 cup milk
- 1 large egg
- 1 teaspoon vanilla extract
- 2 tablespoons melted butter
- Vegetable oil for frying
- 1 cup powdered sugar
- 2 tablespoons maple syrup
- 1 tablespoon milk (for glaze)
Instructions
- Whisk together flour, granulated sugar, baking powder, and salt in a medium bowl.
- In a separate bowl, whisk together milk, egg, and vanilla extract.
- Pour the wet ingredients into the dry ingredients and mix until just combined. Stir in the melted butter. Do not overmix.
- Heat about 2 inches of vegetable oil in a deep pot to 350 degrees F (175 degrees C).
- Drop batter by rounded teaspoons into the hot oil. Fry in batches, turning occasionally, until golden brown on all sides, about 2 to 3 minutes.
- Remove donut holes with a slotted spoon and place them on a paper towel-lined plate to drain excess oil.
- While the donut holes cool slightly, whisk together powdered sugar, maple syrup, and 1 tablespoon of milk until smooth for the glaze.
- Dip each warm donut hole into the glaze, coating completely. Place them back on a wire rack to set the glaze.
Notes
- For a thinner glaze, add a few more drops of milk.
- If you do not have a deep fryer, use a heavy-bottomed pot for frying.
- Prep Time: 15 min
- Cook Time: 10 min
- Category: Dessert
- Method: Frying
- Cuisine: American
Nutrition
- Serving Size: 4 donut holes
- Calories: 250
- Sugar: 25g
- Sodium: 150mg
- Fat: 12g
- Saturated Fat: 4g
- Unsaturated Fat: 8g
- Trans Fat: 0g
- Carbohydrates: 33g
- Fiber: 1g
- Protein: 3g
- Cholesterol: 30mg
Keywords: maple, donut holes, glazed, fried dough, sweet treat