
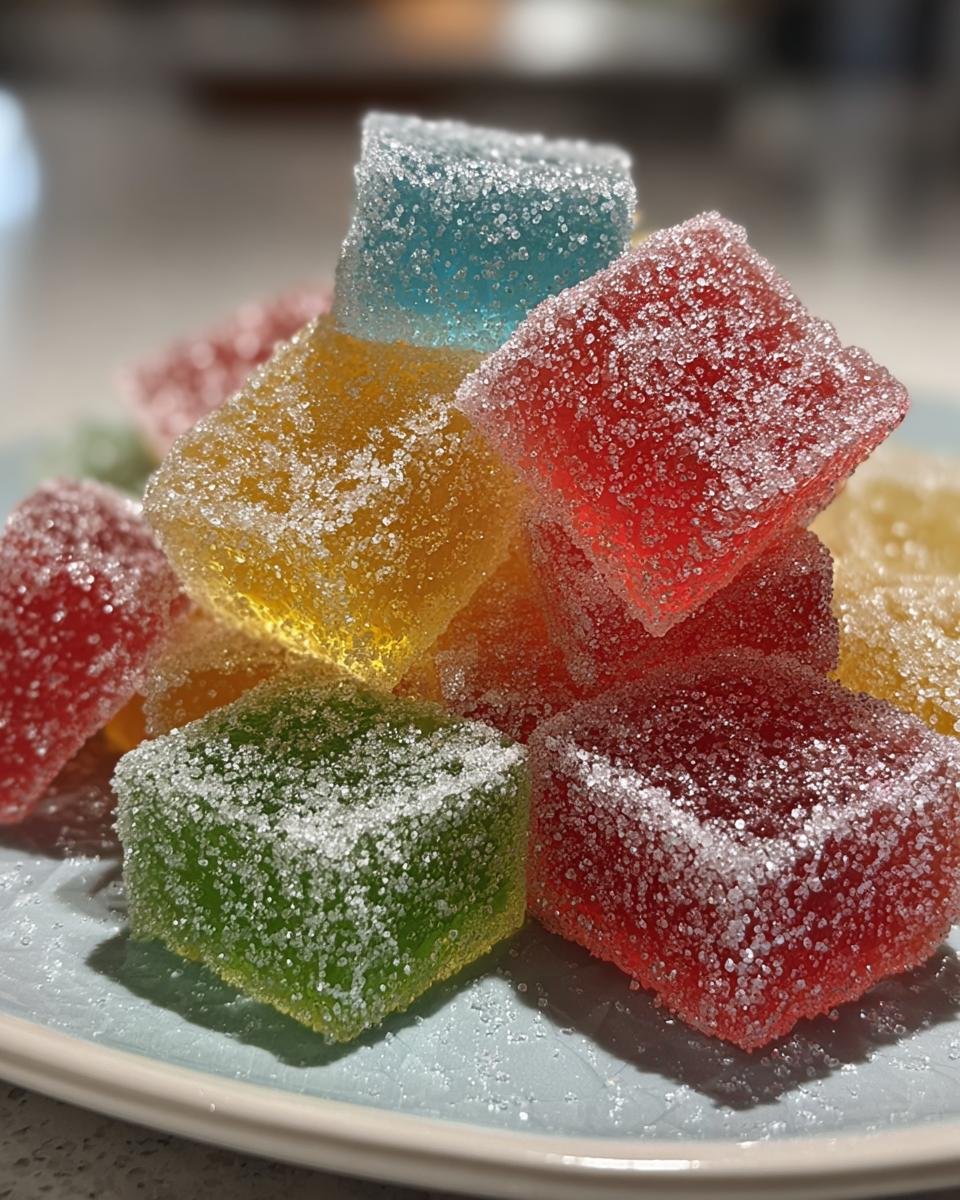
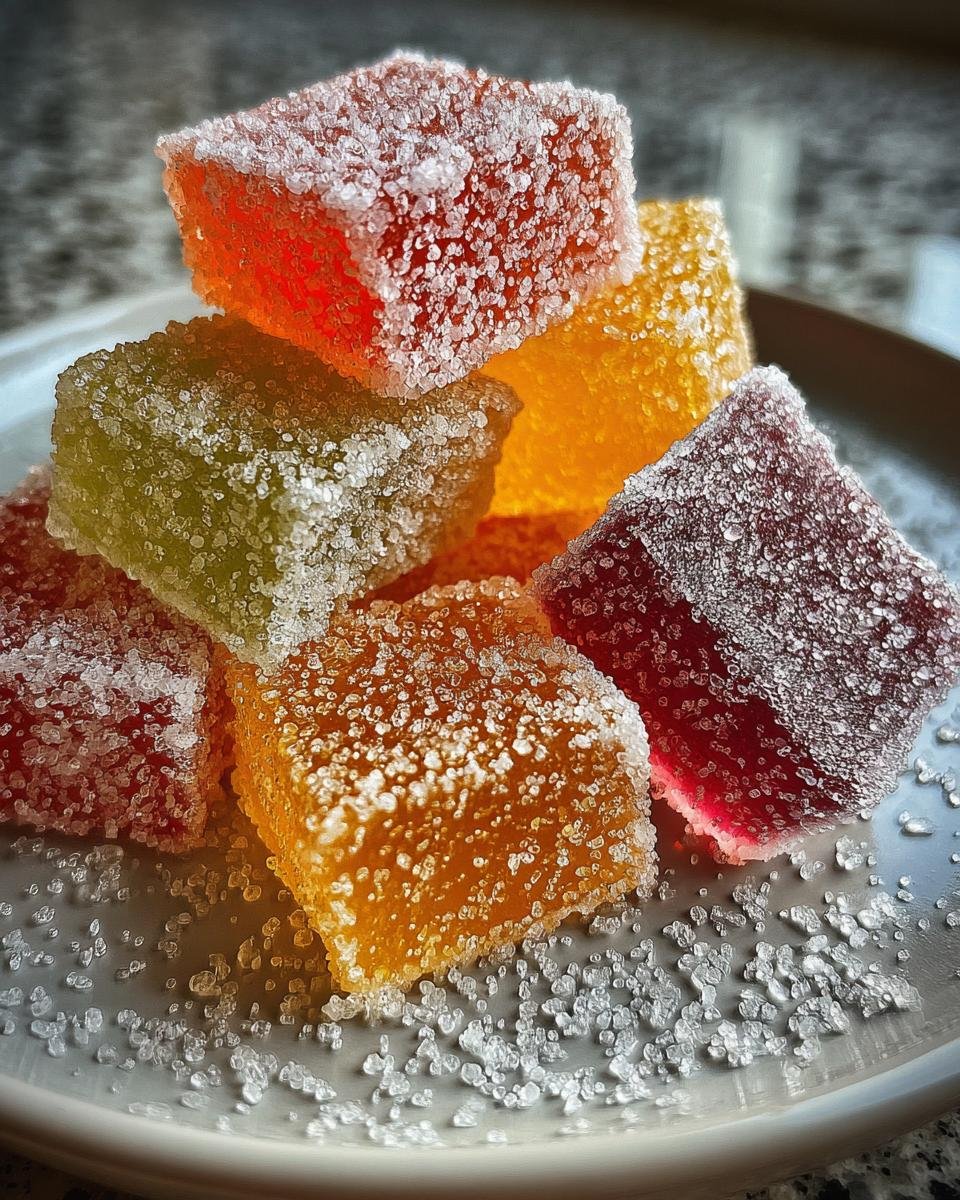
Oh my goodness, if you’re looking for a sweet little bite of pure joy, you HAVE to make these homemade Jelly Slices! Seriously, they just scream nostalgia, don’t they? Like something you’d find in a candy shop from way back when. I remember the first time I tried making these; it felt like magic watching simple ingredients turn into these vibrant, chewy little gems. I’ve messed up my fair share of candy recipes over the years, but these Jelly Slices? They’re surprisingly forgiving and SO much fun to make. Trust me, once you see those bright colors and taste that sweet, tangy flavor, you’ll be hooked!

Why You’ll Love These Jelly Slices
Okay, so why are these Jelly Slices just the absolute best? Let me tell you! They are seriously:
- Super Easy to Make: Don’t let the candy-making part scare you! This recipe is surprisingly straightforward.
- Bursting with Color: You can make them any color you like! It’s so much fun to play with food coloring.
- Perfectly Sweet and Chewy: Just the right amount of sweetness with that classic jelly texture.
- A Total Crowd-Pleaser: Kids go wild for these, and adults love the nostalgic factor.
They really are a classic treat for a reason!
Essential Ingredients for Perfect Jelly Slices
Alright, let’s talk ingredients! Making these Jelly Slices doesn’t require a trip to a fancy store; you probably have most of this stuff in your pantry already. Here’s what you’ll need, and why each part is super important:
- 1 cup granulated sugar: This is our main sweet base. Simple but essential for that classic candy sweetness.
- 1 cup water: Helps dissolve the sugar and create the liquid base for our jelly.
- 1/2 cup cornstarch: This is one of the thickening powerhouses! It works with the gelatin to give us that lovely chewy texture.
- 1/4 cup unflavored gelatin powder: The *other* thickening powerhouse! Gelatin is what makes it set up into that wobbly, sliceable candy. Make sure it’s unflavored so you can add your own fun tastes later if you want!
- 1/4 cup lemon juice: Adds a little brightness and tang to balance out all that sweetness. It really makes the flavors pop!
- Food coloring: This is where the magic happens! You can use liquid or gel colors to make your slices vibrant and fun.
See? Nothing too wild! Just simple things that come together to make something really special.
Equipment Needed to Make Jelly Slices
You won’t need a ton of fancy gadgets for these Jelly Slices, which is great! Just your basic kitchen stuff will do. Here’s what I grab when I’m whipping up a batch:
- A good-sized saucepan for cooking the mixture.
- A whisk to keep everything smooth and lump-free.
- Standard measuring cups and spoons (can’t bake without ’em!).
- And a pan (like an 8×8 or 9×9 inch square pan) for the jelly to set up in. Make sure it’s one you can grease well!
See? Easy peasy!
Step-by-Step Guide to Creating Jelly Slices
Alright, let’s get down to the fun part – actually making these gorgeous Jelly Slices! It’s not complicated, but there are a couple of key moments you want to pay attention to. Just follow along, and you’ll have perfect little candies in no time. We’re going to break it down so it’s totally easy peasy.
Preparing the Jelly Slices Mixture
First things first, grab that saucepan. Pour in your sugar and water. Give it a little stir just to combine things. Now, put that pan on medium heat and bring it to a nice, rolling boil. Keep stirring as it heats up, making sure all that sugar dissolves completely. You want it clear, no grainy bits hiding in the bottom!
While that’s heating, grab a small bowl and whisk together your cornstarch and gelatin powder with the lemon juice. It’ll be a bit thick and pasty, and that’s totally fine. Once the sugar water is boiling and clear, carefully pour this cornstarch mixture into the saucepan. Now, this is important: stir constantly! Don’t stop! It will start to thicken up pretty quickly, getting glossy and like a thick syrup. Keep stirring for about a minute after it thickens just to cook out that starchy taste. Then, take it right off the heat.
Setting and Cutting Your Jelly Slices
Okay, so you’ve got your thickened jelly mixture. If you want different colors (and trust me, you do!), carefully divide the mixture into separate bowls. Add just a few drops of food coloring to each bowl and stir until you get the pretty shades you want. Now, pour each color into your well-greased pan. You can do layers, swirls, or just pour them side-by-side – get creative!
Once it’s all in the pan, it’s time for the hardest part: waiting! Pop the pan into the fridge. You need to chill it for at least 4 hours, but honestly, leaving it overnight is even better. You want it really firm so you can cut it cleanly. When it’s super firm, carefully lift the whole slab out of the pan (that’s why greasing was important!). Place it on a cutting board and use a sharp knife to cut it into squares or rectangles. And there you have it – your beautiful homemade Jelly Slices!
Tips for Making the Best Jelly Slices
Want your Jelly Slices to turn out absolutely perfect every single time? Here are a few little tricks I’ve picked up along the way that make a big difference!
- Grease, Grease, Grease! I cannot stress this enough. Really get into those corners of your pan with butter or cooking spray. It makes getting the finished candy out so much easier and saves you from frustration.
- Don’t Skimp on the Chill Time: Seriously, resist the urge to cut them too early. They need that full chill time to set up properly. If they’re not firm enough, they’ll be a gooey mess when you try to slice ’em. Overnight is always my go-to.
- Vibrant Colors are Key: Don’t be afraid to use a good amount of food coloring, especially if you’re using liquid drops. The color can sometimes lighten a bit as it sets. Gel colors give you really intense results!
- Stir Like You Mean It: When you’re adding the cornstarch/gelatin mixture to the hot sugar water, really whisk it constantly. This prevents lumps and ensures it thickens evenly.
Follow these little tips, and you’ll be a Jelly Slice pro in no time!
Common Questions About Jelly Slices
Okay, so you might have a few questions popping up now that you’re ready to make these yummy Jelly Slices. Totally normal! Here are some things people often ask:
- Can I use different flavors? Absolutely! The base recipe is plain so you can add extracts like vanilla, almond, or even fruit extracts like cherry or orange right when you add the food coloring. A little goes a long way!
- How long do these homemade Jelly Slices last? If stored properly (more on that next!), they can last for a couple of weeks at room temperature. They might get a little firmer over time, but they’ll still be tasty!
- Why didn’t my Jelly Slices set? This usually happens if you didn’t cook the mixture long enough after adding the cornstarch/gelatin, or if you didn’t chill them for the full time. Make sure you see it thicken nicely on the stove and give it plenty of time in the fridge!
Hopefully, that clears things up so you can make your perfect batch of sweet Jelly Slices!
How to Store Your Homemade Jelly Slices
Once you’ve sliced your beautiful Jelly Slices, you want to keep them fresh and chewy! The best way to store them is in an airtight container at room temperature. You can layer them with a little piece of parchment paper in between if you’re worried about them sticking together, although they usually behave pretty well once they’re set.
Estimated Nutritional Information
Just a quick note on the nutrition facts! The details provided here are just an estimate. Things like the specific brands of sugar or gelatin you use can change the numbers a little bit. This gives you a general idea, but don’t take it as gospel, okay?
Print
Amazing Homemade Jelly Slices in under 4 hours
- Total Time: 4 hours 30 minutes
- Yield: 24 slices 1x
- Diet: Vegetarian
Description
Sweet and colorful jelly candy slices.
Ingredients
- 1 cup sugar
- 1 cup water
- 1/2 cup cornstarch
- 1/4 cup gelatin
- 1/4 cup lemon juice
- Food coloring
Instructions
- Combine sugar and water in a saucepan.
- Bring to a boil, stirring until sugar dissolves.
- Mix cornstarch and gelatin with lemon juice.
- Add cornstarch mixture to the saucepan.
- Stir constantly until thickened.
- Remove from heat and divide into bowls.
- Add different food coloring to each bowl.
- Pour into a greased pan.
- Chill until firm.
- Cut into slices.
Notes
- Grease the pan well to prevent sticking.
- Chill for at least 4 hours, or overnight.
- Prep Time: 20 minutes
- Cook Time: 10 minutes
- Category: Dessert
- Method: Boiling
- Cuisine: American
Nutrition
- Serving Size: 1 slice
- Calories: 80
- Sugar: 15g
- Sodium: 5mg
- Fat: 0g
- Saturated Fat: 0g
- Unsaturated Fat: 0g
- Trans Fat: 0g
- Carbohydrates: 20g
- Fiber: 0g
- Protein: 1g
- Cholesterol: 0mg
Keywords: Jelly Slices, Candy, Sweet, Dessert