
Okay, so picture this: I’m maybe seven or eight years old, standing on a step stool in my grandma’s kitchen, flour dusted all over my nose. She’s got this beat-up old mixing bowl, and we’re making cake. It felt like magic back then, and honestly, it still does! But you know what wasn’t magic? The times my *own* cakes flopped as a grown-up! Ugh. So, I set out to find *the* recipe, the one that just… works. Every single time. And friends, I found it! This isn’t just any cake; it’s my go-to, never-lets-me-down, truly fail-proof homemade cake.
Seriously, it’s so simple, uses ingredients you probably already have, and the result is just this perfectly moist, tender crumb that’s utterly delicious. No fancy stuff required. It’s the kind of cake that feels like a warm hug. Ready to dive in?
Why You’ll Love This Homemade Cake That Never Fails
Okay, so why is THIS the homemade cake you need in your life? Let me tell you!
- It’s Seriously Easy: No complicated steps, I promise! It’s perfect even if you’re new to baking.
- Reliable Every Time: This recipe is tested, tried, and true. It’s my secret weapon for when I need a guaranteed delicious cake.
- Classic & Delicious: It has that perfect, simple, buttery vanilla flavor everyone loves. It’s amazing on its own or with frosting!
- Uses Pantry Staples: You likely have everything you need in your kitchen right now.
Basically, it’s a winner, winner, cake dinner!
Equipment for Your Homemade Cake That Never Fails
You don’t need a ton of fancy gadgets for this one, which is another reason I love it! Here’s what you’ll want to grab:
- A couple of mixing bowls (one medium, one large)
- A whisk
- A hand mixer or stand mixer (makes creaming butter easier!)
- Measuring cups and spoons
- A rubber spatula
- A 9-inch round cake pan
- A cooling rack
See? Told you it was simple!
Ingredients for a Perfect Homemade Cake That Never Fails
Alright, let’s talk about the building blocks of this magical cake! The beauty here is that it’s all super standard stuff, nothing you need to hunt down at a specialty store. But using the right kind and prepping them properly makes all the difference in your Homemade Cake That Never Fails!
- 1 ½ cups all-purpose flour: Just your regular flour, nothing fancy needed.
- 1 ½ teaspoons baking powder: Make sure it’s fresh! This is our main leavening agent.
- ½ teaspoon salt: Just a little pinch to balance out the sweetness.
- ½ cup (1 stick) unsalted butter, softened: This is KEY! Make sure it’s truly softened, like you can easily leave a dent with your finger. Take it out of the fridge about an hour before you start.
- 1 cup granulated sugar: Plain old white sugar is perfect here.
- 2 large eggs: Also, super important they are at room temperature! Pop them in a bowl of warm water for a few minutes if you forget.
- 1 teaspoon vanilla extract: Use the good stuff if you have it, it really does make a difference.
- ½ cup milk: Any kind of milk works fine, but whole milk adds a little extra richness. Again, room temperature is best!
See? Simple, right?
Ingredient Notes and Substitutions for Your Homemade Cake That Never Fails
Even though this recipe is pretty straightforward, a couple of things are worth noting to make sure your Homemade Cake That Never Fails lives up to its name!
Softened Butter & Room Temperature Eggs/Milk: I know I mentioned it, but seriously, this step is crucial! Cold ingredients don’t cream together properly with the sugar, and that affects the texture of your cake. It’s worth the wait, trust me!
Flour: I always use all-purpose, and it works perfectly. I haven’t tested it with gluten-free blends, but if you do, let me know your results!
Butter vs. Margarine/Oil: For this specific recipe, I really recommend using butter. It gives the cake that classic flavor and helps with the structure in a way that margarine or oil just don’t quite replicate for this Homemade Cake That Never Fails.
Milk: You can use dairy or non-dairy milk here, just aim for something with a bit of fat content if possible.
How to Make Your Homemade Cake That Never Fails
Okay, let’s get baking! This is the fun part, and honestly, it goes pretty quickly. Just follow these steps, and you’ll have a beautiful Homemade Cake That Never Fails in no time.
- Get the Oven Ready: First things first, preheat your oven to 350°F (175°C). While it’s heating up, get your 9-inch round cake pan ready. I like to grease it really well with butter or baking spray, then dust it with a little flour. Make sure you tap out any excess flour! This helps prevent sticking, which is key for a fail-proof cake.
- Whisk the Dry Stuff: Grab that medium bowl and whisk together your flour, baking powder, and salt. A quick whisk just makes sure everything’s evenly distributed. Set this aside for a minute.
- Cream the Butter and Sugar: Now for the magic! In your large bowl (or the bowl of your stand mixer), cream together that lovely softened butter and the granulated sugar. Beat it on medium speed until it’s light and fluffy and pale yellow. This usually takes a few minutes, and it’s important because it whips air into the batter, which helps the cake rise and gives it that tender texture.
- Add the Eggs and Vanilla: Add your room temperature eggs one at a time, beating well after each addition until it’s fully incorporated. Scrape down the sides of the bowl as needed. Then, stir in your vanilla extract. It’ll smell amazing already!
- Alternate Dry and Wet: This is a classic cake technique, and it really helps keep the batter smooth and prevents overmixing. You’re going to add the dry ingredients and the milk in three alternating additions. Start with about a third of the dry ingredients, mix on low speed just until *almost* combined. Then add about half of the milk, mix until just combined. Repeat with the second third of the dry ingredients, the rest of the milk, and finish with the last third of the dry ingredients. Only mix until everything is *just* combined. Little streaks of flour are okay! Overmixing at this stage can make your cake tough.
- Pour and Bake: Pour the batter into your prepared cake pan and spread it out evenly with your spatula. Pop it into your preheated oven.
- Bake Until Done: You’ll bake it for about 30-35 minutes. The best way to tell if it’s ready is to insert a wooden skewer (like a toothpick) into the center. If it comes out clean, your Homemade Cake That Never Fails is done! If there’s wet batter on it, give it a few more minutes.
- Cool It Down: Let the cake cool in the pan for about 10 minutes. This is important! It gives the cake time to firm up a bit before you try to move it. Then, carefully invert the cake onto a wire rack to cool completely. Don’t try to frost or slice it until it’s totally cool, or it might crumble.
And there you have it! Your very own Homemade Cake That Never Fails, ready for frosting or just a simple dusting of powdered sugar.
Tips for Success with Your Homemade Cake That Never Fails
Want to make sure your Homemade Cake That Never Fails lives up to its name? Here are my top little pointers:
- Room Temp is Your Friend: Seriously, make sure your butter, eggs, and milk are all at room temperature. It makes a huge difference!
- Don’t Overmix: Once you add the dry ingredients and milk, mix *just* until combined. Overmixing develops gluten and can make your cake tough.
- Test for Doneness: The skewer test is your best friend. Ovens vary, so rely on that rather than just the timer.
- Grease and Flour Well: Nobody wants a cake that sticks! Take the time to properly prepare your pan.
Follow these, and you’re golden!
Variations on Your Homemade Cake That Never Fails
Okay, so the basic Homemade Cake That Never Fails is amazing on its own, but sometimes you want to jazz things up a little, right? Here are a few super easy ways to change the flavor profile without messing with that perfect texture:
- Lemon Zing: Add the zest of one lemon to the batter along with the wet ingredients. It gives it a lovely bright flavor!
- Almond Bliss: Swap the vanilla extract for almond extract for a totally different, but equally delicious, taste.
- Citrus Splash: Use orange zest instead of lemon for a warm, sunny flavor.
- Spice It Up: Whisk in a teaspoon of cinnamon or a hint of nutmeg with the dry ingredients for a cozy, spiced cake.
See? Easy peasy ways to make this classic your own!
Serving and Storing Your Homemade Cake That Never Fails
Once your beautiful Homemade Cake That Never Fails is completely cool, the best part begins – eating it! You can serve it completely plain, which is honestly delicious, or you can add your favorite frosting. A simple vanilla buttercream or even just a dusting of powdered sugar is perfect.
If you have leftovers (which is a big if in my house!), store the cake in an airtight container at room temperature for up to 3-4 days. If it’s frosted with something that needs refrigeration (like cream cheese frosting), keep it in the fridge. It stays wonderfully moist, so no need to worry about it drying out quickly!
Frequently Asked Questions About This Homemade Cake That Never Fails
Okay, I know you might have a few questions buzzing around your head as you get ready to make this Homemade Cake That Never Fails. Don’t worry, I’ve got you covered! Here are some things people often ask:
Q: Can I double this recipe?
A: Absolutely! This recipe doubles beautifully. You might want to bake it in a 9×13 inch pan or two 9-inch rounds. Just remember the baking time might be a little longer.
Q: What if I don’t have a 9-inch round pan?
A: No problem! You could use an 8×8 inch square pan, but the cake will be a little taller, so you’ll need to increase the baking time slightly and keep an eye on it with the skewer test.
Q: Can I add chocolate chips or nuts?
A: Yes! This is a great base for mix-ins. Gently fold in about ½ cup of chocolate chips or chopped nuts after you’ve finished mixing the batter, right before you pour it into the pan.
Q: My cake sunk in the middle! What happened?
A: Oh no! That usually happens if the oven door was opened too early (especially in the first 20 minutes) or if the cake wasn’t fully baked when it came out. Make sure your oven temperature is accurate and always use the skewer test!
Q: Why is room temperature ingredients so important?
A: It really helps everything emulsify (mix together smoothly!) properly. Cold butter won’t cream well with sugar, and cold eggs can make the batter curdle slightly. Room temperature ingredients create a smoother, more uniform batter, which means a better texture in your finished Homemade Cake That Never Fails.
Nutritional Information for This Homemade Cake
I’ve included some nutritional information below as a general guide for this Homemade Cake That Never Fails. Please remember that this is an estimate! The actual values can vary depending on the specific brands of ingredients you use and how accurately you measure. It’s just here to give you a rough idea!
Share Your Homemade Cake Success
Alright, now it’s YOUR turn! I absolutely LOVE hearing when you guys try my recipes, especially this Homemade Cake That Never Fails. Did it work its magic for you? What did you serve it with? I’d be thrilled if you left a comment below and told me all about it! And hey, if you snap a photo, tag me on social media so I can see your beautiful creation!
Print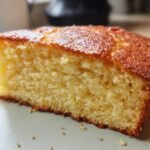
Shock: Homemade Cake That Never Fails
- Total Time: 45 minutes
- Yield: 8 servings 1x
- Diet: Vegetarian
Description
A simple and reliable recipe for a classic homemade cake that is moist and delicious every time.
Ingredients
- 1 1/2 cups all-purpose flour
- 1 1/2 teaspoons baking powder
- 1/2 teaspoon salt
- 1/2 cup unsalted butter, softened
- 1 cup granulated sugar
- 2 large eggs
- 1 teaspoon vanilla extract
- 1/2 cup milk
Instructions
- Preheat oven to 350°F (175°C). Grease and flour a 9-inch round cake pan.
- In a medium bowl, whisk together the flour, baking powder, and salt.
- In a large bowl, cream together the softened butter and sugar until light and fluffy.
- Beat in the eggs one at a time, then stir in the vanilla extract.
- In three alternating additions, add the dry ingredients and the milk to the wet ingredients, beginning and ending with the dry ingredients. Mix until just combined, being careful not to overmix.
- Pour the batter into the prepared cake pan and spread evenly.
- Bake for 30-35 minutes, or until a wooden skewer inserted into the center comes out clean.
- Let the cake cool in the pan for 10 minutes before inverting it onto a wire rack to cool completely.
Notes
- Ensure all ingredients are at room temperature for best results.
- Do not overmix the batter as this can result in a tough cake.
- Baking time may vary depending on your oven.
- Prep Time: 15 minutes
- Cook Time: 30 minutes
- Category: Dessert
- Method: Baking
- Cuisine: American
Nutrition
- Serving Size: 1 slice
- Calories: 350
- Sugar: 30g
- Sodium: 250mg
- Fat: 18g
- Saturated Fat: 11g
- Unsaturated Fat: 6g
- Trans Fat: 0g
- Carbohydrates: 45g
- Fiber: 1g
- Protein: 4g
- Cholesterol: 90mg
Keywords: homemade cake, easy cake recipe, fail-proof cake, simple cake, classic cake