
Oh, homemade donuts! There’s just something magical about them, isn’t there? That warm, fluffy bite, the sweet glaze melting on your tongue… it’s pure comfort. For years, I thought making donuts from scratch was some kind of mythical baking quest, reserved only for seasoned pros. I mean, all that yeast and frying? It felt intimidating!
But then, I stumbled upon this incredible donut dough recipe, and my whole world changed. Seriously, it’s not just easy; it’s *fun*! This isn’t one of those fussy, finicky recipes that makes you want to throw your mixing bowl across the kitchen. This is a simple, reliable donut dough that anyone, even a beginner, can master. You’ll get deliciously fluffy donuts every single time, and the best part? You made them yourself! Trust me, once you try this recipe, you’ll never go back to store-bought. You’re about to become a donut-making superstar, and I’m here to guide you every step of the way!

Why You’ll Love This Homemade DONUT DOUGH
Once you make your own donuts, you’ll wonder why you ever bought them! There’s just something so incredibly satisfying about pulling a batch of warm, golden rings out of the fryer. This homemade donut dough recipe is a total game-changer, and here’s why you’re going to absolutely adore it:
- It’s surprisingly easy! Seriously, don’t let yeast scare you. This recipe is straightforward and super forgiving.
- The taste is unmatched. Freshly made donuts have a flavor and texture that store-bought just can’t compete with.
- Customization galore! Once you have this perfect base, you can go wild with glazes, toppings, and fillings. The possibilities are endless!
- Pure joy. The smell of fresh donuts filling your kitchen? Pure happiness, I tell ya!
The Magic of Simple DONUT DOUGH
What makes *this* particular donut dough so special? It’s all about that perfect balance of simplicity and incredible results. It’s designed to be approachable for everyone, yet it consistently delivers those light, airy, and utterly delicious donuts you dream about. No fancy techniques, just pure donut magic!
Essential Ingredients for Your DONUT DOUGH
Alright, let’s talk ingredients! This is where the magic begins for our amazing donut dough. You don’t need anything super fancy, just good quality basics, and a little attention to detail. Getting these right is key to those fluffy, irresistible donuts. Here’s exactly what you’ll need:
- 1 cup warm milk (105-115°F): This is crucial for waking up our yeast! Think bathwater warm, not scorching hot.
- 2 ¼ teaspoons active dry yeast: One standard packet usually does the trick! Make sure it’s fresh – old yeast means sad, flat donuts.
- ¼ cup granulated sugar: Sweetness for the dough, and food for our yeast.
- 1 large egg, room temperature: Room temp eggs mix better and give a smoother dough. Don’t skip this!
- 2 tablespoons unsalted butter, melted: Adds richness and tenderness. Just melt it gently, don’t brown it.
- ½ teaspoon salt: Balances the sweetness and enhances flavor.
- 3 cups all-purpose flour, plus more for dusting: Standard AP flour is perfect. Have a little extra on hand for kneading.
- Vegetable oil, for frying: You’ll need enough to get a good depth in your pot, usually a few cups. Canola, sunflower, or peanut oil work great.
Understanding Your DONUT DOUGH Ingredients
Each ingredient plays a super important part in making your donut dough sing! The warm milk and yeast are our rising stars – they’re what give us that incredible light and airy texture. The butter and egg? They add richness, flavor, and help create that tender crumb we all love. And the flour, of course, is the structure! For the best results, always check your yeast’s expiration date, and use fresh, good-quality dairy products. Trust me, it makes a difference!
Crafting the Perfect DONUT DOUGH: Step-by-Step Instructions
Okay, this is where the magic really happens! Don’t be intimidated; making this donut dough is super fun and satisfying. Just follow these steps, and you’ll be on your way to delicious homemade donuts in no time. Get ready to roll up your sleeves!
- Wake Up the Yeast: Grab a large bowl – your biggest one, because this dough is gonna grow! Pour in your warm milk (remember, bathwater warm, not hot!). Sprinkle the active dry yeast over the top. Give it a gentle stir, then let it sit for about 5 minutes. You’ll know it’s happy and alive when it gets foamy and bubbly. If it doesn’t foam, your yeast might be old or your milk wasn’t the right temp, and you’ll need to start again.
- Mix the Wet Ingredients: Once your yeast is all bubbly, stir in the granulated sugar, room temperature egg, melted butter, and salt. Give it a good whisk until everything’s nicely combined. It’ll look a little milky and smooth.
- Gradually Add Flour: Now for the flour! Add it in about a cup at a time, mixing with a wooden spoon or a sturdy spatula. You’ll see the dough start to come together. Keep mixing until a soft, shaggy dough forms. It might still look a little sticky, and that’s totally okay!
- Knead That Dough: Lightly flour your clean countertop or a large cutting board. Turn the dough out onto it. Now for the kneading! Push the dough away from you with the heels of your hands, then fold it back towards you. Give it a quarter turn and repeat. Do this for about 5-7 minutes. You’re looking for a smooth, elastic dough that springs back when you gently poke it. It should be less sticky now, too.
- First Rise (The Grand Nap): Lightly grease a clean bowl (I like to use a little cooking spray or a pat of butter). Place your kneaded dough in the bowl, turning it once to coat all sides. This stops it from drying out. Cover the bowl tightly with plastic wrap or a clean kitchen towel. Find a warm spot in your kitchen – maybe near a sunny window, or in an oven that’s been turned off but is still slightly warm. Let it rise for 1 to 1.5 hours, or until it’s beautifully doubled in size. This is where patience pays off!
Preparing Your DONUT DOUGH for Frying
Your donut dough has had its nap, and now it’s time to get it ready for its big moment! Gently punch down the risen dough to release the air. Turn it out onto a lightly floured surface. Grab your rolling pin and roll the dough out to about ½-inch thickness. Now, for the fun part: cutting! Use a donut cutter, or if you don’t have one, a large round cutter for the donut and a smaller one for the hole. Place your cut donuts on a parchment-lined baking sheet, leaving a little space between them. Cover them lightly and let them rise for another 30 minutes. This second rise makes them extra fluffy!
Frying Your DONUT DOUGH to Golden Perfection
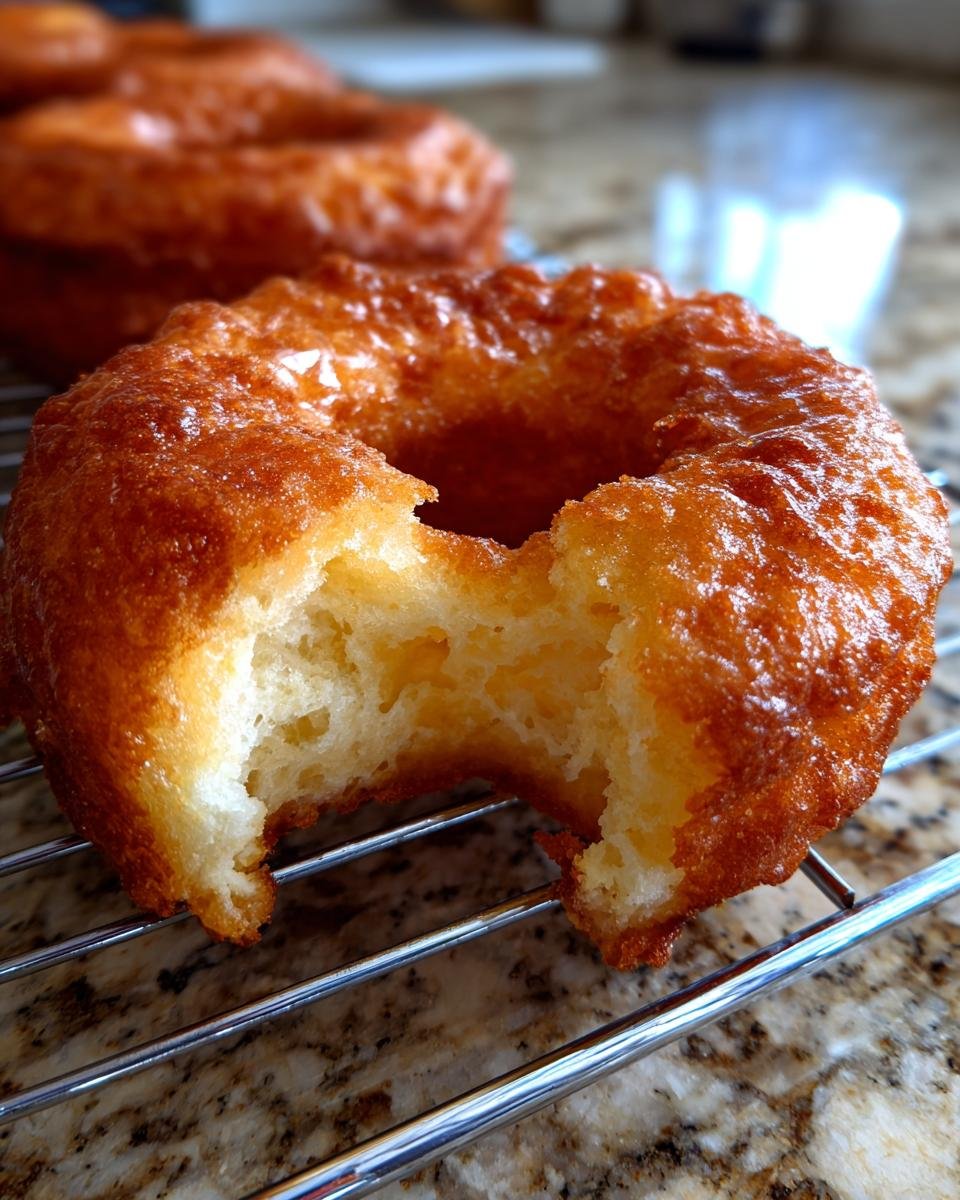
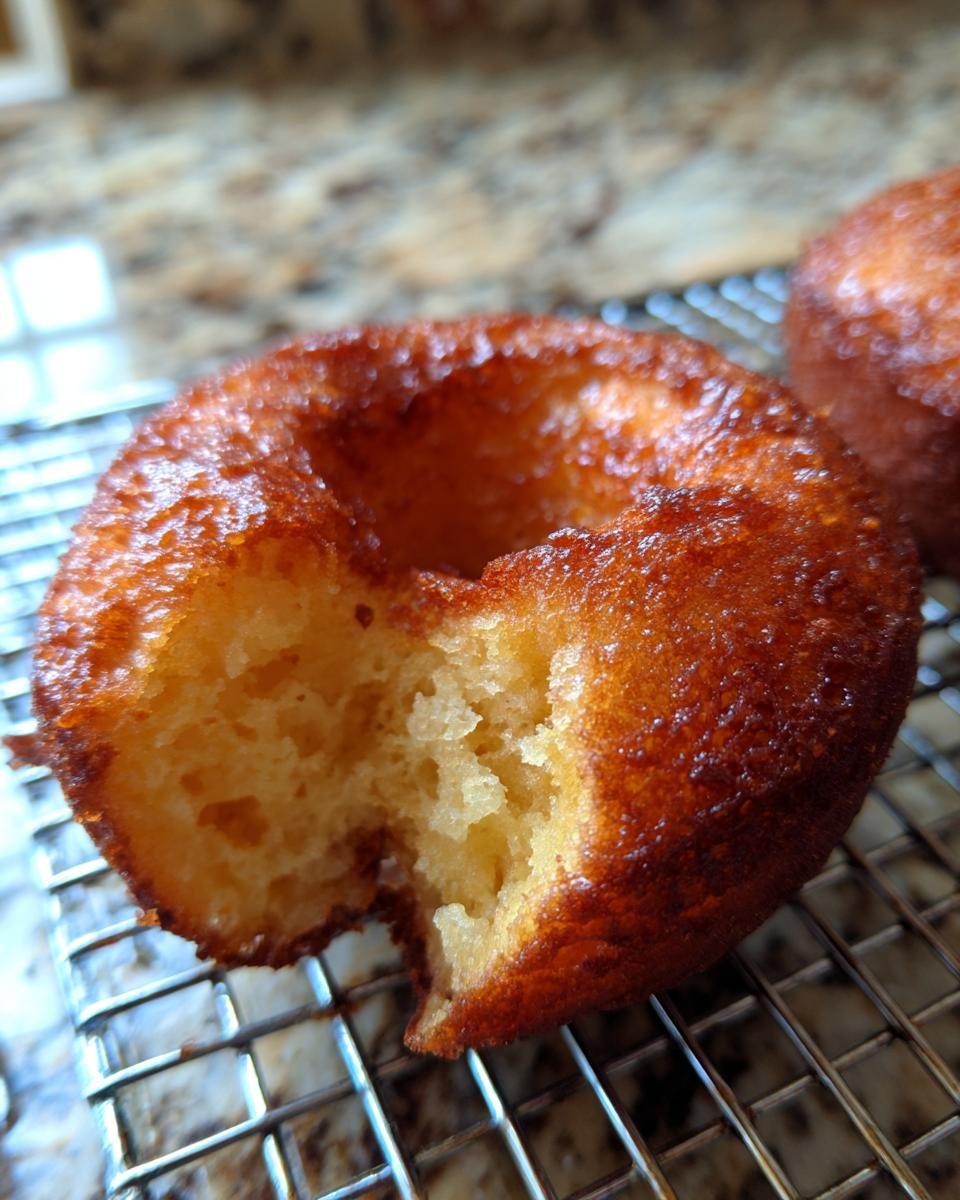
Get ready for some sizzling action! Heat about 2-3 inches of vegetable oil in a large, heavy-bottomed pot or a deep fryer to 350°F (175°C). A thermometer is your best friend here – too cool and your donuts will be greasy, too hot and they’ll burn. Carefully slide 2-3 donuts into the hot oil using a slotted spoon or spider. Don’t overcrowd the pot! Fry for 1-2 minutes per side, or until they’re a gorgeous golden brown. Use that slotted spoon to flip them gently. Once golden, lift them out and place them on a wire rack lined with paper towels to drain that excess oil. They’re hot and delicious now, ready for glazing or a dusting of sugar!
Tips for DONUT DOUGH Success
Making delicious donuts is super rewarding, and these little tips will help ensure your donut dough turns out perfectly every single time! First off, always, *always* check your yeast. If it doesn’t foam up in the warm milk, it’s dead, and your dough won’t rise. Just toss it and start fresh with new yeast. Also, don’t skimp on the kneading time! Those 5-7 minutes really develop the gluten, which gives your donuts that lovely chewiness and structure. And when it comes to proofing, find a truly warm spot. A slightly warm oven (turned off!) or a sunny window works wonders. Don’t rush the rise; patience here means fluffier donuts!
Troubleshooting Your DONUT DOUGH
Okay, so what if your donut dough isn’t playing nice? If it’s not rising, your yeast might be inactive, or your milk was too hot/cold. Try again with fresh yeast and the right milk temperature. If your donuts are dense, you might have added too much flour, or you didn’t knead enough. For greasy donuts, your oil wasn’t hot enough. It’s all about practice!
Frequently Asked Questions About DONUT DOUGH
I know you probably have a few questions swirling around in your head about this amazing donut dough! That’s totally normal. Here are some of the most common ones I get, and my best answers to help you feel super confident in your donut-making journey.
Can I Make This DONUT DOUGH Ahead of Time?
Absolutely! This is one of my favorite tricks for fresh morning donuts without the early start. After the first rise, punch down the donut dough, then place it in a greased bowl, cover it tightly with plastic wrap, and pop it in the fridge overnight (up to 24 hours). The next morning, just take it out, let it come to room temperature for about 30 minutes, then proceed with rolling, cutting, and the second rise. Easy peasy!
What If My DONUT DOUGH Isn’t Rising?
Oh, the dreaded flat dough! Don’t panic. The most common culprit is inactive yeast. This can happen if your yeast is old, or if your milk was too hot (it kills the yeast) or too cold (it won’t activate it). Make sure your milk is between 105-115°F – like a warm bath. If your yeast didn’t foam up in the first step, it’s best to discard it and start with fresh yeast. Also, ensure your rising spot is warm enough. Cold rooms make for very slow, or no, rising in your donut dough.
Storing and Reheating Your DONUT DOUGH Creations
So, you’ve made a glorious batch of donuts from this amazing donut dough, and somehow, there are leftovers! (A rare but beautiful problem, right?) The best way to store them is in an airtight container at room temperature for a day or two. If they have a glaze, they might get a little sticky, but they’ll still be delicious. To reheat and get that fresh-from-the-fryer feel, pop them in the microwave for about 10-15 seconds, or a toaster oven for a few minutes until just warm. They’ll be soft and lovely again!
Estimated Nutritional Information for Your DONUT DOUGH
Just a quick note on the numbers for this wonderful donut dough! Please remember that these nutritional values are just estimates. They can totally vary based on the exact brands of ingredients you use, how much oil your donuts absorb during frying, and even the size you cut them. But, to give you a general idea, here’s what you can expect per donut:
- Calories: Approximately 250
- Fat: Around 12g
- Carbohydrates: About 30g
- Protein: Roughly 4g
Share Your DONUT DOUGH Masterpiece!
Alright, you amazing bakers, you’ve done it! You’ve conquered the art of homemade donuts with this fantastic donut dough. I absolutely LOVE seeing your creations, so please, pretty please, share your pictures with me! Leave a comment below, rate the recipe, or tag me on social media. I can’t wait to see your delicious results. Now go on, enjoy every single fluffy, sweet bite of your homemade donut masterpiece!
Print
Amazing DONUT DOUGH: Make 12 Fluffy Dreams Today
- Total Time: 2 hours 15 minutes
- Yield: 12 donuts 1x
- Diet: Vegetarian
Description
This recipe makes a basic donut dough, perfect for frying and then glazing or coating with sugar.
Ingredients
- 1 cup warm milk (105-115°F)
- 2 ¼ teaspoons active dry yeast
- ¼ cup granulated sugar
- 1 large egg, room temperature
- 2 tablespoons unsalted butter, melted
- ½ teaspoon salt
- 3 cups all-purpose flour, plus more for dusting
- Vegetable oil, for frying
Instructions
- In a large bowl, combine warm milk and yeast. Let stand for 5 minutes, until foamy.
- Stir in sugar, egg, melted butter, and salt.
- Gradually add flour, mixing until a soft dough forms.
- Turn dough out onto a lightly floured surface and knead for 5-7 minutes, until smooth and elastic.
- Place dough in a greased bowl, turning once to coat. Cover with plastic wrap and let rise in a warm place for 1-1.5 hours, or until doubled in size.
- Punch down dough and turn onto a lightly floured surface. Roll to ½-inch thickness.
- Cut out donuts using a donut cutter or two different sized round cutters.
- Place donuts on a parchment-lined baking sheet. Cover lightly and let rise for another 30 minutes.
- Heat vegetable oil in a large pot or deep fryer to 350°F (175°C).
- Carefully place donuts into hot oil, 2-3 at a time. Fry for 1-2 minutes per side, until golden brown.
- Remove donuts with a slotted spoon and place on a wire rack lined with paper towels to drain excess oil.
- Glaze or coat with sugar while warm.
Notes
- Ensure your yeast is active for proper rising.
- Do not overcrowd the pot when frying.
- Adjust frying time based on your desired doneness.
- Prep Time: 2 hours
- Cook Time: 15 minutes
- Category: Dessert
- Method: Frying
- Cuisine: American
Nutrition
- Serving Size: 1 donut
- Calories: 250
- Sugar: 15g
- Sodium: 150mg
- Fat: 12g
- Saturated Fat: 4g
- Unsaturated Fat: 7g
- Trans Fat: 0g
- Carbohydrates: 30g
- Fiber: 1g
- Protein: 4g
- Cholesterol: 30mg
Keywords: donut dough, yeast donut, fried donut, homemade donut