
Oh, the joy of crispy vegetables! There’s just something about that crunch that makes a simple side dish feel like a treat. But let’s be real, deep-frying can be such a messy hassle, not to mention a little heavy for everyday eating. That’s why I absolutely fell in love with this Oven-Fried Squash recipe. It gives you all that satisfying crispiness without a drop of messy oil to clean up or any of the guilt!
I remember the first time I tried to make “fried” squash in the oven. I was skeptical, thinking it wouldn’t measure up to the real deal. But wow, was I wrong! This method for Oven-Fried Squash truly delivers. It’s become a total game-changer in my kitchen. As someone who loves developing easy, delicious recipes that actually work, I can tell you this one is a winner. It’s healthier, super simple, and incredibly tasty. Trust me, your taste buds (and your clean-up crew) will thank you!

Why You’ll Love This Crispy Oven-Fried Squash
So, why is this Oven-Fried Squash recipe worth adding to your weekly rotation? Well, let me tell you, it hits all the sweet spots. It’s:
- Super Healthy: You get all that delicious crunch without the deep-fried grease. Your body will thank you!
- Crazy Easy: Seriously, it’s just a few simple steps, and you’re mostly hands-off while it bakes.
- Incredibly Delicious: The flavor is fantastic, and that crispy coating? *Chef’s kiss!*
- Versatile: It’s perfect as a side dish, a snack, or even tossed into a salad.
- Less Mess: No splattering oil to clean up afterward. Hallelujah!
The Benefits of Oven-Fried Squash
Choosing to oven-fry your squash instead of deep-frying is a total no-brainer in my book. You’re cutting down on a lot of unnecessary fat and calories, which is always a good thing, right? But it’s not just about health. Baking in the oven also means less active cooking time for you. You just pop it in, set a timer, and let the oven do its magic while you get other things done. It’s a win-win!
Essential Ingredients for Perfect Oven-Fried Squash
Alright, let’s talk ingredients! You don’t need anything fancy for this crispy oven-fried squash, which is one of the things I absolutely adore about it. We’re talking everyday pantry staples that come together to create something truly magical. Here’s what you’ll want to gather:
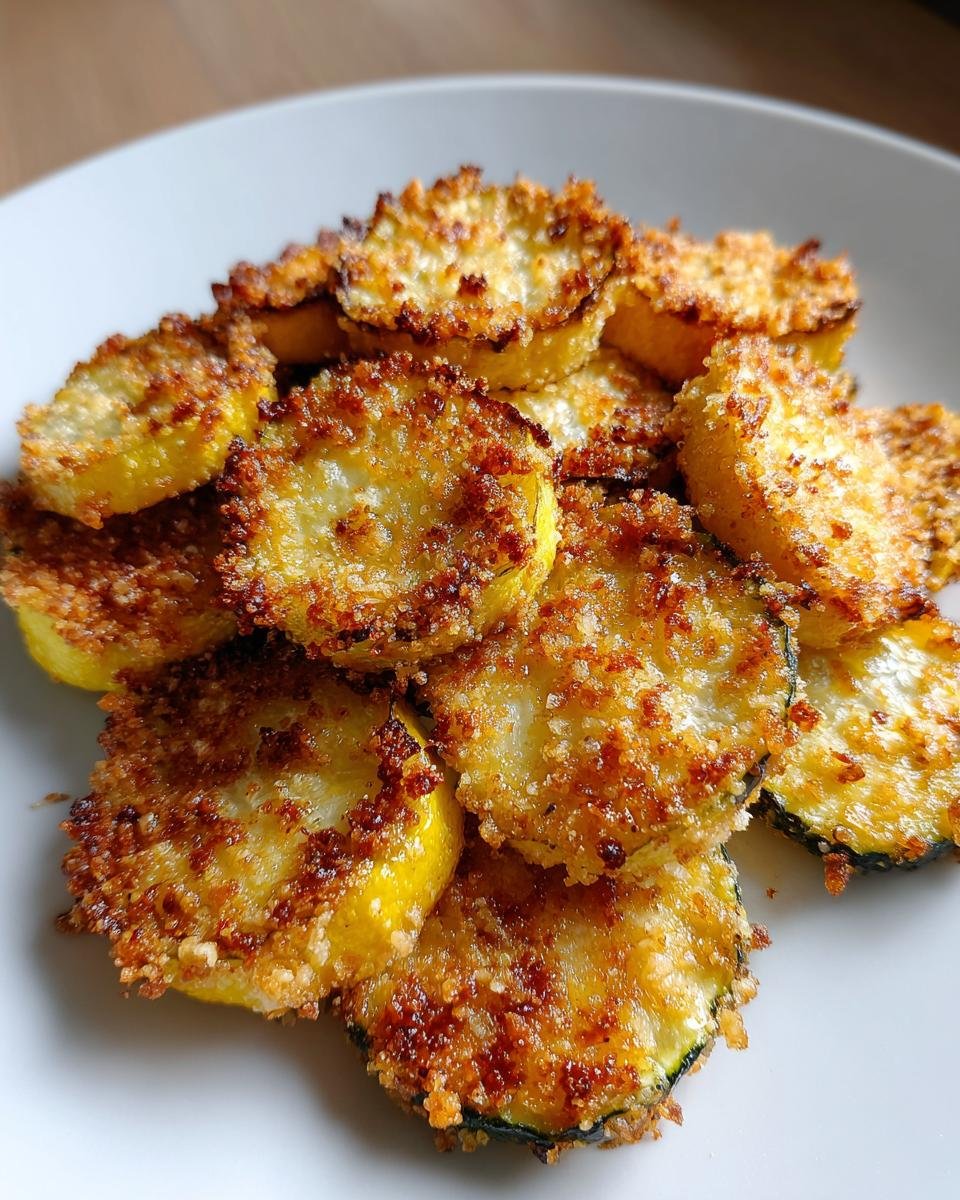
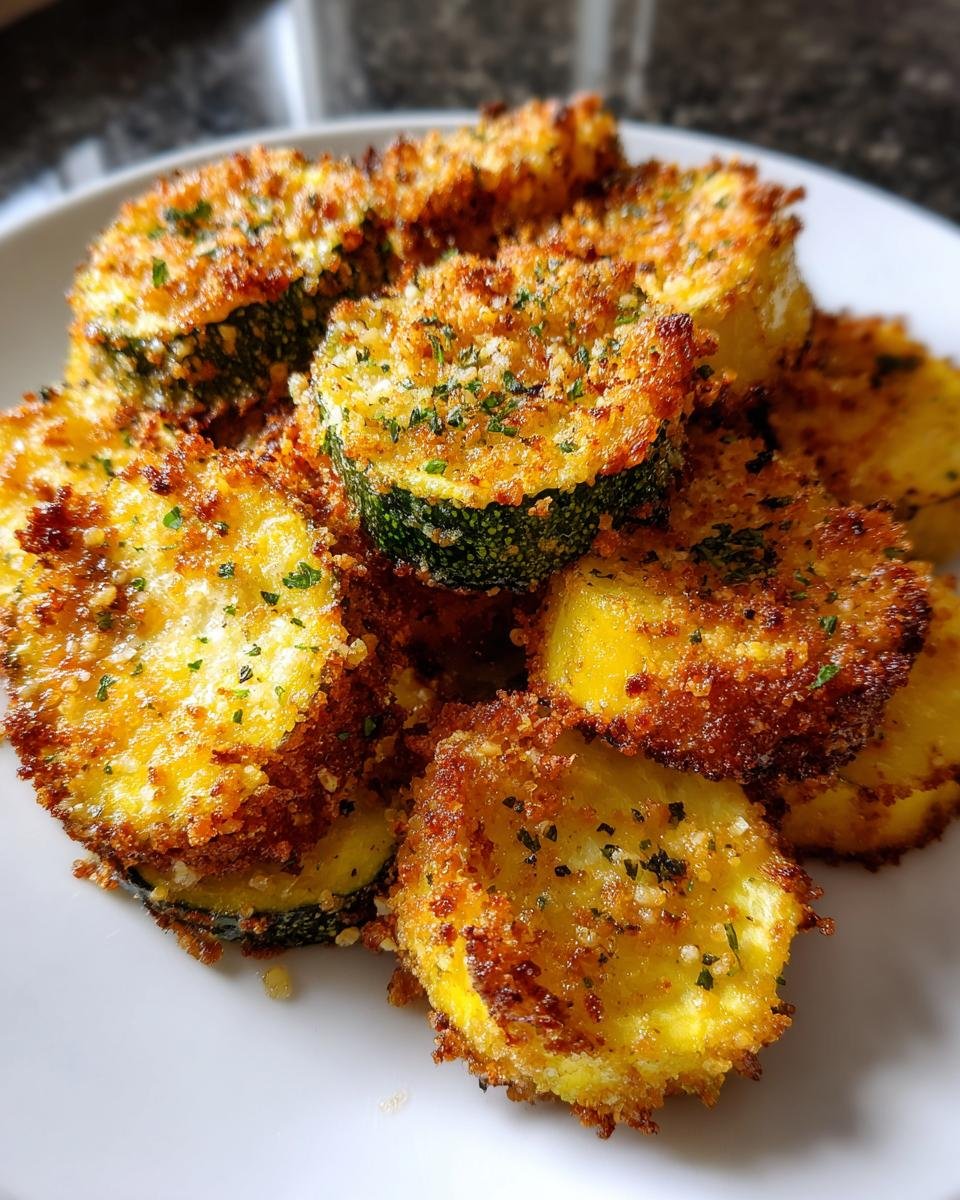
- 2 medium yellow squash: The stars of our show! Make sure they’re firm and bright. We’ll be slicing these into nice, even 1/4-inch rounds.
- 1/2 cup all-purpose flour: This is our first coating layer, helping everything else stick.
- 1 teaspoon salt: For seasoning, of course!
- 1/2 teaspoon black pepper: A little kick never hurt anyone.
- 1/4 teaspoon garlic powder: Adds that savory depth we all love.
- 1/4 teaspoon paprika: For a lovely color and a hint of smoky sweetness.
- 1 large egg: Our “glue” layer that helps the panko adhere. Just one, lightly beaten.
- 1/2 cup panko breadcrumbs: This is the secret to that incredible, airy crispiness. Don’t skimp on the panko!
- 2 tablespoons olive oil: A drizzle of this helps the squash get beautifully golden and super crispy in the oven.
See? Simple, right? No obscure ingredients you have to hunt down!
Getting Your Squash Ready for Oven-Frying
Now, before we get to the fun part of coating, let’s quickly chat about the squash itself. You really want to pick yellow squash that feels firm when you gently squeeze it – no soft spots! This ensures it holds up well during baking and gives you that perfect texture. And the slicing? That 1/4-inch thickness is key! If it’s too thick, it won’t get as crispy, and if it’s too thin, it might just disappear. Uniform slices mean everything cooks evenly, so you get perfectly crispy bites every single time. Take your time here; it really makes a difference!
How to Make Irresistible Oven-Fried Squash
Alright, friends, this is where the magic happens! Making this oven-fried squash is super straightforward, but following these steps will guarantee you get that amazing crispy texture we’re aiming for. Get ready, because your kitchen is about to smell incredible!
- Preheat your oven: First things first, crank that oven up to 400°F (200°C). Don’t skip this! A hot oven is crucial for crispiness. While it’s heating, grab a baking sheet and line it with parchment paper. This makes clean-up a breeze and helps prevent sticking.
- Set up your dredging stations: This is like an assembly line for deliciousness. You’ll need three shallow dishes.
- In the first dish, combine your flour, salt, pepper, garlic powder, and paprika. Give it a good whisk to make sure all those spices are evenly distributed.
- In the second dish, beat that large egg until it’s nice and smooth.
- In the third dish, pour your panko breadcrumbs. Don’t be shy here!
And that’s it! Pull them out of the oven, and prepare for a chorus of “Mmm!” from everyone lucky enough to be around.
Achieving the Crispiest Oven-Fried Squash
Want that ultimate, irresistible crunch? It’s all about the details! First, make sure your oven is truly hot before the squash goes in; preheating is non-negotiable for that initial crisp. The triple-layer coating—flour, egg, then panko—is crucial because it creates a solid base for the panko to adhere to. And speaking of panko, don’t skimp on pressing it on firmly! Finally, that drizzle of olive oil acts like a little burst of “frying” in the oven, helping the breadcrumbs get super golden and crunchy. Flipping them halfway through ensures both sides get equally baked and browned, so no soggy bottoms here!
Tips for Success with Your Oven-Fried Squash
Okay, so you’ve got the basic steps down, but I’ve got a few extra tips up my sleeve to make sure your oven-fried squash turns out absolutely perfect every single time. These little tricks can make all the difference between good and *amazing*:
- Don’t Overcrowd the Pan: I know, I said it before, but it’s worth repeating! Give those squash slices space. If they’re too close, they’ll steam instead of crisp, and nobody wants soggy squash. Use two baking sheets if you need to!
- Pat Your Squash Dry: Before you even start the dredging process, give your squash slices a good pat with a paper towel. Excess moisture is the enemy of crispiness!
- Freshness Matters: Use firm, fresh yellow squash. Limp, old squash won’t crisp up as nicely.
- Panko Power: Seriously, stick with panko breadcrumbs. Regular breadcrumbs just don’t give you the same light, airy crunch. Trust me on this one!
- Hot Oven is Key: Make sure your oven is fully preheated. Popping them into a cold oven will result in a less crispy coating.
- Broil for Extra Crisp: If they’re not quite as golden as you’d like after baking, pop them under the broiler for 1-2 minutes at the very end. But watch them like a hawk – they can burn fast!
Smart Substitutions for Oven-Fried Squash
Life happens, and sometimes you need to swap things out! If you don’t have yellow squash, zucchini works beautifully here too. You can also experiment with different spices in your flour mixture – a pinch of cayenne for heat, or some dried herbs for a different flavor profile. For a gluten-free version, use gluten-free all-purpose flour and gluten-free panko. It’s super versatile!
Common Questions About Oven-Fried Squash
I get a lot of questions about this recipe, and I love it! It means you’re just as excited about crispy, healthy veggies as I am. Here are some of the most common things people ask me about making the best oven-fried squash:
Q1: Can I use different types of squash? Absolutely! While yellow squash is my go-to for this oven-fried recipe, zucchini works beautifully too. Just make sure to slice them evenly, and remember that zucchini might release a little more water, so pat it extra dry. You could even try pattypan squash!
Q2: What if my squash isn’t getting crispy enough? This is usually down to a few things. Make sure your oven is hot enough (400°F is key!). Don’t overcrowd the baking sheet – give those pieces space to breathe. Also, that little drizzle of olive oil really helps, and flipping them halfway through is crucial. If all else fails, a quick minute or two under the broiler at the very end can work wonders, but watch it closely!
Q3: Can I make this oven-fried squash ahead of time? You can definitely prep the ingredients ahead, like slicing the squash and mixing your dry ingredients. But for the absolute best crispiness, I really recommend coating and baking them right before you plan to serve. They’re best fresh out of the oven.
Storing and Reheating Your Oven-Fried Squash
Got leftovers? Lucky you! Store any extra oven-fried squash in an airtight container in the fridge for up to 3 days. To bring back that glorious crispiness, the best way to reheat is in the oven at 350°F (175°C) for about 10-15 minutes, or even better, in an air fryer for 5-7 minutes. Microwaving will make them soggy, and we don’t want that!
Nutritional Information for Oven-Fried Squash
I know many of you are curious about the nutritional breakdown of recipes, and I totally get it! While I can’t give you exact numbers down to the last milligram (because things like the brand of flour or the size of your squash can change things up), please know that this oven-fried squash is a fantastic, healthier alternative to deep-fried versions. The values provided are just estimates, so they might vary a bit based on the specific ingredients and brands you use. It’s all about making smart choices!
Share Your Oven-Fried Squash Creations
Well, there you have it! My absolute favorite way to make crispy, delicious oven-fried squash. I truly hope you love this recipe as much as I do. If you try it, please come back and leave a comment below – I’d love to hear how it turned out for you! Don’t forget to rate the recipe, and if you share your beautiful creations on social media, tag me! Let’s get more crispy, healthy veggies out into the world!
Print
Oven-Fried Squash: 1 Genius Trick for Amazing Crunch
- Total Time: 40 minutes
- Yield: 4 servings 1x
- Diet: Vegetarian
Description
Crispy oven-fried squash, a healthier alternative to deep-fried versions.
Ingredients
- 2 medium yellow squash, sliced into 1/4-inch rounds
- 1/2 cup all-purpose flour
- 1 teaspoon salt
- 1/2 teaspoon black pepper
- 1/4 teaspoon garlic powder
- 1/4 teaspoon paprika
- 1 large egg, beaten
- 1/2 cup panko breadcrumbs
- 2 tablespoons olive oil
Instructions
- Preheat oven to 400°F (200°C). Line a baking sheet with parchment paper.
- In a shallow dish, combine flour, salt, pepper, garlic powder, and paprika.
- In another shallow dish, beat the egg.
- In a third shallow dish, place the panko breadcrumbs.
- Dip each squash slice first in the flour mixture, then in the beaten egg, and finally coat thoroughly with panko breadcrumbs.
- Arrange coated squash slices in a single layer on the prepared baking sheet. Drizzle with olive oil.
- Bake for 20-25 minutes, flipping halfway through, until golden brown and crispy.
Notes
- For extra crispiness, you can broil for the last 2-3 minutes.
- Serve immediately for best results.
- Leftovers can be reheated in the oven or an air fryer.
- Prep Time: 15 minutes
- Cook Time: 25 minutes
- Category: Side Dish
- Method: Baking
- Cuisine: American
Nutrition
- Serving Size: 1/4 of recipe
- Calories: 220
- Sugar: 3g
- Sodium: 450mg
- Fat: 10g
- Saturated Fat: 1.5g
- Unsaturated Fat: 7g
- Trans Fat: 0g
- Carbohydrates: 25g
- Fiber: 3g
- Protein: 7g
- Cholesterol: 45mg
Keywords: oven-fried squash, baked squash, crispy squash, healthy squash recipe