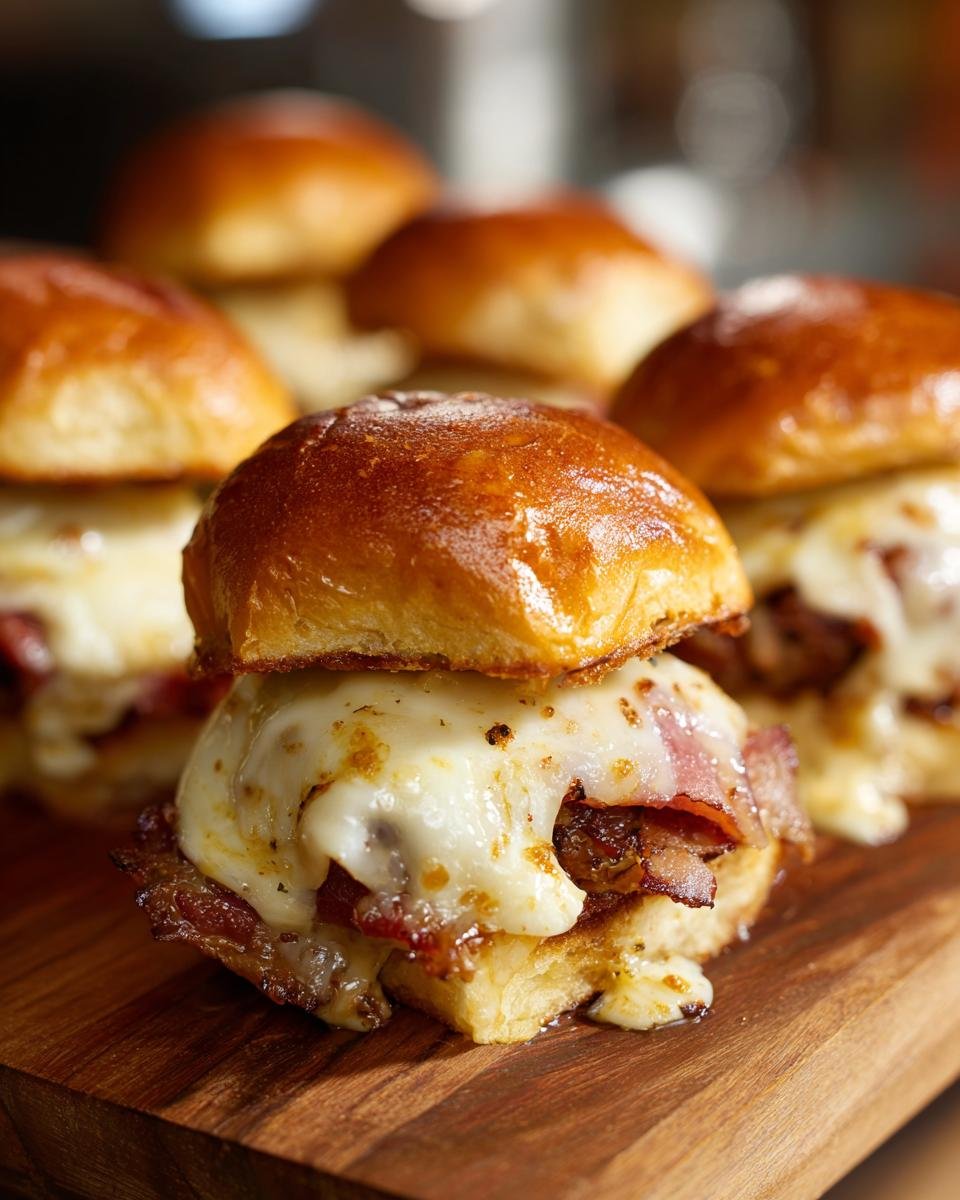
Oh, you guys, get ready for a game-changer! If you’re looking for a guaranteed hit for literally any get-together, look no further. My recipe for Irresistible Ham And Cheese Sliders For Any Occasion is hands-down the easiest and most loved appetizer I make. I swear, the last time I brought these to a potluck, I only managed to snag one for myself before the whole tray vanished! They’re just so darn perfect for parties, quick weeknight treats, or honestly, just because. Everyone loves them, and you’ll love how simple they are to whip up.

Why These Irresistible Ham And Cheese Sliders Are a Crowd-Pleaser
Seriously, what’s not to love about these little guys? They’re practically magic! Here’s why my Irresistible Ham And Cheese Sliders are always the first to disappear:
- They’re ridiculously easy to make: You can whip up a whole batch in under 30 minutes, and most of that is oven time. No fancy skills needed at all!
- Gooey, cheesy goodness: The combination of melty cheese and savory ham tucked into those soft buns? Pure comfort food bliss.
- Super versatile: Whether it’s game day, a birthday bash, a holiday party, or just a Tuesday night craving, these sliders fit every single occasion. They’re the ultimate party food!
- They satisfy that craving: You know that feeling when you just want something warm, savory, and a little bit indulgent? These sliders hit the spot every single time.
- They taste amazing: The buttery, seasoned topping just takes them over the top. They’re more than just a sandwich; they’re a flavor explosion!
Gathering Your Ingredients for Irresistible Ham And Cheese Sliders
Alright, let’s talk about what you’ll need to make my famous Irresistible Ham And Cheese Sliders. The beauty of this recipe is that you probably already have most of it in your pantry or fridge! You’ll need a dozen slider buns – Hawaiian rolls or any soft dinner rolls work like a charm. Grab about 12 slices of your favorite ham, and for the cheese, I’m partial to Swiss or cheddar for that classic flavor, but feel free to mix it up! Then, we’ve got our flavor-packed topping: about 1/4 cup of butter that’s been melted, a tablespoon of Dijon mustard, a teaspoon of Worcestershire sauce, and just a pinch of garlic powder and onion powder. Oh, and if you’re feeling fancy, a sprinkle of poppy seeds on top is totally optional but adds a nice little touch!
Step-by-Step Guide to Making Your Irresistible Ham And Cheese Sliders
Okay, let’s get down to business and make some magic happen with these Irresistible Ham And Cheese Sliders! It’s really a straightforward process, and trust me, the results are SO worth it.
Prepping the Buns and Filling
First things first, preheat your oven to 350°F (175°C). While that’s warming up, take your slider buns and carefully slice them in half horizontally. It helps if you have a nice, long bread knife for this! Then, line them up on your baking sheet. Now for the fun part: layer about two slices of delicious ham onto each bottom bun half, and then top that with a slice of your chosen cheese. Make sure it’s spread out nicely; we want cheesy goodness in every bite! Make sure your cheese is ready for melty perfection using tips for how to perfectly melt cheese.

Crafting the Flavorful Butter Topping
This is where the real secret sauce comes in, and it’s SO simple! In a small bowl, whisk together your melted butter, Dijon mustard, Worcestershire sauce, garlic powder, and onion powder. Give it a good whisk until everything is blended perfectly. You want this mixture to be smooth and fragrant, like a little flavor bomb waiting to happen. This topping is what makes them truly irresistible!
Baking for Golden Perfection
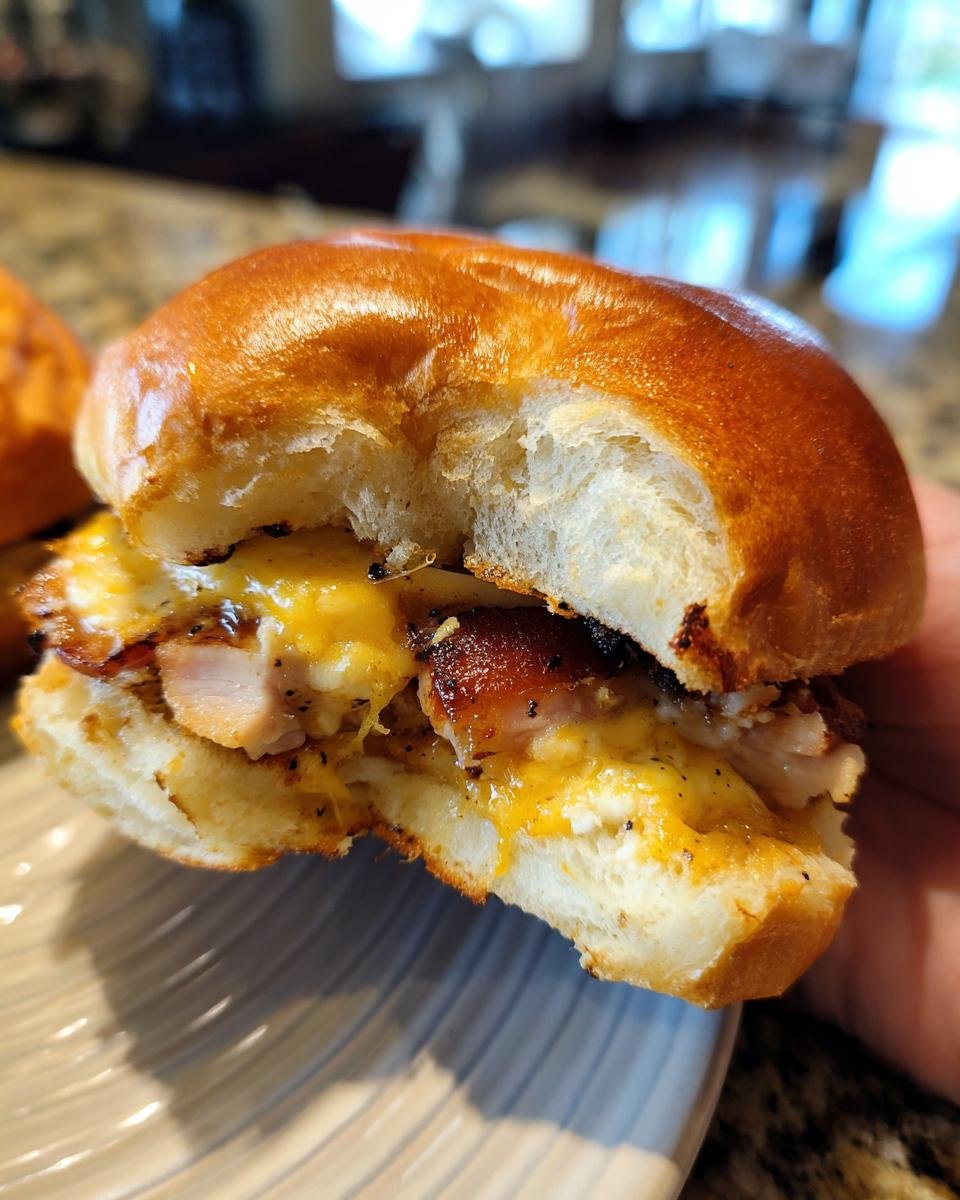
Now, generously brush that amazing butter mixture all over the tops of the sliders. If you’re using poppy seeds, sprinkle them on now – they look so pretty! To keep them nice and soft while the cheese melts, cover your baking sheet tightly with aluminum foil. Pop them into the preheated oven for about 15-20 minutes, or until you can see that glorious cheese starting to melt. For that perfect little bit of crispiness on top, take off the foil and let them bake for another 5 minutes. You’ll know they’re ready when they’re lightly toasted and smelling absolutely divine!
Expert Tips for Perfect Ham And Cheese Sliders
Whipping up these Irresistible Ham And Cheese Sliders is already a breeze, but let me share a few little secrets to make them absolutely, positively perfect every single time. Trust me on this!
First off, ingredient quality really does matter here. Since these are simple, the flavor of your ham and cheese really shines through. Use a good quality deli ham and a cheese you genuinely love the taste of – maybe check out my guide to the best cheeses for sandwiches for some inspiration! Slicing the buns and layering the fillings evenly is key, too. You want every bite to have that perfect ratio of bun, ham, and melty cheese. Don’t be shy with that buttery topping; it’s what gives them that amazing, slightly crispy, flavor-packed edge!
A really common pitfall is over-baking, which can dry out the buns. Keep an eye on them during that last 5-minute blast without the foil. You’re looking for a light golden brown, not a deep toast. If you’re assembling them ahead of time, I’d suggest holding off on brushing on the butter mixture until just before baking to keep the buns from getting too soggy. These little tweaks really take your sliders from good to absolutely unforgettable!
Variations and Customizations
Oh, the fun doesn’t stop with just ham and cheese! My Irresistible Ham And Cheese Sliders are a fantastic base for all sorts of delicious twists. Want to try a different cheese? Go for it! Provolone adds a nice sharpness, Gruyere is amazing for a nutty kick, and even something like pepper jack can give you a little heat. Feeling a bit more adventurous? Try adding some thin slices of pickle or a bit of caramelized onion right on top of the ham before you add the cheese – SO good! You could even swap the ham for turkey or roast beef for a different vibe. It’s all about making these sliders your own!
Serving and Storing Your Sliders
These Irresistible Ham And Cheese Sliders are best served warm, right out of the oven when that cheese is perfectly gooey and the buns are just lightly toasted. They’re fantastic as is, but you could totally serve them with a side of potato salad or a quick green salad for a more complete meal. If you happen to have any leftovers (which is rare in my house!), don’t worry! Just pop them into an airtight container and keep them in the fridge. They’ll be good for about 2-3 days. To reheat, just pop a few in a toaster oven or on a baking sheet in a regular oven at around 300°F (150°C) for about 5-10 minutes until they’re warmed through and the cheese is melty again. Just be careful not to microwave them; they can get a bit rubbery that way!
Frequently Asked Questions About Ham And Cheese Sliders
Got questions about these amazing little sliders? I totally get it! They’re so popular, I always get a few questions when I bring them to parties. Here are some of the most common ones:
Can I make these ahead of time?
Yes, you absolutely can! This is one of their best features. You can assemble them up to a day in advance. Just store them in an airtight container in the fridge and hold off on brushing on the butter mixture until about 15-20 minutes before you plan to bake them. This keeps those buns nice and soft!
What are the best buns to use for these sliders?
Honestly, the classic choice is Hawaiian sweet rolls. Their slight sweetness is a perfect contrast to the salty ham and cheese! But don’t feel limited; any soft, small dinner rolls work wonderfully. Just make sure they’re not too dense, or they might not soak up all that yummy butter topping!
Can I freeze these sliders?
I don’t recommend freezing the assembled sliders before baking, especially with the butter mixture on top – it can make the buns a bit mushy when thawed. If you need to prepare ahead way in advance, you can assemble them, wrap them well, and keep them in the fridge for up to 24 hours. Baking them fresh right before serving is always best for that perfect texture!
How do I reheat leftovers?
If you’re lucky enough to have leftovers, the absolute best way to reheat them is in a toaster oven or a regular oven at a low temperature (around 300°F or 150°C) for about 5-10 minutes. You want to warm them through until the cheese is melty again. Avoid the microwave if you can, as it can make the buns chewy.
Estimated Nutritional Information
Just so you know, these little flavor bombs are estimated to have around 250 calories per slider. You’re looking at about 15g of fat, 10g of protein, and 20g of carbs. Keep in mind that these numbers can totally change depending on the kind of ham, cheese, and even the buns you use! It’s a delicious estimate, though, and totally worth it for how easy and yummy they are!
Print
Irresistible Ham And Cheese Sliders
- Total Time: 40 min
- Yield: 12 sliders 1x
- Diet: Vegetarian
Description
Easy and delicious ham and cheese sliders perfect for any gathering.
Ingredients
- 12 slider buns
- 12 slices ham
- 12 slices cheese (Swiss or cheddar)
- 1/4 cup butter, melted
- 1 tablespoon Dijon mustard
- 1 teaspoon Worcestershire sauce
- 1/2 teaspoon garlic powder
- 1/4 teaspoon onion powder
- Poppy seeds (optional)
Instructions
- Preheat your oven to 350°F (175°C).
- Slice the slider buns in half horizontally.
- Place the bottom halves of the buns on a baking sheet.
- Layer two slices of ham and one slice of cheese on each bottom bun half.
- Place the top halves of the buns over the cheese.
- In a small bowl, whisk together the melted butter, Dijon mustard, Worcestershire sauce, garlic powder, and onion powder.
- Brush the butter mixture evenly over the tops of the sliders.
- Sprinkle with poppy seeds, if desired.
- Cover the baking sheet tightly with aluminum foil.
- Bake for 15-20 minutes, or until the cheese is melted and the buns are lightly toasted.
- Remove the foil and bake for another 5 minutes to crisp the tops.
- Serve immediately.
Notes
- You can use different types of cheese like provolone or Gruyere.
- Add a thin layer of mayonnaise or butter to the inside of the buns before assembling for extra flavor.
- These sliders can be assembled ahead of time and baked just before serving.
- Prep Time: 15 min
- Cook Time: 25 min
- Category: Appetizer
- Method: Baking
- Cuisine: American
Nutrition
- Serving Size: 1 slider
- Calories: 250
- Sugar: 5g
- Sodium: 600mg
- Fat: 15g
- Saturated Fat: 7g
- Unsaturated Fat: 8g
- Trans Fat: 0g
- Carbohydrates: 20g
- Fiber: 1g
- Protein: 10g
- Cholesterol: 40mg
Keywords: ham and cheese sliders, party food, appetizer, easy recipe, quick meal, sliders, sandwich