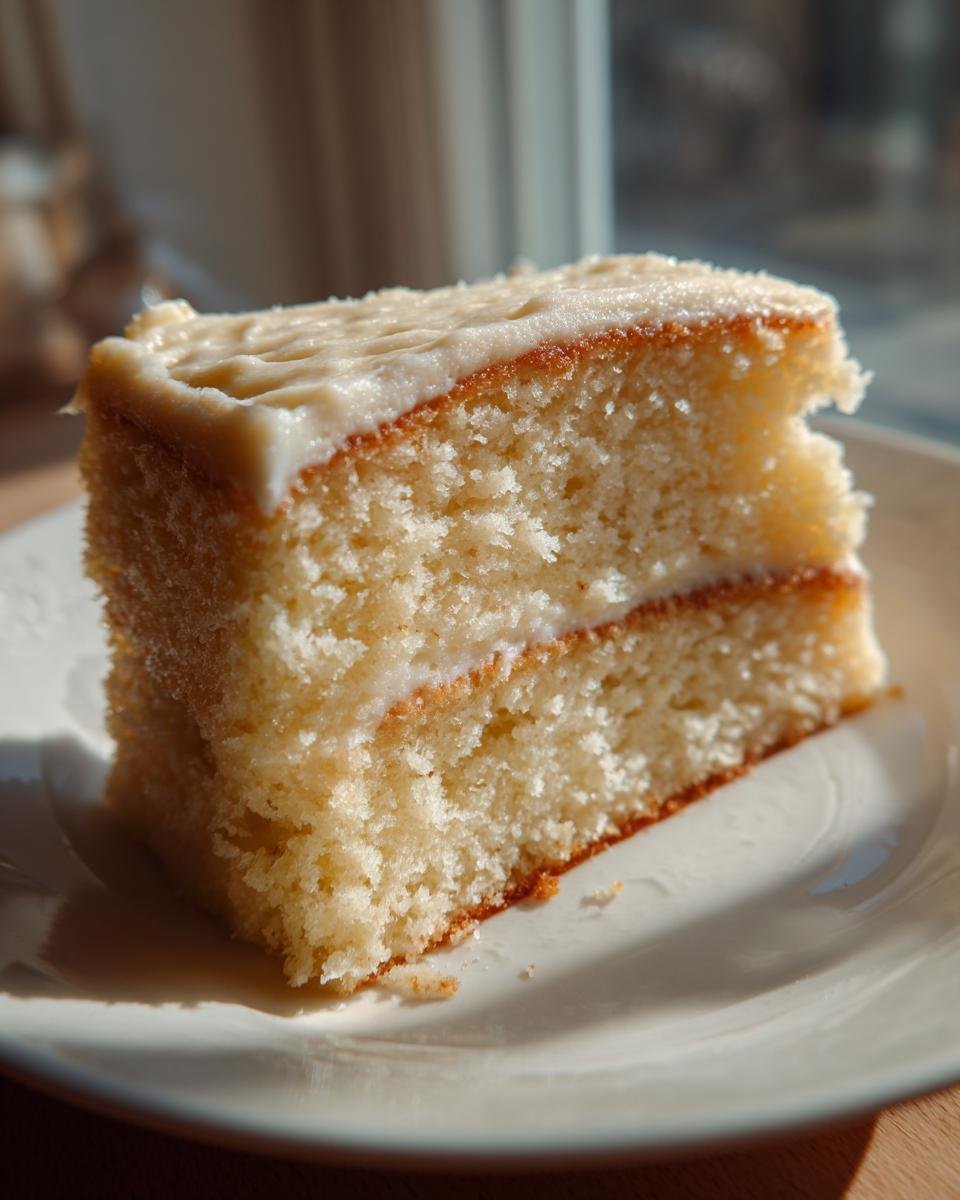
It’s funny how the biggest moments in life—birthdays especially—always come back to the simplest things. For me, that’s cake. Not some fussy, multi-layered, complicated thing, but a pure, wonderful centerpiece that tastes exactly like happiness. I spent ages trying to nail the perfect celebration cake, burning batches and ending up with dry disappointments. But I finally cracked the code on this basic, beautiful **Vanilla Birthday Cake**. Seriously, this is the recipe that finally worked! It’s my go-to because it promises a perfectly moist, tender crumb, every single time you pull those golden layers out of the oven. It’s proof that you don’t need a million steps for perfection.
Why This Vanilla Birthday Cake Recipe Works So Well
I know you might look at a simple vanilla recipe and think, ‘What’s the secret?’ Honestly, the secret is that there’s no catch! This is the recipe I turn to when I need guaranteed success for any celebration. I’ve made this so many times, I barely look at the paper anymore.
Moisture Guarantee for Your Vanilla Birthday Cake
- The ratio of butter to liquid here is just spot on. It gives you that rich flavor without ending up heavy.
- Also, we’re using baking powder, which helps keep the crumb light enough that it balances out the richness. It’s all about happy chemistry!
Simple Techniques for a Perfect Vanilla Birthday Cake
You don’t need to know any crazy baker tricks to get this amazing result. It’s all about following the easy steps. It comes together so fast, you could whip up your layers before your frosting even chills. You can see how I handle similar techniques when making perfect cupcakes, too, if you ever want another foolproof recipe! Check out those cupcake details if you ever want extra practice.
- Creaming the butter and sugar properly is the only real ‘work’ here.
- Alternating the dry and wet ingredients keeps everything balanced.
Gathering Ingredients for Your Vanilla Birthday Cake
Okay, let’s talk about what you need for this fantastic **Vanilla Birthday Cake**. The most important thing, and I mean the *most* important thing, is ensuring your butter, eggs, and milk are all truly at room temperature. I can’t stress this enough! Room temperature ingredients blend so much better; cold ingredients just make your batter grainy. Don’t even try to rush it by microwaving the butter—that melts it, and we aren’t making soup here!
Since this is a classic, we aren’t getting fancy with specialty flour, but the quality of your vanilla matters a ton when it’s the star flavor. Trust me, use the good stuff!
Ingredient Notes and Substitutions for the Vanilla Birthday Cake
- Flour: We stick to all-purpose flour here. If you want to make your very own cake flour, I have the cheat sheet right here for when you’re in a pinch!
- Vanilla: Since this is a vanilla cake, try a clear vanilla extract if you want the crumb to look super white, or just use a high-quality pure vanilla extract for that rich scent.
- Pan Size Swap: If you want slightly taller layers for stacking—perfect for a tiered look—you can divide this batter into three 6-inch pans instead of the two 8-inch pans listed. Just watch the timing, as they might bake a little faster!
Essential Equipment for Baking the Vanilla Birthday Cake
You don’t need a giant commercial kitchen to pull this off, thank goodness! But having the right basic tools makes everything smoother, especially when you’re working against the clock before the birthday party starts. I usually tackle this on a quick afternoon, so efficiency matters!
What am I always grabbing from the cupboard for this recipe? Definitely my electric hand mixer—while Grandma used a wooden spoon, my sanity requires some electric help when creaming that butter and sugar!
- Two 8-inch round cake pans. Make sure they are sturdy!
- Electric mixer (handheld or stand).
- Two decent-sized mixing bowls.
- A fine-mesh sieve or whisk for your dry ingredients.
- A rubber spatula for scraping down the sides—so important!
- A wire cooling rack. You absolutely need this for proper air circulation so you don’t end up with soggy bottoms.
And always have a good set of measuring cups and spoons ready. Accuracy matters in baking, even when you’re going for a simple cake like this **Vanilla Birthday Cake**.
Step-by-Step Instructions to Bake the Vanilla Birthday Cake
This is where the magic happens, but remember what I always say: patience during the mixing stage saves you from disaster later! We are aiming for perfect layers for our **Vanilla Birthday Cake**, so don’t rush the creaming or the additions. Get your oven warmed up right away so it’s ready when the batter is.
Preparation and Mixing the Vanilla Birthday Cake Batter
First things first: get that oven humming at 350°F (175°C). While it heats up, you need to prep your two 8-inch pans. Grease them well, then dust them liberally with flour, tapping out the excess. Trust me, this step prevents 99% of sticking issues!
In one bowl, whisk together your dry crew: the flour, baking powder, and salt. Set that aside to rest.
Now for the power move: In your big bowl, beat that softened butter and sugar until it looks pale and super fluffy—like soft clouds! That takes a good few minutes with the mixer. Next, add your eggs, but only one at a time. Make sure the first one is totally incorporated before you even think about adding the second. Finish this wet stage by stirring in your vanilla extract.
This part is crucial for tenderness: We alternate the dry mix with the milk. Start by adding about a third of your dry stuff and mix just until it’s almost gone. Then add half your milk and mix until just combined. Keep going, ending with the very last of the dry ingredients. Stop mixing the second you see no more streaks of white flour. Seriously, overmixing at this stage destroys the beautiful texture we just worked so hard to create!

Baking and Cooling Your Vanilla Birthday Cake Layers
Once the batter is smooth and uniform, divide it evenly between your prepared pans. Try to eyeball it so they bake evenly, but don’t stress if it’s not perfect.
Pop them in that hot oven for 25 to 30 minutes. You’ll know they’re done when you slide a wooden pick right into the center and pull it out clean—no wet goo allowed! If you’re worried, check sooner rather than later. It’s much easier to put an underbaked cake back in for five minutes than to fix a dry one.
When they look ready, pull those gorgeous layers out. Here’s the waiting game part: Let them cool *in* the pans on a wire rack for exactly 10 minutes. This lets them firm up just enough. After ten minutes, carefully flip them out onto the rack to finish cooling completely. Don’t even dream about frosting them until they are totally, completely cool—cold cake meets warm frosting equals melted sadness. You can get some great tips on leveling cakes after cooling too, if you want a flat top for icing! If you need help with French butter cake techniques, check this link out, though this vanilla recipe is way simpler!
Tips for an Absolutely Perfect Vanilla Birthday Cake
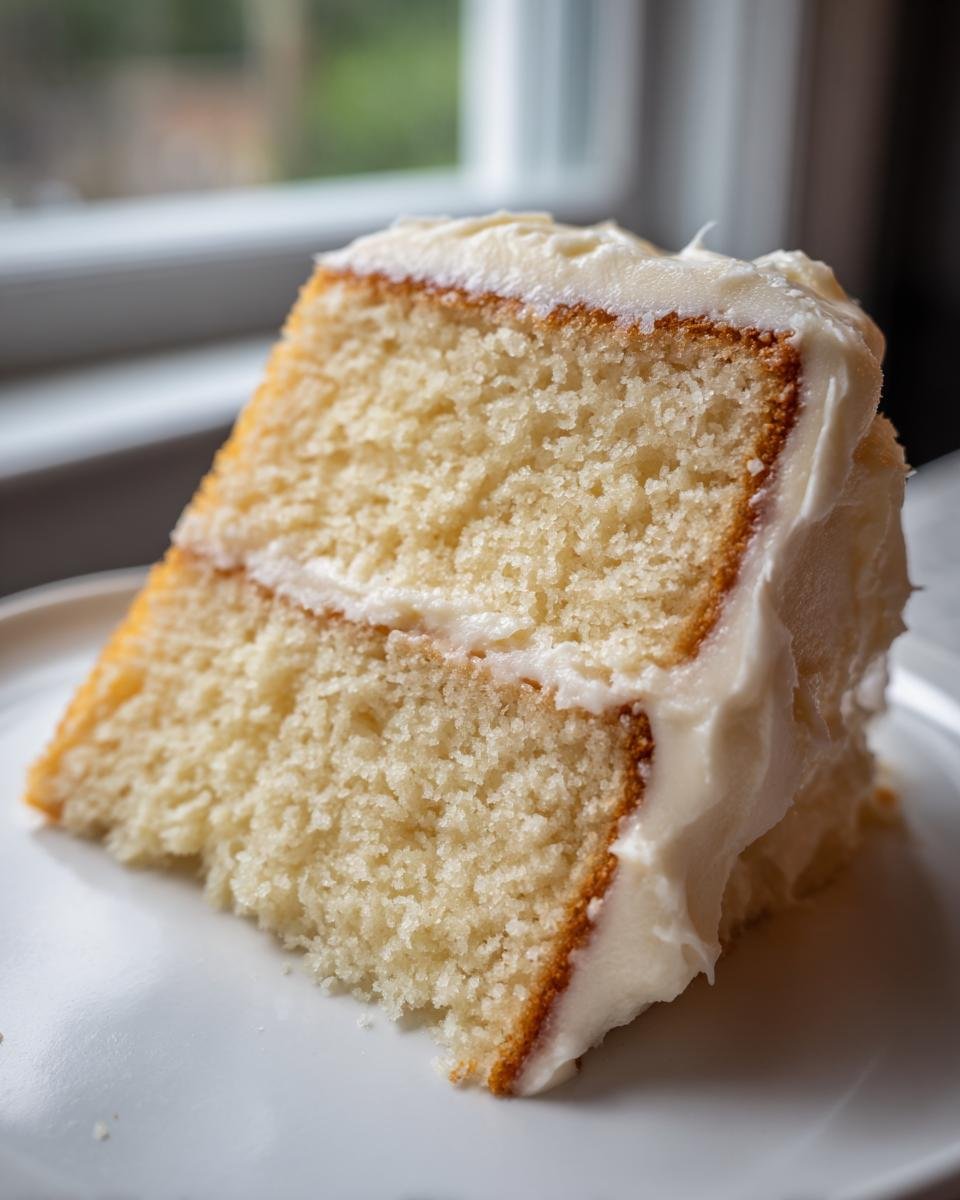
You’ve mixed it right, you’ve baked it perfectly, but maybe your cake layers came out looking like slight mountains instead of perfect flat disks. Don’t worry, this is the absolute most common thing amateur bakers stress over! For a show-stopping **Vanilla Birthday Cake** that stacks beautifully, presentation totally matters, and fixing a dome top is easier than you think.
Also, if you didn’t have time to make the cake goop—which I swear by for easy release—and you’re worried about those edges sticking to the pan, I have a quick fix for you!
- Taming the Dome: If your center rises too much during baking, don’t panic. Once the cakes are completely cool—and I mean bone-dry cool—wrap each layer tightly in plastic wrap and stick them in the freezer for about 30 minutes. Freezing solidifies the structure. When you take them out, use a long, serrated bread knife to carefully saw off the top hump. It slices off cleanly when cold!
- Preventing Pan Sticking: Even if you properly grease and flour, high-sugar batters can sometimes surprise you. If you are extremely paranoid about the cake sticking (and sometimes I am!), try lining the bottom of your pans with a custom-cut circle of parchment paper *after* greasing the sides. It acts as a safety net.
- Room Temp Magic (Again!): I know I mentioned it earlier, but seriously, if you forgot to pull your eggs and milk out, use warm water to slightly warm your eggs in a bowl for five minutes, and gently warm your milk—just a touch, not hot! This helps mimic room temperature when you’re running late.
If you’re looking for a frosting that requires a little less fuss than traditional buttercream while still tasting incredible, you absolutely must explore an Italian Meringue Buttercream. It’s super smooth and holds up beautifully for decorating those high-stacked birthday cakes. You can find one of my favorite starter recipes for it right here if you want to give it a try!
And hey, if you ever want to practice making your own cake flour (since we use all our flour in this recipe), I have a little guide showing you the quick switch-up from regular flour over here. It’s great to know those hacks!
Frosting Suggestions for Your Vanilla Birthday Cake
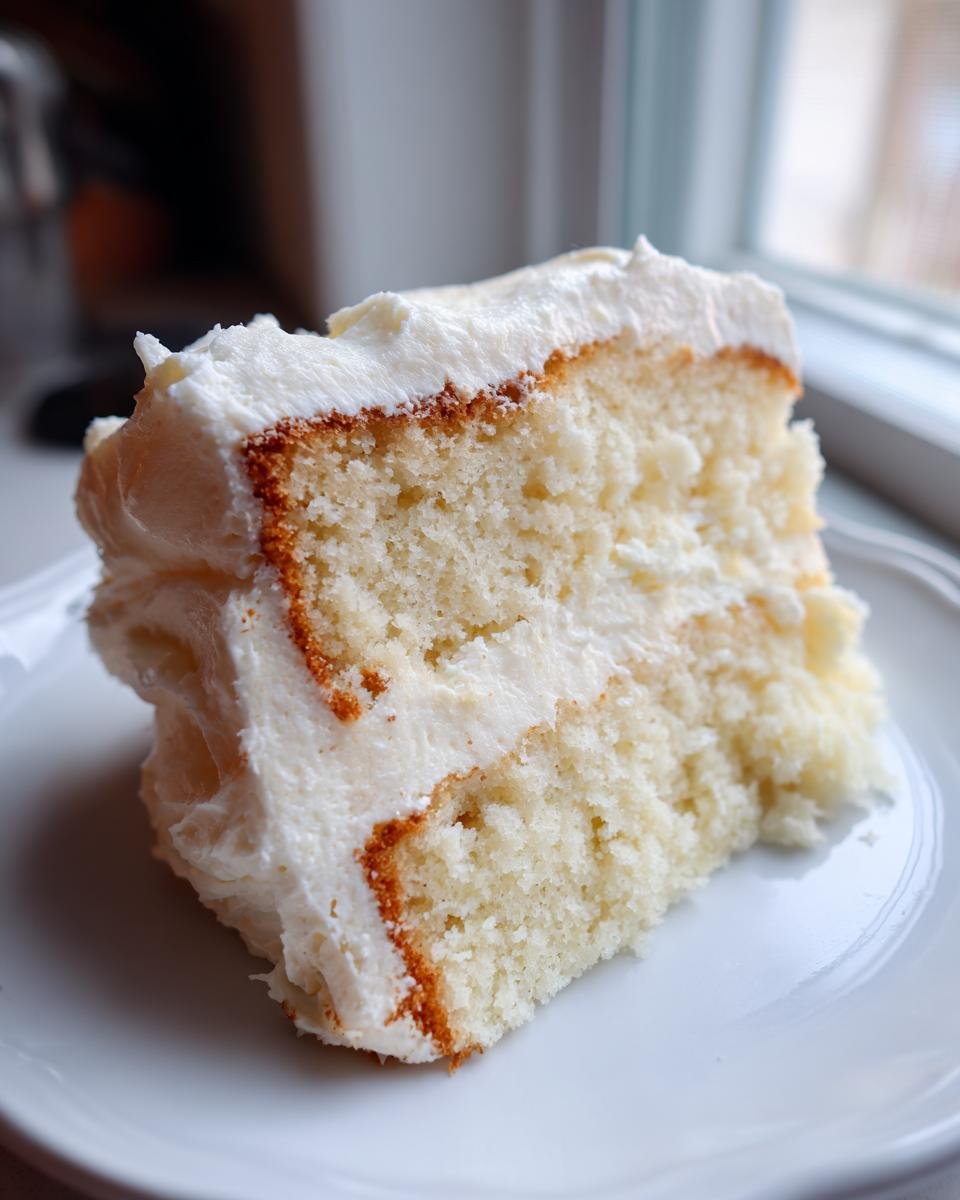
So, the cake layers are cooled—gorgeous, golden, and perfect. Now what? Since this recipe is the blank canvas, you get to decide the flavor party happening on top! Because our **Vanilla Birthday Cake** layers are tender but sturdy, they can handle almost anything you throw at them without collapsing. I usually go classic, because who doesn’t love more vanilla?
My absolute favorite pairing is a rich, American-style buttercream. It pipes like a dream and tastes heavenly against the mild sweetness of the cake. If you want something a little tangier, you can’t go wrong drizzling it with a simple cream cheese frosting—that sharp flavor cuts through the sweetness beautifully. If you’re looking for a recipe that’s foolproof and pipes like silk, I highly recommend trying out my favorite buttercream recipe. It’s my standard companion for this exact cake.
Storing and Serving Your Vanilla Birthday Cake
Listen, your **Vanilla Birthday Cake** is usually meant to be eaten right away, right? If you frost it with a standard American buttercream, it’s actually fine sitting happily on the counter, covered, for two maybe three days. The cake stays nicely moist that way!
If you used cream cheese frosting or if your kitchen is super hot, you should stick it in the fridge. Just make sure you pull it out about an hour before anyone wants a slice! Cold cake is hard cake, and we want that delightful tenderness we worked for. I usually just pop the leftovers in an airtight container; it stays great for four days.
Frequently Asked Questions About This Vanilla Birthday Cake
I get so many wonderful questions rolling into my inbox about this simple layer cake! It’s the most baked recipe on my site, which tells me a lot of people need that reliable, go-to birthday cake recipe. Let’s tackle some of the common hurdles so your next **Vanilla Birthday Cake** is perfect.
Can I use self-rising flour for this Vanilla Birthday Cake?
That’s a great question, especially if you want to skip adding the baking powder! Self-rising flour already has salt and leavening agents mixed in. If you substitute it cup-for-cup, you should skip adding the 1 1/2 teaspoons of baking powder listed in my recipe. However, I actually suggest sticking to the regular all-purpose flour if you can. My recipe is really balanced around that exact amount of baking powder, and cutting agents into pre-mixed flour can sometimes give you a slightly different rise. If you try it, just taste your batter before you bake to make sure it doesn’t taste too metallic!
How do I get a truly white Vanilla Birthday Cake?
Ah, you want that pristine, bakery white look! If you look at the ingredients, we use whole eggs, which naturally give the crumb a slight cream or ivory tint. To get it truly snow white, you’d need to switch to all egg whites. Just swap those two whole eggs out for about 1/2 cup of egg whites. Also, make sure you’re using clear vanilla extract instead of the dark pure extract. It makes a subtle difference in color, but it’s worth trying if you’re aiming for a bright white canvas for rainbow sprinkles!
What is the best way to level the layers of my Vanilla Birthday Cake?
I talked about this above, but it bears repeating because nobody wants a crooked cake! The absolute best way is to let the cake cool completely, preferably wrapping it and chilling it for a bit first (it cuts so much cleaner when cold). Then, grab a long, serrated bread knife. Hold the knife perfectly parallel to your counter and gently saw away the top dome. Don’t push down! Just use the sawing motion to slice off the bumpiness. If you mastered your bake time, this should be a super easy trim. If you want another quick baking trick, check out how fast I get things done in this speed-baking recipe!
Nutritional Snapshot of the Vanilla Birthday Cake
Okay, let’s talk about the numbers for this lovely **Vanilla Birthday Cake**, even though I usually try not to look too closely after I’ve already had a big slice! Remember, these figures are just estimates based on standard calculations for one serving size, so your exact results might vary depending on the brands of butter or milk you use. We all know the best way to enjoy cake is to not sweat the tiny details too much, right?
But for those of you who like to keep track, here is what you can generally expect per slice:
- Serving Size: 1 slice
- Calories: 320
- Sugar: 30g
- Fat: 15g (including about 9g saturated fat)
- Protein: 5g
- Carbohydrates: 42g
- Cholesterol: 70mg
- Sodium: 200mg
This is a straightforward recipe, so we don’t have any crazy additives, but remember, that sugar content is what makes it taste like a celebratory treat! Enjoy it, and don’t worry about the numbers too much—it’s a birthday cake, after all!
Print
Simple Vanilla Birthday Cake
- Total Time: 50 min
- Yield: 8 servings 1x
- Diet: Vegetarian
Description
A basic recipe for a moist vanilla layer cake suitable for birthdays.
Ingredients
- 1 1/2 cups all-purpose flour
- 1 1/2 teaspoons baking powder
- 1/2 teaspoon salt
- 1/2 cup unsalted butter, softened
- 1 cup granulated sugar
- 2 large eggs
- 1 teaspoon vanilla extract
- 1/2 cup milk
Instructions
- Preheat your oven to 350°F (175°C). Grease and flour two 8-inch round cake pans.
- In a medium bowl, whisk together the flour, baking powder, and salt. Set aside.
- In a large bowl, cream the softened butter and sugar together until light and fluffy.
- Beat in the eggs one at a time, mixing well after each addition. Stir in the vanilla extract.
- Gradually add the dry ingredients to the wet ingredients, alternating with the milk, beginning and ending with the dry ingredients. Mix until just combined. Do not overmix.
- Divide the batter evenly between the prepared pans.
- Bake for 25 to 30 minutes, or until a wooden pick inserted into the center comes out clean.
- Let the cakes cool in the pans for 10 minutes before inverting them onto a wire rack to cool completely.
- Frost as desired once fully cooled.
Notes
- Use room temperature ingredients for better batter consistency.
- For a taller cake, you can bake the batter in three 6-inch pans instead.
- Prep Time: 20 min
- Cook Time: 30 min
- Category: Dessert
- Method: Baking
- Cuisine: American
Nutrition
- Serving Size: 1 slice
- Calories: 320
- Sugar: 30g
- Sodium: 200mg
- Fat: 15g
- Saturated Fat: 9g
- Unsaturated Fat: 6g
- Trans Fat: 0.5g
- Carbohydrates: 42g
- Fiber: 1g
- Protein: 5g
- Cholesterol: 70mg
Keywords: vanilla cake, birthday cake, layer cake, simple cake, white cake