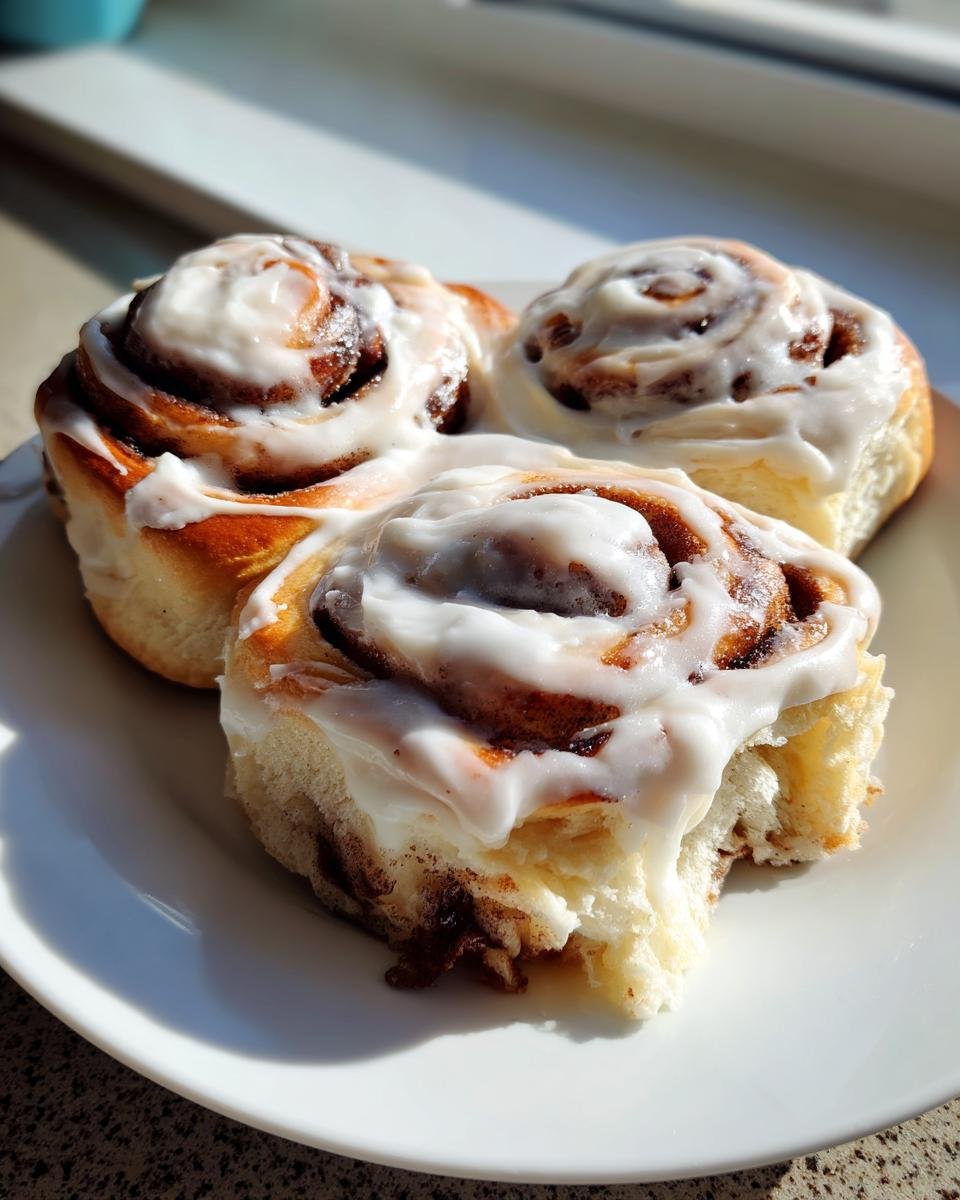
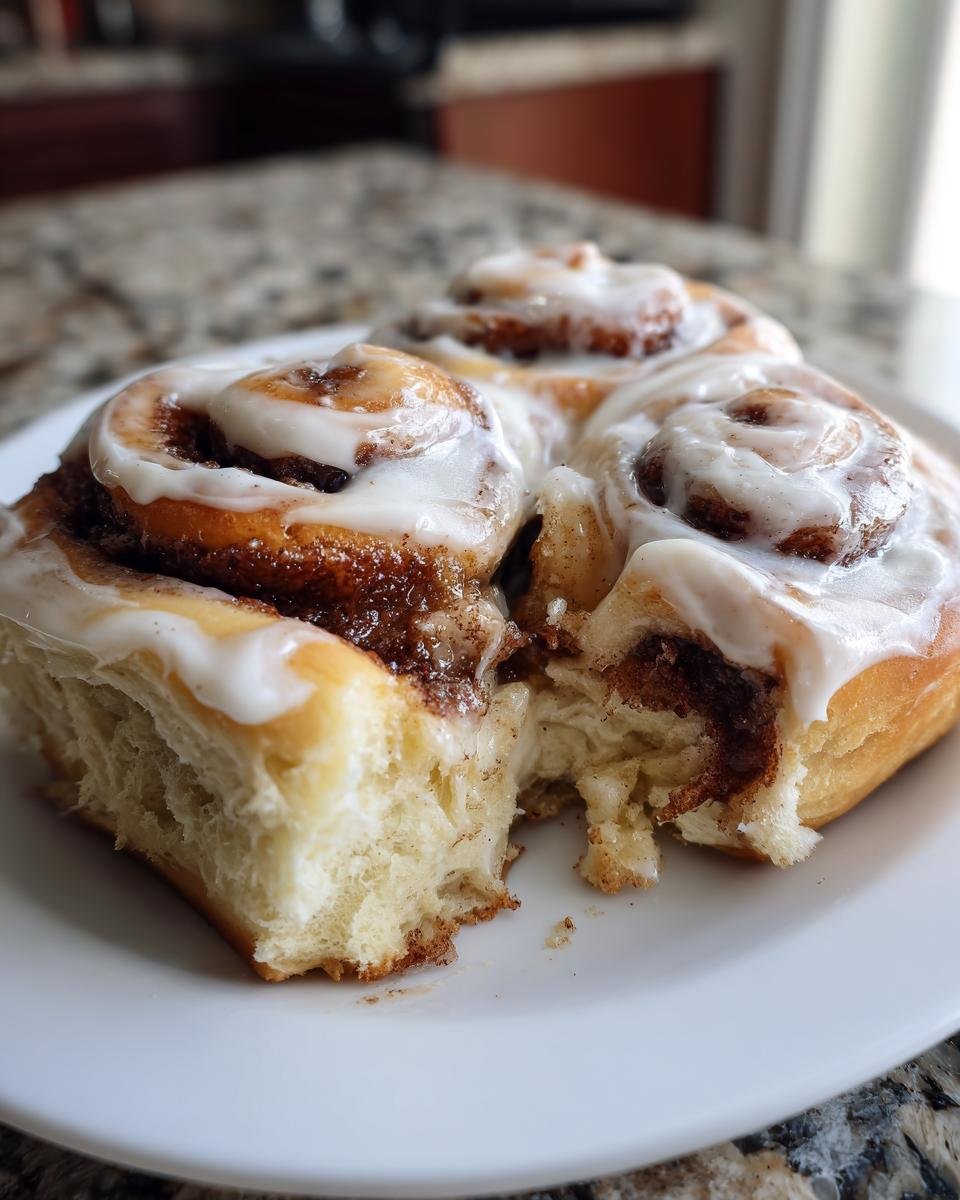
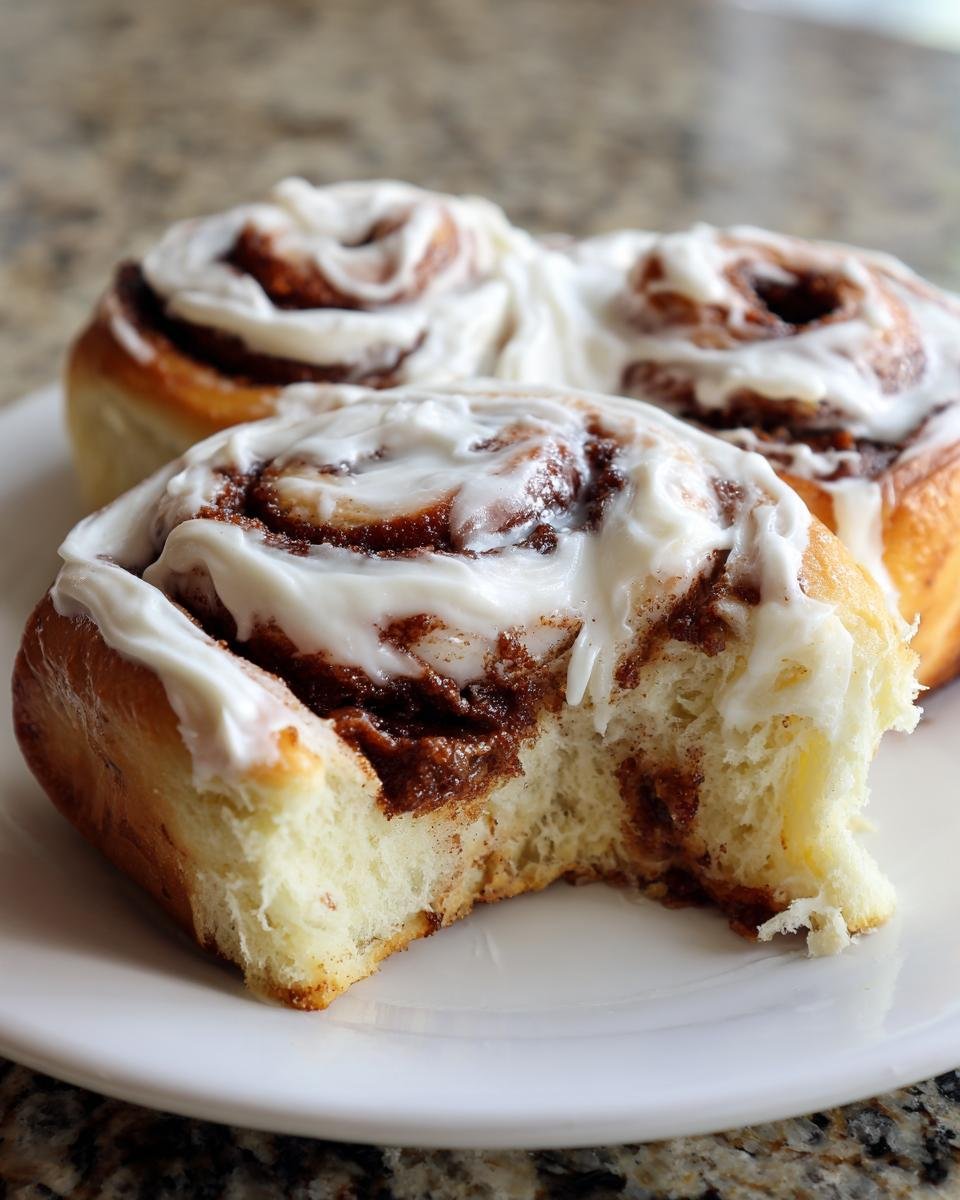
Oh, there’s absolutely nothing—and I mean *nothing*—that beats the smell of yeast dough rising and cinnamon baking in the oven. It’s the official scent of comfort, isn’t it? For years, I messed around trying to get that perfect sweet roll texture—you know, the kind that pulls apart in soft, pillowy layers? We finally perfected it. Trust me when I say these Classic Homemade Cinnamon Rolls are going to be your new weekend tradition. I remember the first time I tried them; the kitchen looked like a flour bomb went off, and I was convinced my yeast was dead! But that heavenly aroma pulled me through, and when I finally bit into that gooey center, I knew I’d cracked the code. It’s so much easier than you think once you know the little tricks!
We talk about keeping family recipes alive, and this one is sacred. I’ve linked up my notes on making truly phenomenal bread if you want something simple to practice with first, but if you’re ready for the big leagues, let’s get rolling!
Read up on my basic bread-making tips before we start, just to get your confidence up!
Why You Will Master These Classic Homemade Cinnamon Rolls
I know what you’re thinking: yeast breads are scary! But honestly, this recipe is practically foolproof if you follow the steps for the dough. No more tough, dry rolls here. You are going to nail these, I promise. They come out beautifully every single time, making that early start totally worth it.
Here’s exactly why this recipe is different and why you’ll feel like a pastry chef when you pull these out of the oven:
- The texture is unbelievably soft—we’re talking cloud-like dough, not dense bricks.
- The filling has that perfect sweet-to-spice ratio; it never tastes too spicy or too sugary.
- I break down the yeast activation step so there’s zero guesswork involved in getting that first rise going strong.
- The rolls bake up tall and tender because we give them enough time for that second puff before they hit the heat.
Essential Ingredients for Perfect Classic Homemade Cinnamon Rolls
Listen, you can have the best technique in the world, but if you skimp on ingredients, those classic homemade cinnamon rolls won’t live up to their potential. We only use really good stuff here. Since this recipe relies so much on the butter creating soft layers, make sure you have everything measured precisely before you even turn on the stove.
For the dough, you absolutely need 1 cup of whole milk—nonfat just won’t give us the richness we need! Don’t forget the 2 1/4 teaspoons of active dry yeast—it’s the star of our rise! Make sure your 1/4 cup of butter for the dough, and that 1/2 cup you need for the filling, is truly softened, not melted, okay? If you want that incredible depth of flavor in the filling, you must use 1 cup of *packed* brown sugar, not granulated. That molasses content makes all the difference in the gooeyness!
And for the frosting? We keep it simple but bright: powdered sugar, a touch of milk, and a good splash of real vanilla extract. The quality of your vanilla really shines through when it’s not competing with tons of other strong flavors. If you want to see how I make my similar honey butter for rolls, check out my dinner roll recipe, but for these, we stick strictly to the formula!
Step-by-Step Instructions for Classic Homemade Cinnamon Rolls
Okay, deep breath! This is where the real magic happens. These steps look long, but honestly, once you get the dough going, it’s mostly waiting time. Don’t rush anything, especially that yeast, and you’ll have the most beautiful, soft Classic Homemade Cinnamon Rolls you’ve ever tasted. It’s a process that honors the tradition, believe me!
Activating the Yeast and Mixing the Dough
First things first: the yeast needs a bath, but we have zero tolerance for scorching it! Warm up that 1 cup of milk until it’s just lukewarm—think baby bottle temperature. If it’s too hot, you’ll kill the little guys, and we’ll end up with bricks, not rolls. Stir in the sugar and the yeast and just let it chill out for about five to ten minutes. If it gets foamy and bubbly on top, you’re good to go! That means happy yeast ready to work on making our Classic Homemade Cinnamon Rolls light and airy.
Once you have that foamy brew, move everything into your big mixing bowl. We add the softened butter, the egg, and the salt right into the yeast mixture first. Now, slowly, gradually, add in your flour. Mix it until it just barely comes together into a shaggy, soft dough. Don’t try to mix it perfectly in the bowl—it’s too wet for that!
Kneading and First Rise for Your Classic Homemade Cinnamon Rolls
Time to get your hands dirty! Turn that dough out onto a surface lightly dusted with flour. You need to knead this for about five minutes total. You’re looking for a dough that feels smooth to the touch, elastic, and generally less sticky than when you started. Don’t keep adding flour to stop the stickiness, or you’ll lose that tenderness! If you think it’s too sticky, just oil your hands slightly instead.
Once it feels lovely and smooth, pop it into a lightly greased bowl, flip it over so the top has a little oil protection, and cover it up. Find a warm spot—maybe near the oven if it’s preheating, or just a sunny corner—and walk away for a full hour. No peeking allowed! It needs to double completely in size before we even think about rolling.
Assembling the Filling and Rolling the Log
When that dough has doubled, gently punch the air out—I call this ‘deflating the ego’ of the dough! On your floured surface again, roll it out into a big rectangle, roughly 12 by 18 inches. This size ensures we get those gorgeous, tight spirals in our Classic Homemade Cinnamon Rolls.
Now for the goo factor! Take that 1/2 cup of softened butter and spread it all the way to the edges, but leave maybe a half-inch border on one of the long sides—this acts as the glue later. Mix your brown sugar and cinnamon together until it’s perfectly uniformed, then sprinkle that gorgeous mixture right over the butter. Once it’s covered evenly, roll that thing up super tight, starting on the long edge opposite your empty border. You want a firm log!

Second Rise and Baking the Classic Homemade Cinnamon Rolls
Grease up that 9×13 inch pan—don’t skip this, or you’ll regret it slicing them out later! Cut your log into 12 equal pieces. I usually use a piece of unflavored dental floss to slice them cleanly; a dull knife always squishes mine! Place them cut-side up in the pan, making sure they are cozy but not completely squished together. Cover them again, and let them rest for 30 minutes this time. They should look puffy again.
While they are enjoying that final rest, get your oven preheated to 375°F (190°C). Bake them until they look beautifully golden brown on top—usually about 20 to 25 minutes. You want that rich color, not pale yellow!
Preparing the Simple Frosting and Finishing
You’ve got about five minutes while those rolls are baking to whip up the easiest frosting ever. Just whisk together your powdered sugar, 3 tablespoons of milk, and the vanilla extract until it’s smooth and pourable. If it seems too thick, splash in another tiny bit of milk, but be careful! We’re aiming for a glossy drizzle, not thick icing.
The absolute best part? Pull those rolls out of the oven, and while **they are still piping hot**, spread that frosting right on top. The heat melts it perfectly, and it seeps down into every crack and crevice. If you’re looking for some super gooey inspiration, I have a trick for extra ooey-gooey texture here, but this simple glaze is classic perfection!
If you try other sweet roll variations, these caramel ones are killer too!
Expert Tips for Perfect Classic Homemade Cinnamon Rolls
It takes a few bakes to turn a good recipe into a legendary one, which is why I want to share the little hacks I’ve learned over the years to make these Classic Homemade Cinnamon Rolls truly shine. These aren’t in the main instructions, but they make a huge difference!
Remember when I said not to add too much flour during kneading? That still holds true! If your dough is sticking to your counter during the first rise, don’t dump in extra flour. Instead, grab a sheet of plastic wrap, lightly brush it with oil, and cover the bowl with that. The dough won’t stick to the plastic, and it traps the humidity better, resulting in a softer dough when it comes back up.
Here is my biggest secret for slicing those rolls cleanly: Forget the knife for the log! Use unflavored dental floss. Slide a piece underneath your tightly rolled log, cross the ends over the top, and gently shimmy it through. It cuts the dough perfectly without squishing all that beautiful air out. Squished rolls mean sad rolls, and we don’t do sad rolls!
Also, pay attention to the butter in the filling. If you use butter that’s straight out of the fridge, it will tear the dough when you spread it. If it’s too oily, it just seeps straight to the bottom. Softened, pliable butter that easily spreads without dragging the dough fibers is key. If you happen to have leftover sour cream from another recipe, I highly recommend folding in a tablespoon of it into the dough along with the egg—it adds unbelievable tenderness, much like the richness in my sour cream coffee cake!
Ingredient Notes and Substitutions for Classic Homemade Cinnamon Rolls
I know we went over ingredients, but I have to hammer home two points because they are make-or-break for these Classic Homemade Cinnamon Rolls. First, that milk temperature for the yeast? Seriously, don’t guess. If you don’t have a thermometer, use the ‘pinky finger dip’ test—it should feel slightly warm, not hot, when you dip your pinky in for a second. If it burns, start over; hot milk kills yeast instantly, and we need that rise!
The other thing is customization in the filling. While the brown sugar and cinnamon combo is perfection, sometimes I like throwing in a little extra texture. If you toast about a half-cup of chopped pecans or walnuts until they are fragrant and then shower them over the butter before the sugar, wow! It adds such a wonderful crunch against that soft dough. Or, you can soak some raisins in hot water for ten minutes, drain ’em really well, and toss those in for a little surprise sweetness scattered throughout your spirals.
Storage and Reheating Instructions for Classic Homemade Cinnamon Rolls
Okay, sharing these treats is hard, but storing them? That’s easy! If you happen to have leftovers—which, let’s be real, is rare when these are fresh—wrap the entire pan tightly with plastic wrap or use an airtight container. They are best kept right on the counter at room temperature for about two days. If you need them to last longer, pop them in the fridge, but don’t forget that chilling dulls the flavor a bit!
Reheating is crucial to bringing back that gooey goodness. For one roll, about 15 seconds in the microwave does the trick. If you’re warming up a few, wrap them loosely in foil and heat them in a 300-degree oven for about ten minutes. That steam keeps them soft while gently warming the sugar glaze!
Frequently Asked Questions About Classic Homemade Cinnamon Rolls
I know you have questions! When you’re dealing with yeast, things can seem tricky, but don’t stress. We want your experience making these Classic Homemade Cinnamon Rolls to be perfect right out of the gate. I gathered up the most common queries people have when they try this recipe for the first time.
Can I use instant yeast instead of active dry yeast?
Yes, you totally can! Instant yeast is handy because you don’t have to wait for that bubbly proofing step first. If you use instant yeast, just skip step one entirely! Mix your instant yeast directly into the dry flour and sugar mixture, and then proceed with adding the wet ingredients. It’s a great time-saver, though I still love watching the active dry yeast foam up—it’s like a little science experiment!
What is the secret to getting them extra gooey?
Gooeyness comes from two places, friend! First, make absolutely sure you pack that brown sugar down when you measure it for the filling—don’t just scoop it loosely! Second, and this is key: you MUST frost them immediately when they come out of the oven. The roll needs to be hot so the glaze melts instantly and gets sucked down into the spirals. If you wait until they cool, the frosting just sits on top, and that’s a tragedy! If you want a really moist dough, maybe try swapping out a handful of your flour for that in my recipe for amazing dinner rolls; it gives a slight tang.
Can these Classic Homemade Cinnamon Rolls dough be made ahead of time?
Yes, you can absolutely get a head start! After you knead the dough (Step 3), instead of letting it rise on the counter, just place it in a lightly oiled bowl, cover it tightly with plastic wrap, and stick it in the fridge. It can cold-proof for up to 24 hours. The slow refrigeration deepens the flavor! Just make sure to pull it out about an hour before you plan to roll it so it warms up enough to handle easily.
My rolls didn’t puff up much during the second rise—will they still bake okay?
Don’t panic if they look a little lazy the second time around! As long as they rose well the first time, they will still puff up in the oven because the heat activates all that yeast activity again. They might just be a bit smaller overall. Next time, check your kitchen temperature; yeast hates drafts!
Serving Suggestions for Your Classic Homemade Cinnamon Rolls
Now that you have the most perfect, softest rolls imaginable, what do you serve them with? Honestly, these Classic Homemade Cinnamon Rolls are amazing all on their own, especially when that glaze is still warm and drippy. But if you’re making a weekend breakfast spread, they pair wonderfully with a strong, hot cup of coffee.
If you need a little caffeine boost to go along with that sugar rush, check out my recipe for a cinnamon maple vanilla latte—it’s like liquid dessert! Otherwise, a simple side of fresh berries or sliced oranges helps cut through the richness just perfectly.
Estimated Nutritional Overview for Classic Homemade Cinnamon Rolls
Alright, I’m going to give you the numbers here, but please remember that baking is an art, not an exact science—especially when we’re dealing with glorious amounts of butter and sugar! These values are just standard estimations based on the amounts listed in the recipe. If you make substitutions, or if you decide the frosting deserves a triple layer (which, honestly, who could blame you?), the numbers will definitely change!
This is a rich treat, but that’s why it’s perfect for a weekend brunch or holiday morning. If you’re looking for lighter ideas, I’ve compiled some great options over here for energizing breakfasts.
Here is the rough breakdown for one beautiful serving of these amazing Classic Homemade Cinnamon Rolls:
- Calories: Approximately 450 per roll
- Fat: Around 22g (Yes, darling, that includes the good stuff!)
- Carbohydrates: Mostly coming in near 58g
- Protein: About 7g
- Sugar: Roughly 45g (This is where all the happy flavor lives!)
- Cholesterol: Around 60mg
Keep in mind that these rolls are decadent! They are meant to be enjoyed as a special treat, not an everyday staple. But what a treat they are!
Share Your Experience Making Classic Homemade Cinnamon Rolls
Now that every step for these heavenly Classic Homemade Cinnamon Rolls is laid out for you, I honestly cannot wait to hear how they turned out! Baking is so much better when we share the results, right? This recipe is my tried-and-true favorite, but I love seeing how you all bring your own kitchen magic to the table.
So, once you’ve pulled those beauties out, hot and dripping with glaze, please don’t be shy! Take a snapshot of your beautiful, spiral-y creations—I want to see them! You can always tag me on social media; seeing your success stories genuinely makes my day. Nothing beats seeing rows of perfectly risen, golden rolls ready for breakfast.
And if you have a moment, drop a comment right here on the blog! Tell me what you thought about the texture, if the yeast behaved for you, or if you tried adding toasted pecans like I suggested. A simple five-star rating helps other bakers know this recipe is worth their time, too. Let’s build a community of really successful sweet roll makers together!
Print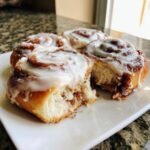
Classic Homemade Cinnamon Rolls
- Total Time: 1 hour 50 min
- Yield: 12 servings 1x
- Diet: Vegetarian
Description
A recipe for making traditional, soft cinnamon rolls from scratch.
Ingredients
- 1 cup whole milk
- 1/4 cup granulated sugar
- 2 1/4 teaspoons active dry yeast
- 1/4 cup unsalted butter, softened
- 1 large egg
- 1 teaspoon salt
- 3 1/2 cups all-purpose flour, plus more for dusting
- 1/2 cup unsalted butter, softened (for filling)
- 1 cup packed brown sugar (for filling)
- 2 tablespoons ground cinnamon (for filling)
- 1 cup powdered sugar (for frosting)
- 3 tablespoons milk (for frosting)
- 1 teaspoon vanilla extract (for frosting)
Instructions
- Warm the milk until it is lukewarm. Stir in the sugar and yeast. Let it stand for 5 to 10 minutes until foamy.
- In a large bowl, mix the softened butter, egg, and salt into the yeast mixture. Gradually add the flour until a soft dough forms.
- Knead the dough on a lightly floured surface for about 5 minutes until smooth. Place the dough in a greased bowl, cover it, and let it rise in a warm place for 1 hour, or until doubled in size.
- Punch down the dough. On a lightly floured surface, roll the dough into a rectangle about 12 by 18 inches.
- Spread the 1/2 cup of softened butter evenly over the dough surface. Mix the brown sugar and cinnamon together, then sprinkle this mixture over the buttered dough.
- Roll the dough tightly along the long edge to form a log. Cut the log into 12 equal rolls.
- Place the rolls in a greased 9×13 inch baking pan. Cover the pan and let the rolls rise again for 30 minutes.
- Preheat your oven to 375 degrees Fahrenheit (190 degrees Celsius). Bake for 20 to 25 minutes, or until golden brown.
- While the rolls bake, whisk together the powdered sugar, 3 tablespoons of milk, and vanilla extract to make the frosting.
- Remove the rolls from the oven and immediately spread the frosting over the warm rolls. Serve warm.
Notes
- For best results, ensure your milk is not too hot, as high heat kills the yeast.
- If you prefer a thicker frosting, add a little more powdered sugar.
- You can substitute cream cheese for some of the butter in the frosting for a tangier flavor.
- Prep Time: 45 min
- Cook Time: 25 min
- Category: Dessert
- Method: Baking
- Cuisine: American
Nutrition
- Serving Size: 1 roll
- Calories: 450
- Sugar: 45g
- Sodium: 350mg
- Fat: 22g
- Saturated Fat: 14g
- Unsaturated Fat: 8g
- Trans Fat: 0.5g
- Carbohydrates: 58g
- Fiber: 2g
- Protein: 7g
- Cholesterol: 60mg
Keywords: cinnamon rolls, homemade, sweet rolls, breakfast pastry, yeast dough, frosting