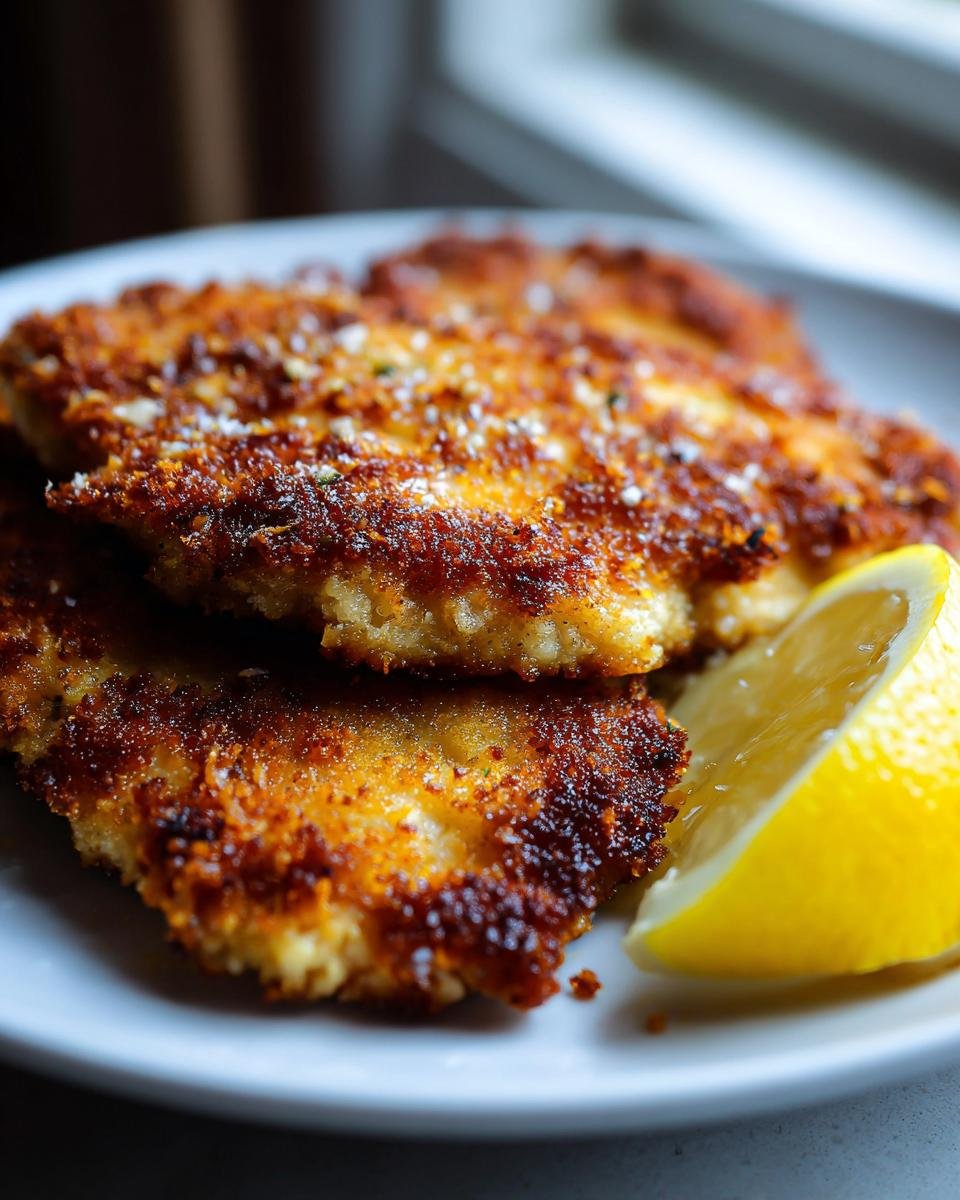
If you’re anything like me, weeknights demand dinner that tastes amazing but doesn’t involve standing over a deep fryer for an hour. That’s where this recipe comes to the rescue! We are talking about genuine, perfectly crisp, golden brown **Chicken Milanese**. Forget the hassle of messy oil baths; I’ve cracked the code on getting that enviable crunch using just a skillet and a bit of technique.
Over the years, I’ve burned more breaded cutlets than I care to admit trying to find that sweet spot in the pan. But trust me, after much testing, I found the perfect butter-to-oil ratio and heat setting. This classic Italian-American dish comes together fast, delivering maximum flavor and texture satisfaction in under 40 minutes. You are going to love how simple elevating your chicken dinner can be!

Why This Chicken Milanese Recipe Works So Well
Honestly, this recipe speeds up dinner without sacrificing that amazing crunchy exterior we all crave. I want you to feel confident making this on a Tuesday night!
- This dish is incredibly fast. Seriously, you’re looking at a total time of just 35 minutes from start to finish. That’s almost as fast as ordering takeout! You can definitely find more quick-fix inspiration when you check out my amazing chicken skewer recipe for another fast option.
- The texture is the absolute best part. It’s crispy, never soggy, and the flavor from the Parmesan just lifts the whole thing.
- Since we aren’t deep-frying, cleanup is so much easier. A little bit of fat in one skillet, and we are done!
Quick Prep and Cook Time for Chicken Milanese
When I say speed, I mean it. With only 20 minutes of prep—mostly just pounding the chicken—this **Chicken Milanese** hits the table in about 35 minutes total. That means less stress and more time enjoying that perfectly tender interior. It’s truly a staple when I need dinner on the fly.
Achieving the Perfect Golden Crust on Your Chicken Milanese
The secret here is blending the cooking fats. I use both olive oil and butter together. The oil has a high smoke point so the pan doesn’t burn immediately, and the butter? Well, butter adds that unmistakable nutty flavor that makes every bite of your **Chicken Milanese** taste incredible. It creates such a superior, golden crunch!
Essential Ingredients for Authentic Chicken Milanese
Okay, when you are making something as classic as **Chicken Milanese**, you can’t skimp on the ingredients. Clarity here is everything, because the way you prep these few simple things makes the difference between “okay” and “wow!” I’ve got my list tried and tested so you know exactly what textures and flavors you’re aiming for. It’s all ready to go, just like the fantastic flavor boosts you can find when you look at my homemade taco seasoning recipe!
Here’s what you need to gather up:
- We need exactly four boneless, skinless chicken breasts. They have to be pounded thin—that’s non-negotiable for quick, even cooking.
- For the dredge stations, grab one cup of plain flour, two large eggs that are only lightly beaten (don’t whip them silly!), and one and a half cups of your plain breadcrumbs.
- The flavor star here is the cheese! You need a half-cup of finely grated Parmesan cheese mixed right into those breadcrumbs. Don’t use the shaker can stuff, fresh grated, please!
- Seasoning is simple: one teaspoon of salt and just a half teaspoon of black pepper.
- And for frying, we use a mix: a quarter cup of good olive oil plus a quarter cup of unsalted butter. That combination is magic, trust me.
Step-by-Step Guide to Making Chicken Milanese
Putting this restaurant-quality dish together at home is surprisingly straightforward once you have your station set up. I find that if I organize everything first, the actual cooking flies by. It’s almost as quick as making my amazing garlic chicken pasta! The execution is all about sequence, especially when pounding and breading that chicken.
Preparing the Chicken Cutlets for Chicken Milanese
The thickness is key here—you don’t want chunky chicken; you want a nice, flat cutlet that cooks in minutes. Take those chicken breasts, place them between two sheets of plastic wrap—or even in a big Ziploc bag if you’re feeling lazy!—and grab your meat mallet. You need to pound them down gently but firmly until they are about a quarter of an inch thick all the way across. Take your time getting them even! This lets the chicken cook quickly and ensures the crust doesn’t burn before the center warms up.
Now, here’s a pro tip I learned from years of disappointing soggy bottoms: once the cutlets are fully breaded, lay them out on a wire rack set over a baking sheet and pop them in the fridge for about 15 minutes! This chilling time lets the coating really adhere to the meat. It stops the crust from falling off in the hot oil, giving you genuinely superior, crisp **Chicken Milanese**.
Setting Up Your Breading Station
You need three shallow dishes lined up right next to each other. Think of it like an assembly line!
- The first dish gets your flour. This is just to dry out the surface a little after pounding.
- The second dish holds your eggs, lightly beaten. They are the glue!
- The third dish is where the party happens: mix your breadcrumbs, the grated Parmesan cheese, salt, and pepper all together thoroughly. Make sure that salty, cheesy goodness is evenly distributed throughout the crumbs.
Now, for each piece of pounded chicken, you’re going to go in order: Flour first (shake off the excess!), then dip it completely in the egg wash (let the drips fall back into the bowl), and finally, you press it firmly into that breadcrumb mix. You have to press the crumbs onto the chicken so they really stick on both sides!
The Frying Technique for Golden Chicken Milanese
Get a large skillet going over medium-high heat. This is where a lot of people mess up—the fat has to be right! Mix your quarter cup of olive oil and quarter cup of unsalted butter. You want this shimmering. If it starts smoking violently, pull it off the heat for a quick second because it’s too hot, which will burn the breading instantly. That butter lets you know it’s hot enough!
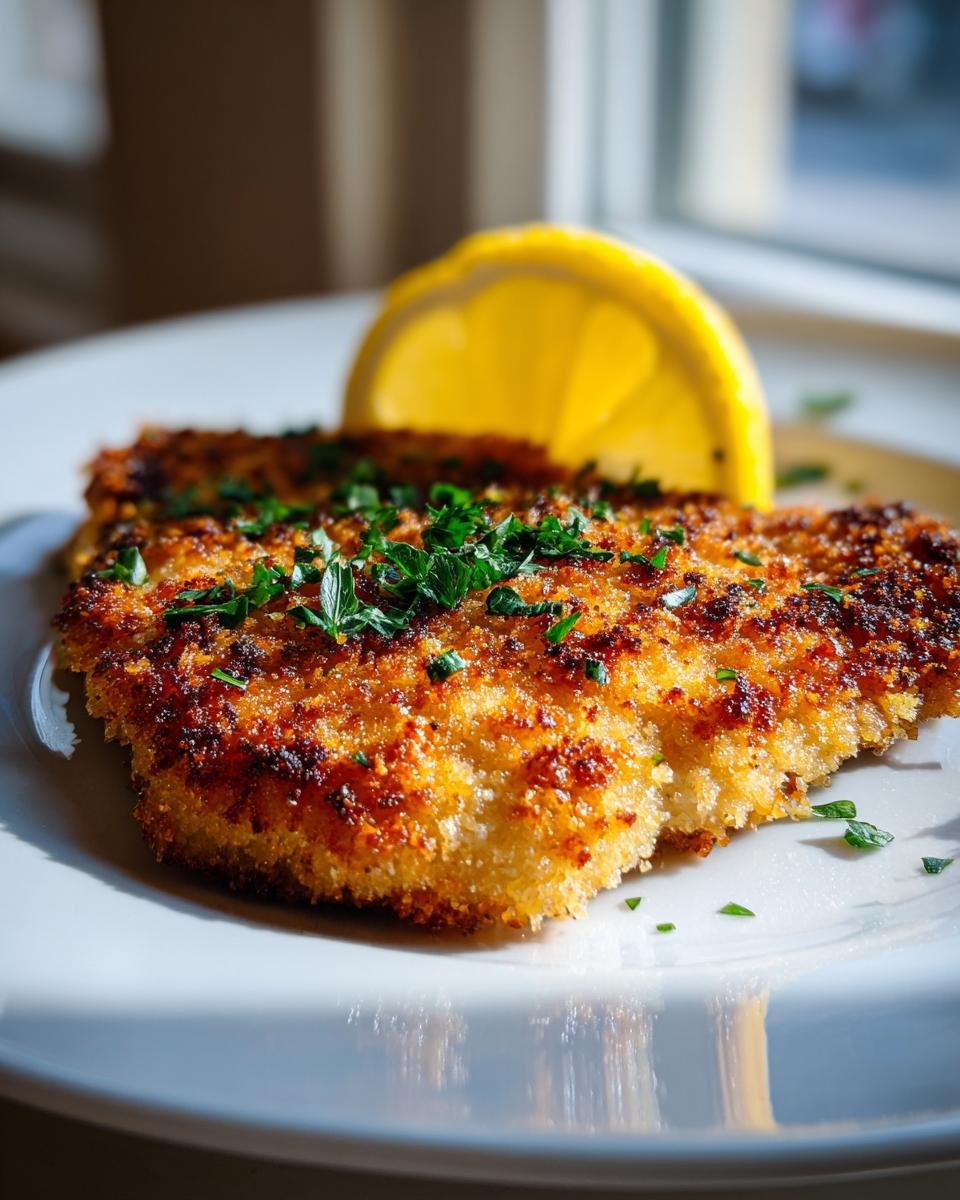
Carefully lay your breaded cutlets into the hot fat. Don’t crowd the pan; serious overcrowding lowers the oil temperature, and you end up with soggy chicken instead of crisp **Chicken Milanese**. Fry them for about 3 to 4 minutes per side. You’re looking for a deep, nutty brown color and the chicken should no longer be pink inside.
If you want the absolute crunchiest coating possible, try swapping out some of the plain breadcrumbs for Panko breadcrumbs. Trust me, the texture is fantastic! Once they are perfectly browned and cooked through, lift them out fast and put them on a wire rack—not paper towels stacked too high—to drain off any extra fat. Serve them immediately!
Expert Tips for Next-Level Flavor and Texture
Look, anyone can follow the recipe steps, but if you want that *chef’s kiss* Milanese texture, you need a couple of insider tricks. These little details take your pan-fried cutlets from good to absolutely unforgettable. I found these tips made a huge difference when I was trying to perfect my skillet technique. You can see how much I care about small details, kind of like when I perfected the flavor profile in my homemade taco seasoning!
Temperature Control for Even Cooking
Heat management is everything when pan-frying! You absolutely need medium-high heat, but you can’t just guess. If you have an instant-read thermometer—and I highly recommend getting one for frying—you want that fat mixture hovering right around 325°F to 340°F. If it’s too low, the chicken soaks up oil like a sponge, and you get soggy sadness. If it’s too high, the beautiful breading burns before the inside even warms up. Sticking in that sweet spot guarantees an even golden color and perfectly cooked chicken.
Draining Excess Fat Properly
Once those cutlets are glorious and golden, don’t just drop them onto a stack of paper towels. I used to do that, and the steam gets trapped underneath, softening that beautiful, crisp crust you worked so hard to create! Instead, pull out a wire cooling rack set over a sturdy baking sheet. Placing the hot chicken directly on the rack allows air to circulate underneath. This drains the excess fat completely while keeping the bottom crust light and crackly. It’s a tiny change, but it keeps your **Chicken Milanese** crispy until the very last bite!
Serving Suggestions for Your Classic Italian-American Dish
Now the hard part is over—you have perfectly crisp cutlets! What do you serve with them? You absolutely cannot skip the lemon wedges; that burst of fresh acidity cuts right through the richness of the frying fat. That simple squeeze revives the whole dish!
My family always pairs this with a bright, peppery arugula salad dressed simply with lemon juice and olive oil. It’s the perfect light contrast. If you want something a little more substantial, try serving it alongside some pasta tossed with butter and Parmesan. Or, for a fresh veggie crunch, check out my refreshing cucumber and bell pepper salad. It’s such a beautiful, easy pairing!
Storage and Reheating Chicken Milanese Leftovers
If you have any of this beautiful **Chicken Milanese** left over—which, let’s be honest, is rare—you need to treat it right! Don’t even think about the microwave; that’s sogginess central. Store any leftovers in a single layer in an airtight container in the fridge for up to three days. That keeps the breading from getting crushed.
To bring back that glorious crunch, your best bet is the oven or an air fryer. Preheat your oven to about 375°F (190°C) and bake the cutlets on a wire rack for about 8 to 10 minutes. The air fryer is even faster! This dries out any absorbed moisture and crisps up that coating beautifully so it tastes almost freshly made.
Frequently Asked Questions About Pan-Fried Cutlets
I get so many messages about making sure the breading sticks properly or how thick to pound the chicken, so I figured I’d just answer the most common questions right here! It’s all about those little tweaks that make the difference between an average dinner and a showstopper. If you need something super fast while you look this up, check out my quick and easy snacks in 5 minutes guide!
What is the ideal thickness for the chicken cutlets?
I stress this constantly because it’s vital: aim for about a quarter of an inch thick! If they are too thick, you risk burning the beautiful golden crust before the inside chicken cooks through to a safe temperature. When they are thin, they cook quickly, stay incredibly tender, and absorb just the right amount of that buttery frying flavor. Remember, pounding means great texture!
Can I use chicken thighs instead of breasts for this Chicken Milanese?
You totally *can*, but I highly recommend sticking to breasts for this version. Thigh meat is fattier, and while it’s delicious, it’s often harder to pound evenly into that perfect, uniform 1/4-inch cutlet shape. Also, thighs take longer to cook. If you do use them, remove some of the excess fat first and be sure to check that internal temperature—you need them fully cooked, even if it means dropping the pan heat slightly halfway through so the breading doesn’t blacken!
Is it necessary to add Parmesan cheese to the breadcrumbs?
Necessary? No, if you absolutely run out of cheese in a pinch, you can skip it, but you will miss out on some serious flavor! Traditional preparation and my family recipe rely on that grated Parmesan mixed into the breadcrumbs. It adds a salty, nutty depth that you just can’t replicate with plain breadcrumbs alone. It really helps define the classic Italian-American taste of the **Chicken Milanese**!

Estimated Nutritional Snapshot for Chicken Milanese
I always like to give you a little peek at what’s in these amazing cutlets! Remember, these numbers are estimates based on splitting the recipe four ways and using that standard amount of oil for pan-frying. Since you’re cooking this delicious **Chicken Milanese** at home, you have total control over how much fat you use! Nutrition facts are always approximations, but here’s what you can expect per serving:
- Calories: 410
- Protein: 38g
- Fat: 18g (with 5g saturated)
- Carbohydrates: 25g
- Sodium: 450mg
It’s a wonderful, protein-heavy meal that feels indulgent but keeps the sodium and sugar surprisingly low, especially compared to heavily processed versions!
Share Your Golden Brown Creations
Now that you’ve conquered the art of the perfect pan-fry and created beautiful, golden **Chicken Milanese**, I truly want to see it shine on your table! This recipe means the world to me, and knowing it’s helping you put a fantastic, quick dinner on your own table makes my day.
Did this 35-minute wonder become your new weeknight hero? If you made these crispy cutlets, please take a second to pop down to the comments below and leave a rating! Hearing what you loved—maybe it was the Parmesan crust or the quick lemon finish—helps other cooks feel confident trying it out.
And if you snapped a picture of your perfectly plated Italian-American masterpiece, tag me on social media! I absolutely live to see your creations. If you ever have questions that popped up while you were cooking, or if you want to share a side dish substitution that worked great for you, please reach out through my contact page. Happy cooking, and I hope this dish brings deliciousness to your kitchen!
Print
Chicken Milanese
- Total Time: 35 min
- Yield: 4 servings 1x
- Diet: Low Calorie
Description
Thinly pounded chicken breasts coated in breadcrumbs and pan-fried until golden brown.
Ingredients
- 4 boneless, skinless chicken breasts
- 1 cup all-purpose flour
- 2 large eggs, lightly beaten
- 1 1/2 cups plain breadcrumbs
- 1/2 cup grated Parmesan cheese
- 1 teaspoon salt
- 1/2 teaspoon black pepper
- 1/4 cup olive oil, for frying
- 1/4 cup unsalted butter, for frying
- Lemon wedges, for serving
Instructions
- Place chicken breasts between two sheets of plastic wrap. Pound them to about 1/4 inch thickness using a meat mallet.
- Set up a breading station with three shallow dishes. Place flour in the first dish. Whisk eggs in the second dish. Mix breadcrumbs, Parmesan cheese, salt, and pepper in the third dish.
- Dredge each pounded chicken cutlet first in flour, shaking off excess. Then dip it in the egg mixture, letting excess drip off. Finally, press it firmly into the breadcrumb mixture to coat both sides evenly.
- Heat olive oil and butter in a large skillet over medium-high heat. The fat should cover the bottom of the pan.
- Carefully place the breaded cutlets in the hot fat, working in batches if necessary to avoid overcrowding the pan.
- Fry for 3 to 4 minutes per side, until the coating is golden brown and the chicken is cooked through (internal temperature reaches 165°F or 74°C).
- Remove the chicken from the skillet and place it on a wire rack or paper towel-lined plate to drain excess oil.
- Serve immediately with fresh lemon wedges.
Notes
- For crispier coating, chill the breaded cutlets for 15 minutes before frying.
- You can substitute panko breadcrumbs for regular breadcrumbs for extra crunch.
- Serve this dish with a simple arugula salad dressed with lemon juice and olive oil.
- Prep Time: 20 min
- Cook Time: 15 min
- Category: Main Course
- Method: Pan-Frying
- Cuisine: Italian-American
Nutrition
- Serving Size: 1 cutlet
- Calories: 410
- Sugar: 1
- Sodium: 450
- Fat: 18
- Saturated Fat: 5
- Unsaturated Fat: 13
- Trans Fat: 0
- Carbohydrates: 25
- Fiber: 1
- Protein: 38
- Cholesterol: 140
Keywords: chicken milanese, breaded chicken, pan-fried chicken, cutlets, italian chicken