Oh my gosh, you guys, if you are looking for that one dessert that screams ‘The Holidays Are Here!’ but just takes, like, zero effort, you have found your champion. Forget complicated baking projects that stress you out! This recipe for **Chocolate Peppermint Bark** is pure magic. Seriously, it’s my absolute go-to when I need a last-minute hostess gift or just can’t resist that minty, chocolatey combination.
This isn’t some fancy, fussy dessert, either. We’re talking about melting things and spreading things. That’s it! My family expects this sugary delight every December now; it’s part of the tradition, even though it takes practically no time at all. Trust me, once you see how satisfyingly snappy this bark is, you’ll swear off the store-bought stuff forever.
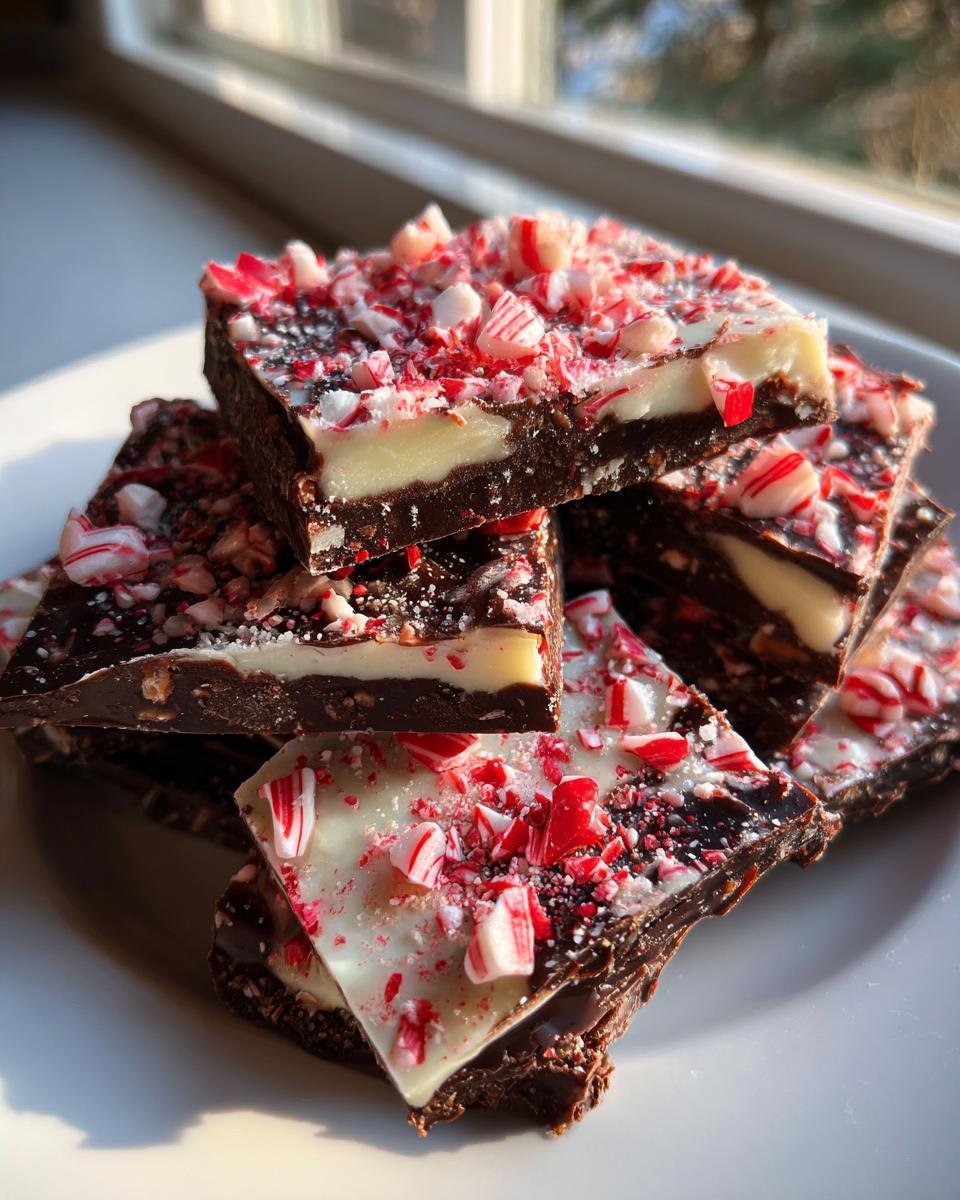
The beauty of this recipe is its simplicity, resulting in that perfect snap and the delightful crunch of candy canes. It’s the best way to get that gorgeous layered look with just dark chocolate, white chocolate, and a little peppermint kick. You’re going to love making this!

Why You Will Love This Simple Chocolate Peppermint Bark Recipe
I honestly don’t know how I ever survived the holidays before I perfected this bark. It’s the kind of recipe you make when you’re already running late, but promised you’d bring something amazing. It looks so fancy, but honestly, it’s the easiest thing in my dessert rotation. It’s foolproof, bright, minty, and those layers just look gorgeous when you break them apart!
- It’s all about the snap! That crisp finish is addictive, and you only need a few minutes to get that perfect texture.
- It requires almost no actual cooking—just melting and chilling! I love dipping into my other bark recipes when I need a baking break, but this one barely requires turning the oven on.
Quick Prep Time for Chocolate Peppermint Bark
You read that right—only fifteen minutes of actual fussing! Can you believe it? That means you can whip up a huge batch of **Chocolate Peppermint Bark** while dinner is simmering or while the kids are occupied. It’s ideal for those unexpected holiday party invites. Once it sets up in the fridge, you’re done!
Minimal Ingredients Needed for Perfect Chocolate Peppermint Bark
This is where I really shine, folks. I keep the ingredient list short and sweet. You absolutely only need four things to create this phenomenal **Chocolate Peppermint Bark**. No scrambling to the store for six weird extracts or specialty nuts. Just good quality chocolate, the mint flavor, and the candy canes. Perfection!
Gathering Ingredients for Your Chocolate Peppermint Bark
Okay, let’s talk ingredients. This is where you set the stage for that amazing snap we talked about. Because we are working with two different types of chocolate and minimal flavorings, the quality really shines through here. Don’t try to cheap out on the chocolate base if you can help it—it makes a massive difference in the final look and feel of your **Chocolate Peppermint Bark**!
You’ll need precisely three main components for the layers, plus the candy canes for the topping. I like to have everything measured out before I even put the double boiler on the stove because once the white chocolate hits the peppermint extract, you need to move fast!
Here’s what you need to collect for a standard batch:
For the base, grab twelve ounces of good quality dark chocolate, chopped up relatively small so it melts evenly. Then, you need another twelve ounces of white chocolate, also chopped. Don’t skip chopping; those big blocks take forever to melt down!
For the flavoring, one teaspoon of peppermint extract is the sweet spot. And finally, you need one full cup of crushed candy canes ready to go. I like throwing mine in a zip-top bag and smashing them with a rolling pin—it’s wonderfully therapeutic!
If you need something extra festive, check out this amazing white chocolate peppermint cheesecake mousse pie variation, though for this bark, we stick to the basics!
Ingredient Notes and Substitutions for Chocolate Peppermint Bark
This is important: the chocolate selection is everything. For the dark layer, use semi-sweet or bittersweet chips/bars that melt nicely. If you use wafers, break them up well. For the white layer, please avoid ‘white baking chips’ if you can—they have stabilizers that make for a waxy melt. Use real white chocolate baking bars if possible for the best smooth finish on your **Chocolate Peppermint Bark**.
Now, about that peppermint extract. The teaspoon I list is strong enough for that classic punch. But if you want to really infuse that wintery taste, you can consider adding a few drops of high-quality, food-grade peppermint oil right alongside the extract. Be careful, though! Oil is super concentrated, so start small. Too much oil, and your bark might taste like toothpaste instead of a holiday treat!
Step-by-Step Instructions for Making Chocolate Peppermint Bark
Okay, here is where the real fun starts! Don’t be intimidated by the two layers; it’s just patience and timing. Remember how I said you need to move fast when adding the peppermint? Keep your candy canes ready to go before you even start melting the second chocolate layer. I always sneak a taste of the dark chocolate once it’s melted—it helps focus the baking energy, I swear!
We are putting this directly onto a sheet pan lined with parchment paper. That parchment is your best friend; it stops everything from sticking, which makes clean-up a breeze. This whole process is about building stable, flavorful layers, so let’s get started on that delicious base.
Preparing the Dark Chocolate Peppermint Bark Base
First things first: grab that dark chocolate you chopped. You can use the microwave, but be super gentle! Microwave in ten-second bursts, pulling it out and stirring hard between each blast. If you rush this, chocolate gets grainy or seizes up, and nobody wants that tough, ugly layer on their **Chocolate Peppermint Bark**.
Once it’s totally smooth—no lumps allowed—pour it right onto your parchment-lined sheet. Use an offset spatula or the back of a spoon to spread it into an even layer. We aren’t looking for artistic design here, just even thickness. Now, scoot that pan into the refrigerator. We only need about ten minutes for this dark layer to set up firm enough to support the white layer without mixing.
Layering and Topping the White Chocolate Peppermint Bark
While the base is chilling, melt your white chocolate very carefully—it burns faster than the dark! Once it’s liquid gold, pull it off the heat and stir in that teaspoon of peppermint extract. Taste it quickly! If you want that extra flavor boost I mentioned earlier, now is the time to drop in a tiny bit of oil!
Take your set dark layer out of the fridge. Pour that warm, minty white chocolate right over the top. Spread it quickly and evenly before it starts setting up again. See how fast that dark layer is cooling the new layer? That’s why we work quickly!
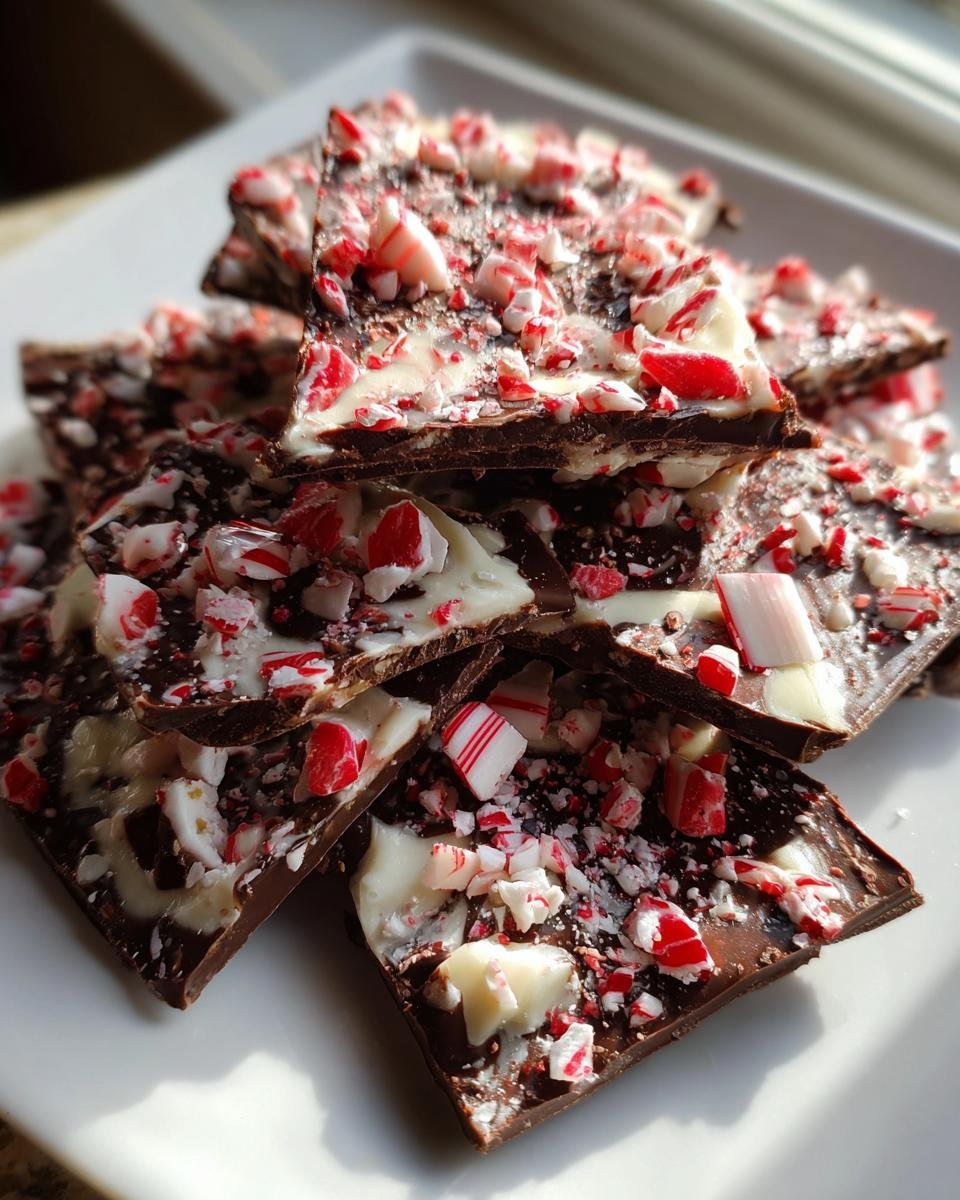
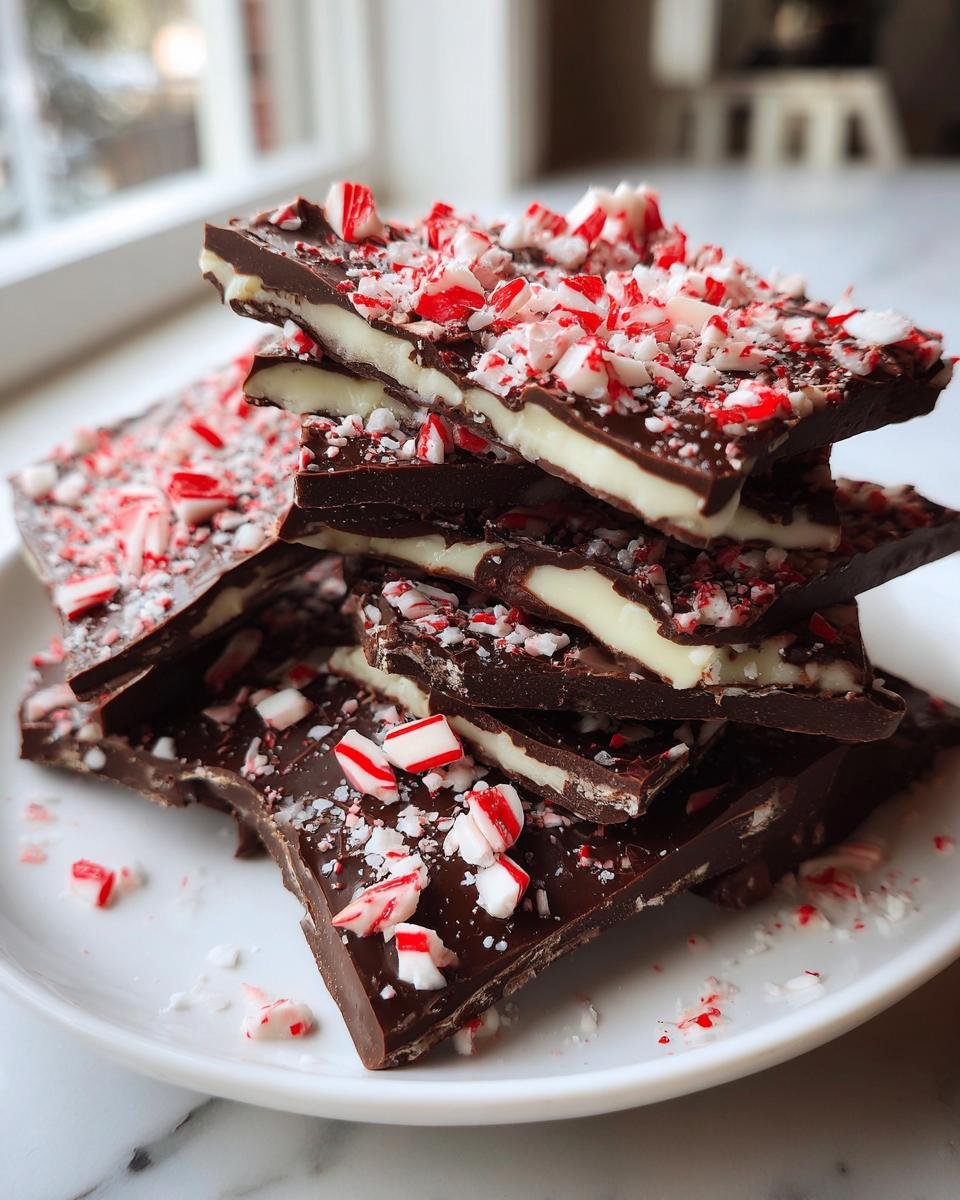
The second you finish spreading, grab your crushed candy canes and sprinkle them generously across the top! This is the payoff! Press them in just lightly with your fingertips or the bottom of a measuring cup. You don’t want to smash them so hard they poke through to the dark layer—we want contrast! Then, back into the fridge for at least thirty minutes until it’s completely firm and ready to break apart into gorgeous pieces of **Chocolate Peppermint Bark**.
If you want to see another fantastic way that white chocolate shines, you should check out this irresistible white chocolate peppermint cheesecake mousse pie while it chills!
Expert Tips for Perfect Chocolate Peppermint Bark
I have broken this bark many times, friends, usually because I got impatient waiting for the chocolate to set or I went overboard with the peppermint oil. Don’t repeat my mistakes! These little insider secrets are what separate ‘pretty good’ bark from the kind that shatters perfectly when you bite it.
My biggest piece of advice centers on temperature. If your dark chocolate layer is too warm when you pour the white chocolate on, they’ll swirl together, and you lose that beautiful, distinct contrast. If it’s too cold, the white layer won’t spread without dragging bits of the dark chocolate up with it. Aim for firm to the touch, but not rock hard, before layering up!
When it comes to crushing those candy canes, texture is everything. If you smash them into a fine powder, they just dissolve into the white chocolate layer. That’s not what we want! You need variety—some little jagged shards, some medium pieces, and yes, a tiny bit of dust is fine. It’s the jagged pieces that give you that satisfying crunch when you finally break into the finished confection.
Also, a quick note on spreading: Don’t fuss over perfection on the second layer. As soon as you pour that white chocolate mixture, quickly spread it out to the edges. If you work it too much, you risk melting that cool dark layer underneath. Just aim for coverage within about thirty seconds, and then immediately sprinkle your topping before the surface skin starts to form.
Finally, storage matters immensely if you want a good ‘snap.’ If the kitchen is humid, definitely keep it in the fridge in an airtight container. If the environment is dry, room temperature is usually fine, but make sure it’s completely protected so no stray crumbs or moisture get in there. Nobody wants soft, floppy peppermint layers!
Storing Your Homemade Chocolate Peppermint Bark
So, you’ve made the most beautiful, snappy **Chocolate Peppermint Bark** the world has ever seen. Awesome! Now, how do we keep it stunning until it’s all gone? Because this homemade candy is so much better than the stuff you get wrapped up tight in the store, you want to treat it right for storage.
This is the easiest part, honestly! You have two main options, and which one you choose depends mostly on how warm your kitchen is, or maybe just how long you plan on keeping it before devouring it all in one sitting—I’ve been there!
The original recipe notes mention that you can store your finished **Chocolate Peppermint Bark** in an airtight container. This is the most important step, no matter where you put it. An airtight container keeps out pantry smells and, crucially, humidity. If moisture gets to peppermint, things go downhill fast; you lose that wonderful structural integrity.
If your kitchen stays relatively cool, like under 70 degrees, you’re totally fine keeping that airtight container right on the counter. I usually use a big tin—one of those decorative holiday ones—and line it with wax paper before adding the pieces. It usually stays perfectly good at room temperature for a solid week, maybe even ten days, if the humidity isn’t too bad.
However, if you live somewhere warm, or if you made this way ahead of time for Christmas (good planning!), definitely tuck that airtight container into the refrigerator. Chilling keeps everything super firm, and the snap is even more pronounced when it comes straight from the cold. Just remember, if you store **Chocolate Peppermint Bark** in the fridge, let it sit on the counter for about fifteen minutes before serving. This gives the chocolate just enough time to soften slightly so it shatters beautifully instead of just cracking too sharply!
Seriously, this stuff lasts ages if you treat it right, but I’ve never tested it past two weeks. I usually find myself making a second batch before the first one is even fully gone!
Variations on Traditional Chocolate Peppermint Bark
Now, I know the traditional recipe is my favorite, but sometimes you just need to shake things up a bit, right? Especially when you’re making a whole platter of goodies, having a couple of different flavors ready to go is always a win. Once you master the basic layering and chilling technique for our classic **Chocolate Peppermint Bark**, the world of chocolate candy is your oyster!
I love playing around with the extract—it’s such an easy switch that changes the whole profile. If you’re not a huge fan of that intense, sharp mint, you can swap out the extract entirely for something sweeter and warmer. Think about using pure vanilla extract in the white chocolate layer instead! It gives you a gorgeous, creamy vanilla-and-dark-chocolate vibe that’s elegant and subtle. It’s still festive, just a little less winter-shock, you know what I mean?
Another fun way to incorporate complementary flavors is by sneaking something extra into the toppings or mixing it with the white chocolate layer before pouring. I sometimes add a few teaspoons of dried orange zest when I’m mixing in the peppermint extract. The bright citrus cuts through the richness of both chocolates beautifully. It turns the whole thing into something super bright!
Here are a few other fun ways I’ve tried dressing up the classic **Chocolate Peppermint Bark**:
- Add More Chocolate Texture: Right after you sprinkle the candy canes, toss on about half a cup of rough-chopped dark chocolate chips or even some milk chocolate chips. This gives you three layers of chocolate flavor!
- Salty & Sweet Crunch: Want a little savory bite? Crush up some pretzels (the little knots work great!) and sprinkle those on top along with the candy canes, or maybe even replace half the candy cane volume with them. The salt is incredible with the mint.
- Nuts for Texture: For those who like a bit of chew, coarsely chopped toasted pecans or hazelnuts mix surprisingly well with the peppermint crunch. Just be mindful of allergies if you’re gifting these around!
Honestly, you can raid the pantry. If you have other holiday candies, break those up and use them! It all works because both the dark and white chocolate layers are so rich and firm. It’s a great way to use up bits and bobs from other holiday baking projects. If you’re looking for more inspiration on creative holiday chocolate treats, sometimes I look at other fun recipes, like this irresistible Easter chocolate bark recipe just for layering ideas!
Serving Suggestions for Chocolate Peppermint Bark
Once your amazing **Chocolate Peppermint Bark** is fully set and you’ve broken it into those beautiful, craggy, irregular pieces, the next challenge is deciding what to *do* with it all! It’s so tempting to just stand over the container and eat it yourself, but this stuff is truly meant for sharing—though I won’t judge if you keep the best pieces for yourself!
Because this bark looks so festive with its stark white and dark layers studded with bright red candy bits, it requires almost no extra decoration to look spectacular. It’s the ultimate showstopper for minimal effort, which is exactly what I look for in a holiday treat!
The best serving suggestion, of course, is on a big, tiered holiday platter surrounded by cookies and fudge. But if you want to branch out, here are a few of my favorite ways to use up leftover **Chocolate Peppermint Bark**:
- The Ultimate Gift Wrap: This is my primary use! Package the pieces into cute little cellophane bags or small tin boxes. Tie a bright red or green ribbon around it, maybe add a little handwritten tag, and boom—instant, thoughtful gift for neighbors, teachers, or coworkers. It looks professional, I promise!
- Ice Cream Topping: Do you need to fancy up a bowl of vanilla ice cream? Take a few of your smaller, crunchier shards of **Chocolate Peppermint Bark** and crush them up a bit more—not totally powdered, but smaller chunks. Sprinkle generously over the ice cream. The cold temperature keeps the chocolate firm, and the mint melts just slightly when it hits the cold cream. It’s heaven.
- Hot Cocoa Stirrers: This is for the smaller, flatter pieces you might break off during shaping. Pop a piece on top of a fresh mug of hot cocoa. It melts slowly, diffusing that lovely peppermint flavor right into the drink. It’s way more exciting than just stirring with a spoon!
- Crumbled into Baked Goods: If you happen to have some that’s getting slightly older (ha! unlikely), crush it up finely and stir it into brownie batter or sprinkle it over muffins before baking. It adds a lovely minty swirl. You can see how adaptable chocolate recipes are when you check out this irresistible apple crisp cheesecake recipe for more inspiration on texture mixing!
No matter how you serve it, just make sure you offer a little cocktail napkin nearby, because the dark chocolate always seems to leave a tiny smudge on fingers! Enjoy watching everyone admire the layers before they happily crunch right through them!
Frequently Asked Questions About Chocolate Peppermint Bark
I know you might have a few things spinning through your head once you see how easy this treat is. It seems too simple to be true, right? But that’s the beauty of a great holiday confection! I’ve gathered the questions I usually get when I bring this **Chocolate Peppermint Bark** to gatherings.
Can I use milk chocolate instead of dark chocolate for the base?
You absolutely *can*, but you’ll change the entire classic experience! Milk chocolate has much more sugar and fat, so the base layer won’t be as firm or as structured for snapping. It also won’t give you that beautiful, dramatic color contrast against the white chocolate. If you prefer sweeter things, use a high-quality dark chocolate that’s maybe 55% cacao, not a super bitter 75%. That will give you a nice balance so your **Chocolate Peppermint Bark** isn’t overly sweet.
Does this candy truly need to be refrigerated?
For the best texture, yes, it needs a long chill (that initial 30 minutes minimum!) to set completely hard. Once it’s set, though, it depends on your environment. If your house is cool and dry, it’s fine stored airtight at room temperature for a week or so. But here’s my hot tip: if you plan on keeping your **Chocolate Peppermint Bark** around for longer than a week, or if your kitchen gets warm, definitely store it in the fridge! It ensures that perfect, loud snap when you break a piece off.
How do I stop the crushed candy canes from falling off?
This is all about timing, my friend! The candy canes must go on *immediately* after you pour and spread the white chocolate layer. That white chocolate needs to be slightly warm, but not hot, so there is still a little bit of melting “stickiness” on top. Lightly pressing them in helps secure them, but the stickiness of the melting chocolate does the heavy lifting. If you wait even five minutes, the white layer hardens, and your candy pieces will just slide right off later!
What if my melted chocolate looks grainy or dull?
That usually means your chocolate seized up, which happens when just a tiny bit of water or steam gets into it while melting, especially with the white chocolate. Or, if you overheated it rapidly in the microwave. If this happens, don’t throw it out! Try stirring in a half teaspoon of vegetable shortening or a tiny splash of coconut oil. It won’t make it perfect, but it can sometimes save a dull batch of **Chocolate Peppermint Bark** by smoothing out the texture enough to spread.
Can I make this ahead of time for holiday gifting?
Yes, and you absolutely should! This is one of the best things to prepare early because it keeps so well, provided you store it right in that airtight container. I usually make my big batch about ten days before Christmas, wrap it up nicely, and put it aside. It holds its flavor and its texture beautifully, making Christmas Eve way less stressful!
Nutritional Snapshot of Chocolate Peppermint Bark
Alright, let’s talk numbers! I know sometimes when we’re making delicious, chocolatey things like this **Chocolate Peppermint Bark**, we aren’t watching the nutritional breakdown too closely, but I like to be transparent about what we’re grabbing when we reach for a piece.
Keep in mind that because candy canes and chocolate quality can vary so much, these numbers are just estimates based on what I used to calculate the general profile of a serving. This breakdown is based on a standard one-ounce serving size, which is usually a medium-sized, nice, satisfying shard of bark.
Here is the estimated breakdown for one ounce of that dreamy **Chocolate Peppermint Bark**:
- Serving Size: 1 ounce
- Calories: Around 150 calories—not bad for such a big flavor punch!
- Fat: About 10 grams total. Remember, chocolate has natural cocoa butter fats, which are usually the better kind!
- Sugar: This clocks in around 15 grams. That’s where all the holiday joy comes from, right?
- Carbohydrates: Roughly 16 grams.
- Protein: You get about 2 grams of protein in that serving size.
It’s definitely a treat, so moderation is key, but knowing the facts helps when you’re balancing out the holiday baking! It’s worth every single gram of sugar when that minty crunch hits your tongue, I promise you!
Print
Chocolate Peppermint Bark
- Total Time: 50 min
- Yield: About 1 pound 1x
- Diet: Vegetarian
Description
Simple recipe for making layered dark and white chocolate peppermint bark.
Ingredients
- 12 ounces dark chocolate, chopped
- 12 ounces white chocolate, chopped
- 1 teaspoon peppermint extract
- 1 cup crushed candy canes
Instructions
- Line a baking sheet with parchment paper.
- Melt the dark chocolate using a double boiler or microwave in short intervals, stirring until smooth.
- Spread the melted dark chocolate evenly onto the prepared baking sheet.
- Place the sheet in the refrigerator for 10 minutes, or until the chocolate is set.
- Melt the white chocolate using a double boiler or microwave, stirring until smooth.
- Stir the peppermint extract into the melted white chocolate.
- Pour the white chocolate mixture over the set dark chocolate layer. Spread evenly.
- Immediately sprinkle the crushed candy canes over the white chocolate layer. Press them lightly into the chocolate.
- Return the bark to the refrigerator for at least 30 minutes, or until completely firm.
- Break the hardened bark into irregular pieces.
Notes
- Store the finished bark in an airtight container at room temperature or in the refrigerator.
- For a stronger peppermint flavor, you can add a few drops of food-grade peppermint oil along with the extract.
- Prep Time: 15 min
- Cook Time: 5 min
- Category: Dessert
- Method: Chilling
- Cuisine: American
Nutrition
- Serving Size: 1 ounce
- Calories: 150
- Sugar: 15
- Sodium: 10
- Fat: 10
- Saturated Fat: 6
- Unsaturated Fat: 4
- Trans Fat: 0
- Carbohydrates: 16
- Fiber: 1
- Protein: 2
- Cholesterol: 5
Keywords: chocolate, peppermint, bark, candy, holiday, sweet, dessert