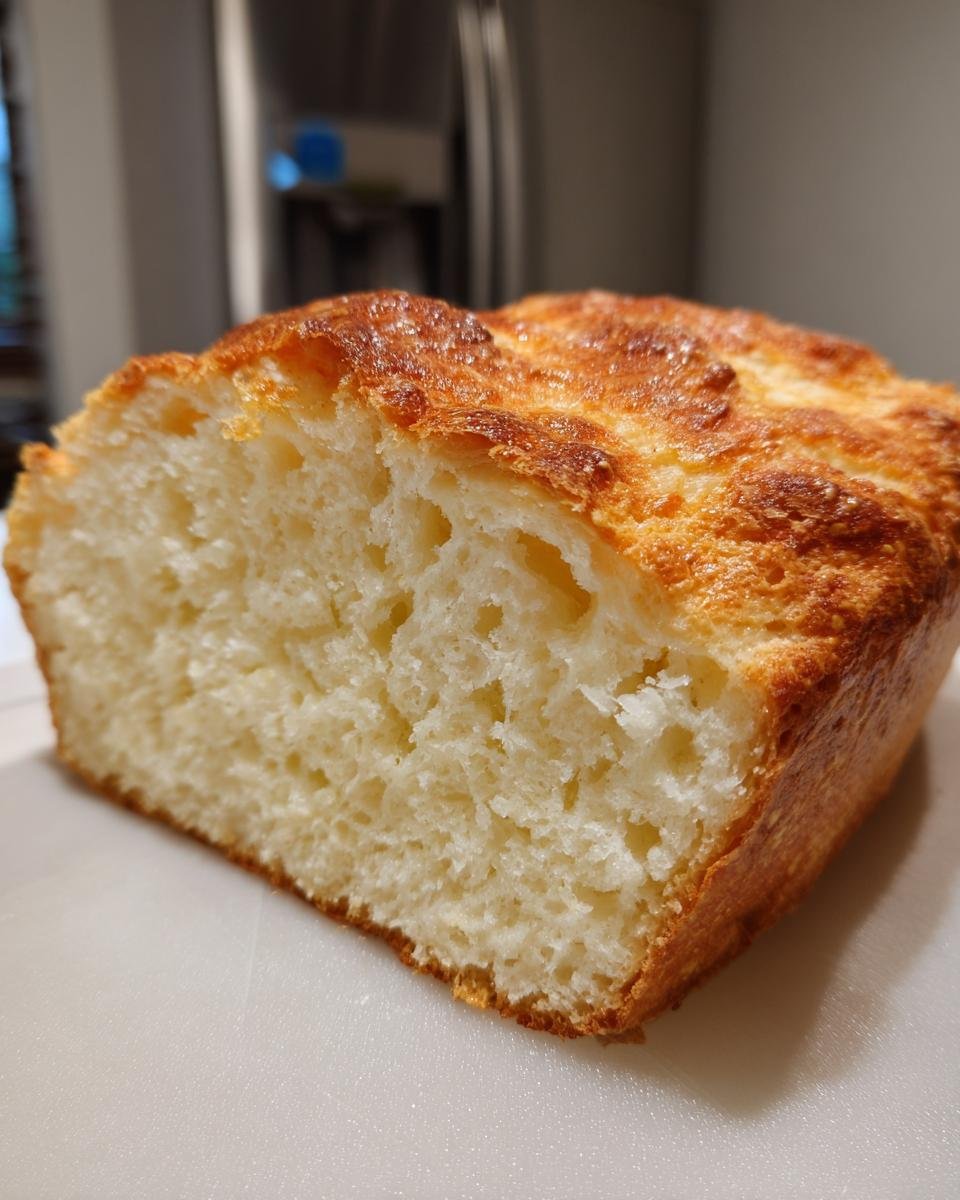
There’s something truly magical about the smell of freshly baked bread wafting through the house, isn’t there? For me, it instantly takes me back to my Grandma’s kitchen. She wasn’t a fancy baker, oh no, but her bread? It was pure comfort. This recipe for Grandma’s Perfect Homemade Bread is more than just a recipe; it’s a little piece of my childhood and a whole lot of love baked into one delicious loaf. It’s surprisingly simple, and trust me, it tastes ten times better than anything from the store.
Why This Grandmas Perfect Homemade Bread A Family Favorite Recipe Stands Out
Okay, so what makes this bread recipe so special? Honestly, it’s the perfect storm of amazingness. It’s ridiculously easy to make, even if you’ve never baked bread before. Seriously, no fancy equipment needed!
- Simple to Make: You’ll be amazed at how little effort it takes for such a fantastic result.
- Classic Comfort Flavor: It has that perfect, slightly toasty, slightly sweet taste that just feels like home.
- Super Versatile: Great for toast, sandwiches, dipping in soup, or just slathering with butter.
- Pure Comfort in a Loaf: Baking this Grandma’s Perfect Homemade Bread A Family Favorite Recipe just feels good, and eating it feels even better!
Gathering Your Ingredients for Grandmas Perfect Homemade Bread
Alright, let’s get our little bread-making station ready! You don’t need anything super fancy here, just some good old pantry staples. Here’s what you’ll need to gather for Grandma’s Perfect Homemade Bread:
- 1 cup of warm water. And when I say warm, I mean comfy-bath-water warm, about 105-115°F. Too hot and you’ll kill the yeast, too cold and it won’t wake up!
- 2 and 1/4 teaspoons of active dry yeast. Make sure it’s the active dry kind.
- 1 teaspoon of sugar. This is like a little wake-up call for the yeast.
- 1 teaspoon of salt. Don’t skip it – it’s super important for flavor and texture!
- 3 cups of all-purpose flour. Plus, have a little extra handy for whenever you need to dust your board.
- 2 tablespoons of vegetable oil. Any neutral oil works, like canola or even olive oil if you don’t mind a tiny hint of flavor.
Step-by-Step Guide to Making Grandmas Perfect Homemade Bread
Alright, my friends, this is where the magic happens! Making Grandma’s Perfect Homemade Bread A Family Favorite Recipe is a journey, but trust me, it is SO worth it. Grab your apron, maybe put on some music, and let’s get this dough going. You’ll find a wonderful easy homemade bread recipe can be this straightforward!
Activating the Yeast
First things first, we need to wake up that yeast! Grab a big bowl – I like using my biggest one so there’s plenty of room to work. Pour in your warm water, sprinkle over the active dry yeast and the teaspoon of sugar. Give it a little stir. Now, just let it hang out for about 5 to 10 minutes. You want to see it get nice and foamy on top. If it doesn’t froth up, your yeast might be old, or the water was too hot or cold, and we’ll need to start over. Don’t worry, it happens!
Developing the Dough
Once your yeast is happily foamy, it’s time to add the rest of our wet ingredients and get started on the dough. Stir in the salt – it’s crucial for flavor and structure, so don’t you dare skip it! Then, add in your vegetable oil. Now, start adding the flour, a cup at a time, mixing as you go. It’ll start looking like a shaggy, messy dough, and that’s exactly what we want at this stage. Just bring it all together until there are no dry bits hiding in the bowl.
Kneading for Perfect Texture
This is my favorite part, getting your hands in there! Turn that shaggy dough out onto a surface you’ve lightly dusted with flour. Now comes the kneading. You need to work it, stretch it, and fold it for about 8 to 10 minutes. It might feel stick initially, but keep kneading! The dough will become smoother, more pliable, and super elastic. A good trick to check if it’s ready is the windowpane test: pinch off a tiny piece of dough and gently stretch it. If you can stretch it thin enough to see light through it without it tearing, it’s perfect! This careful kneading is what gives us that lovely soft texture in our bread.

The First Rise: Patience for Flavor
Once your dough is beautifully kneaded, find another bowl and give it a light coating of oil. Place your dough ball in there, give it a little turn to coat all sides (this stops it from drying out), and then cover the bowl tightly with plastic wrap. Now, find a nice, warm-ish spot in your kitchen – maybe near a sunny window or on top of the slightly warm (but not on!) oven. Let it do its thing for about 1 to 1.5 hours. You want it to puff up and roughly double in size. This long rise is where all the amazing flavor development really happens!
Shaping and Second Rise
Okay, dough has risen wonderfully! Now, gently punch it down – it’s so satisfying! Turn it out onto your floured surface again and shape it into a nice loaf. Pop it right into a greased 9×5 inch loaf pan. Lightly cover the pan with plastic wrap or a clean kitchen towel. Let it have another rise in that same warm spot for about 30-45 minutes. This time, you want it to get nearly doubled in size again, looking nice and billowy.

Baking to Golden Perfection
While your dough is having its second rise, it’s time to get that oven nice and hot. Preheat it to 375°F (190°C). Once your loaf is perfectly puffed up and the oven is ready, carefully place the loaf pan inside. Bake it for about 30 to 35 minutes. You’re looking for a beautiful golden-brown crust. For the absolute best assurance, it’s done when the internal temperature reaches around 200°F (93°C).
Cooling for the Best Crust
The hardest part? Waiting! As soon as the bread comes out of the oven, carefully turn it out of the pan. Let it sit on a wire rack for at least 10 minutes. This is super important because it allows the steam to escape, which helps create that perfect crust you’ve been dreaming of. And resist, I know it’s tough, but wait until it’s mostly cooled before you slice it. Slicing hot bread can make it gummy inside. Almost there!
Tips for Success with Your Homemade Bread
Making Grandma’s Perfect Homemade Bread A Family Favorite Recipe feels like a bit of an art, but trust me, it’s totally doable! A little bit of know-how goes a long way. My biggest tip? Pay attention to your yeast! Make sure it’s fresh, and that your water is just right – not too hot, not too cold, just comfortably warm like a bath. I learned that the hard way once, and the dough just sat there looking sad. Also, don’t be afraid to really get in there and knead. It feels like a workout, but that’s truly what makes the bread soft and chewy, not dense like a brick! If you want a super soft crust, remember to give it a little brush with melted butter right when it comes out of the oven. It makes all the difference! If you’re feeling adventurous and want to try another easy recipe, this amazing 1-bowl peanut butter cream pie is fantastic too.
Ingredient Notes and Substitutions
So, about those ingredients for your Grandma’s Perfect Homemade Bread. The recipe is pretty straightforward, but sometimes life throws you a curveball and you might need a substitute! For the yeast, make sure it’s ‘active dry yeast’ – instant yeast can sometimes behave a little differently, so stick to active dry unless you’re an experienced baker who knows how to adjust. As for the oil, vegetable oil is pretty neutral and what Grandma always used, but canola or even a light olive oil will work just fine. If you’re out of all-purpose flour, bread flour is your next best bet; it’ll give you a slightly chewier crumb. Just remember, substitutions are fun, but sticking to the recipe the first time around is always a great way to start!
Serving Suggestions for Your Freshly Baked Bread
Honestly, there’s almost no wrong way to enjoy this bread! A thick slice of warm, homemade bread slathered with good butter is pure heaven. Of course, it makes fantastic toast for breakfast or as a base for avocado toast. It’s also sturdy enough for sandwiches – think classic grilled cheese or even hearty turkey and swiss. And don’t forget how amazing it is for dunking into a warm bowl of soup or stew! If you’re looking for more quick ideas, these amazing cucumber tea sandwiches are perfect for a light lunch too!
Storage and Reheating Instructions
So, you’ve got this gorgeous loaf of Grandma’s Perfect Homemade Bread, and you want to keep it fresh, right? The best way is to store it in a bread box or wrap it tightly in plastic wrap or a reusable beeswax wrap at room temperature. Don’t put it in the fridge; that actually makes it go stale faster! If you happen to have any super dry bits left (unlikely!), just pop a slice in the toaster or wrap it loosely in foil and pop it in a warm oven for a few minutes to bring it back to life. Enjoy every last crumb!
Frequently Asked Questions about Grandmas Perfect Homemade Bread
Got questions about making Grandma’s Perfect Homemade Bread A Family Favorite Recipe? It’s totally normal! Baking bread for the first time can feel daunting, but I’m here to help smooth out any bumps. Here are a few things folks often ask:
Can I use instant yeast instead of active dry?
Yes, you absolutely can! If you’re using instant yeast, you can usually skip that first step of blooming it in water. Just mix it right in with your dry ingredients (flour, salt, sugar). It tends to rise a bit faster, too, so keep an eye on it during those rising times!
Why didn’t my dough rise?
Oh no, the dreaded flat dough! This usually happens for a couple of reasons. The most common is the yeast wasn’t alive anymore, or the water was too hot or too cold when you mixed it. If your yeast didn’t foam up in that first step, that’s usually your culprit. Another reason could be it just didn’t have a warm enough spot to rise in. Don’t despair if it happens; just grab some fresh yeast and try again!
How long will the bread stay fresh?
This lovely homemade bread stays fresh at room temperature for about 2-3 days, wrapped up tightly in plastic wrap or a bread box. Honestly though, it’s usually gone waaaay before that! If you do have a bit left over and want to freeze it, wrap it really well. Just thaw it out on the counter when you’re ready for another slice of deliciousness. Need more help? Feel free to reach out!
Nutritional Information (Estimated)
Just a heads-up, the nutritional info for Grandma’s Perfect Homemade Bread can vary a bit depending on the exact ingredients and brands you use. But as a general idea, a single slice is usually around 120 calories, with about 3g of fat and 20g of carbs. It’s a simple bread, so nothing too wild here! Enjoy it as part of a balanced diet, of course!
Print
Grandma’s Perfect Homemade Bread
- Total Time: 2 hours 30 minutes
- Yield: 1 loaf 1x
- Diet: Vegetarian
Description
A classic family favorite bread recipe that is simple to make and delicious.
Ingredients
- 1 cup warm water (105-115°F)
- 2 1/4 teaspoons active dry yeast
- 1 teaspoon sugar
- 1 teaspoon salt
- 3 cups all-purpose flour, plus more for dusting
- 2 tablespoons vegetable oil
Instructions
- In a large bowl, combine the warm water, yeast, and sugar. Let stand for 5-10 minutes, until foamy.
- Stir in the salt and vegetable oil.
- Gradually add the flour, mixing until a shaggy dough forms.
- Turn the dough out onto a lightly floured surface and knead for 8-10 minutes, until smooth and elastic.
- Place the dough in a lightly oiled bowl, turning to coat. Cover with plastic wrap and let rise in a warm place for 1-1.5 hours, or until doubled in size.
- Punch down the dough and shape it into a loaf. Place in a greased 9×5 inch loaf pan.
- Cover and let rise again for 30-45 minutes, or until nearly doubled.
- Preheat your oven to 375°F (190°C).
- Bake for 30-35 minutes, or until golden brown and the internal temperature reaches 200°F (93°C).
- Let cool in the pan for 10 minutes before transferring to a wire rack to cool completely.
Notes
- For a softer crust, brush the top of the loaf with melted butter immediately after baking.
- You can add herbs or seeds to the dough for extra flavor.
- Prep Time: 20 minutes
- Cook Time: 35 minutes
- Category: Baking
- Method: Baking
- Cuisine: American
Nutrition
- Serving Size: 1 slice
- Calories: 120
- Sugar: 2g
- Sodium: 200mg
- Fat: 3g
- Saturated Fat: 0.5g
- Unsaturated Fat: 2.5g
- Trans Fat: 0g
- Carbohydrates: 20g
- Fiber: 1g
- Protein: 4g
- Cholesterol: 0mg
Keywords: homemade bread, family recipe, easy bread, baking, white bread, classic bread