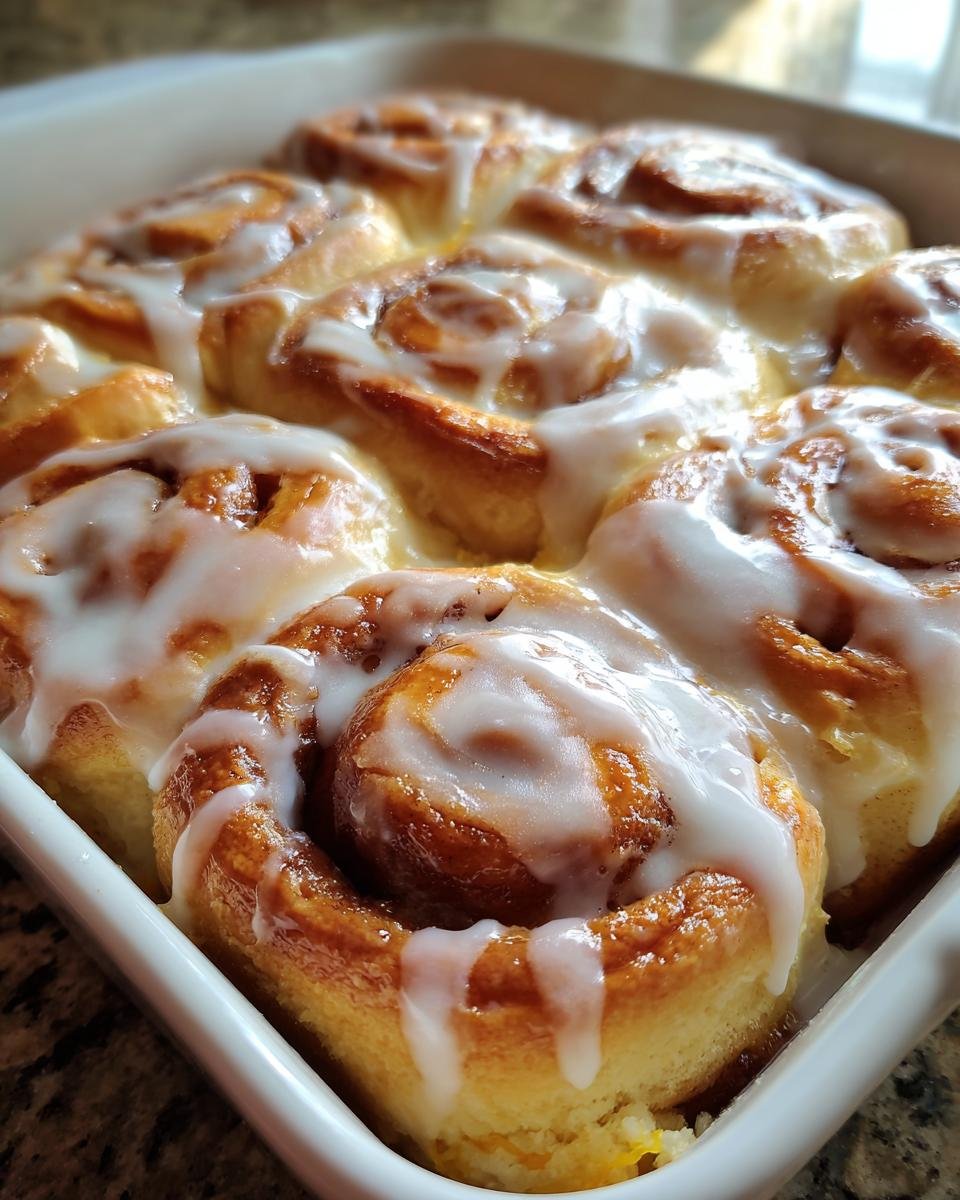
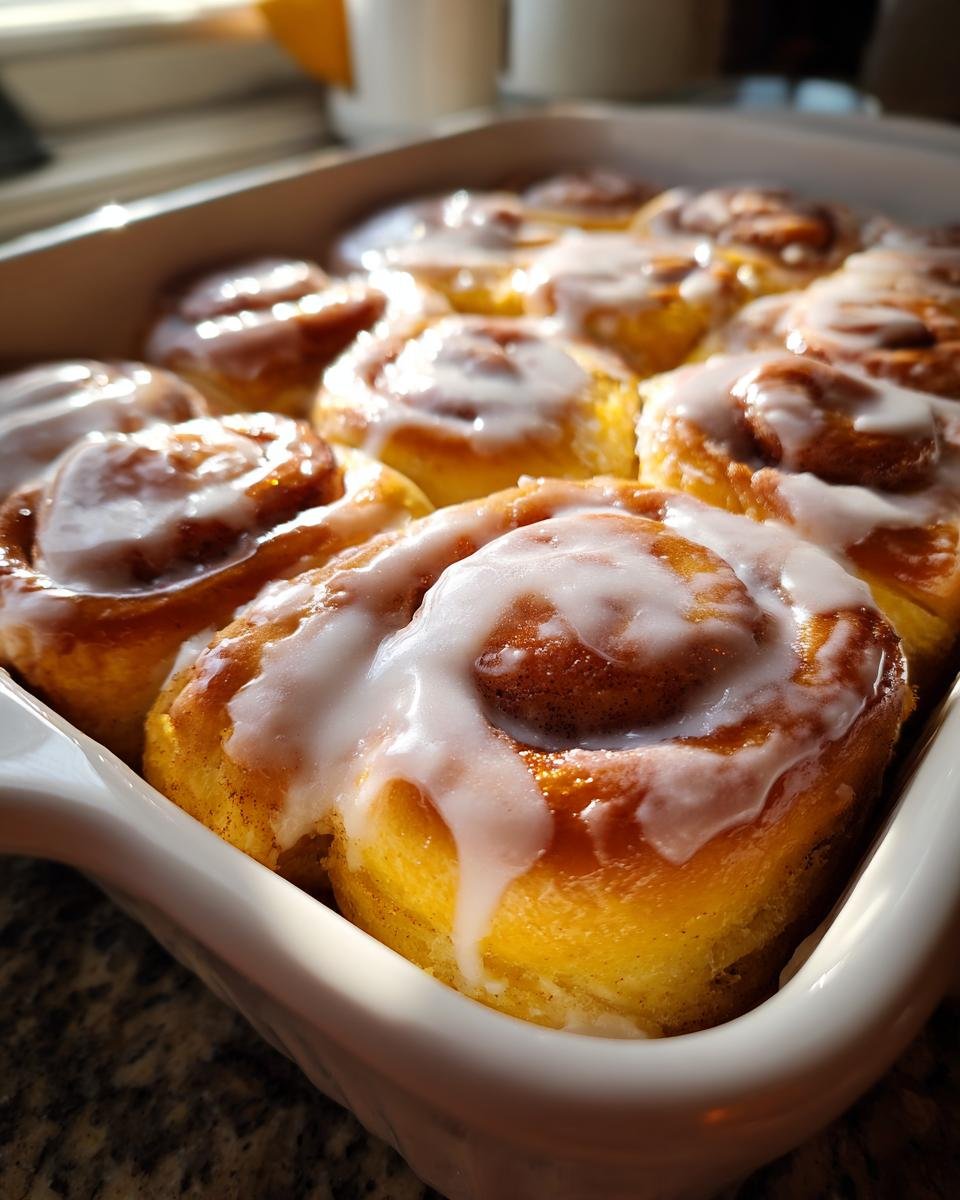
Oh, nothing beats that smell, right? That warm, yeasty, buttery cloud that just screams ‘weekend morning’ and ‘cozy kitchen.’ I have tried hundreds of sweet roll recipes over the years, but I keep coming back to one special batch. Forget boring sugar swirls for a second—we’re talking about the ultimate Homemade Orange Cinnamon Rolls. Seriously, the bright pop of fresh orange zest combined with the warmth of cinnamon just elevates everything to a whole other level. I remember the first time I got the yeast just right—it was fluffy and eager to prove itself! That’s the biggest secret with any yeast dough: keep your milk warm, but not hot, trust me on that one. Once you master the rise, these rolls practically bake themselves!
Why You Will Love These Homemade Orange Cinnamon Rolls
So, why should this recipe jump to the top of your weekend baking list? I’m telling you, it’s worth the effort. These rolls are everything you want in a breakfast pastry, only somehow brighter and more flavorful than the standard fare.
- That Incredible Zest Pop: We aren’t messing around with imitation flavors here. Using fresh orange zest means every bite has this wonderfully bright, fragrant quality that cuts through the richness of the butter and brown sugar beautifully.
- Seriously Soft Texture: The balance of ingredients here creates a dough that is easy to handle *and* bakes up unbelievably tender. They pull apart like clouds, just how a perfect sweet roll should. No tough edges allowed in my kitchen!
- The Perfect Tangy Glaze: That simple glaze made with powdered sugar and fresh orange juice sets up beautifully but keeps things moist. It’s sweet, yes, but has that acidic lift to keep things exciting.
- Great for Making Ahead: Because this dough rises so well, you can give it its first long, slow rise in the fridge overnight. Waking up to ready-to-roll dough? Yes, please!
- Family Approved: Look, everyone loves cinnamon rolls, but when you swap in orange? People remember these. They feel special without taking me all day to prepare.
Essential Ingredients for Perfect Homemade Orange Cinnamon Rolls
Okay, before we even think about kneading, we have to talk about what goes into these babies. Using quality ingredients is non-negotiable, especially when dealing with yeast and aromatic spices. Don’t skip the small details here; they make the difference between a good roll and a “call the neighbors because you have to try this” roll!
The real star, obviously, is the orange component. I insist you use fresh orange zest. Buying those little jars of dried zest? Not worth it! You need that bright, oily fragrance that only comes from zesting a beautiful navel orange right before you toss it in. It perfumes the butter beautifully. While you are prepping, pay close attention to the butter temperature requirements; it’s crucial for the yeast.
Here is what you need to gather before the fun starts. I’ve grouped them slightly by use for easy mise en place:
The Dough Foundation (The Wet Stuff)
- 1 cup warm milk: This is make-or-break for the yeast! It absolutely has to be between 105°F and 115°F. If it’s too cold, the yeast sulks; if it’s too hot, you kill your yeast dead. Just warm to the touch but not steaming.
- 2 1/4 teaspoons active dry yeast: That’s one standard packet. We activate this first with a little sugar so we can see it wake up.
- 1/4 cup unsalted butter, melted: We use this here for moisture in the dough mixture before the second rise.
- 1 large egg: Make sure this is at room temperature! Cold eggs can shock the yeast mixture when you add them in.
The Dough Foundation (The Dry Stuff)
- 1/2 cup granulated sugar, divided: We split this up—a tiny bit goes with the yeast, the rest goes in later.
- 3 1/2 cups all-purpose flour, plus more for dusting: Start with the measured amount. You might need more if your kitchen is unusually humid, but always add it slowly.
- 1 teaspoon salt: We need this for flavor and to control the yeast’s enthusiasm!
The Flavor Burst Filling
This is where the orange and cinnamon dance together. Make sure your butter is truly softened—leave it out for at least an hour. It should yield easily to a gentle press but not look oily or melted.
- 1/2 cup unsalted butter, softened: For spreading edge-to-edge on your rolled-out dough. Don’t substitute this with melted butter here, or the filling will just soak right into the dough instead of creating that beautiful, spreadable layer.
- 2 tablespoons orange zest: Fresh! See above. This is our secret weapon for amazing flavor.
- 2 tablespoons ground cinnamon: Make sure this spice is fresh, too! Old cinnamon tastes dusty and sad.
The Finishing Touch (Glaze)
- 1 cup powdered sugar: Sifted if you want the smoothest glaze possible, but honestly, whisking usually handles it fine.
- 3 tablespoons orange juice: Freshly squeezed juice, again, makes the glaze taste real and vibrant.
Once you’ve got all your measured ingredients lined up, you’ll be amazed how quickly the mixing goes! If you’re curious about making similar fluffy bases for other sweet treats, I found a great recipe for homemade pastry cream that uses similar attention to temperature control for perfect results.
Step-by-Step Instructions for Homemade Orange Cinnamon Rolls
Alright, let’s get our hands dirty! Working with yeast dough can feel intimidating, but I promise, if you stick to the timing and temperature cues, you’ll have the prettiest, softest orange rolls you’ve ever made. Don’t rush the rising periods; that’s where all the wonderful, pillowy texture comes from.
We’re going to follow the process exactly as written, but I want you to listen to your dough. If it feels stiff, maybe add a teaspoon of milk. If it’s ridiculously sticky, a tiny dusting of flour won’t hurt it. For similar techniques on achieving that ultra-gooey texture in other rolls, always check out guides like the one on Cinnabon cinnamon rolls—they have perfecting the swirl down to an art!
Activating the Yeast and Mixing the Dough for Homemade Orange Cinnamon Rolls
This is where the magic starts brewing, literally! Get that yeast active and bubbly. This step proves your yeast is alive and ready to make your dough rise beautifully.
- First, combine that 1 cup of warm milk, your 2 1/4 teaspoons of yeast, and 1 teaspoon of the granulated sugar right in a decent-sized bowl. Give it a gentle swirl and then just let it sit on the counter. You’re looking for foamy, bubbly action on top in about 5 minutes. If it doesn’t foam, toss it and start over with fresh yeast!
- Once it’s happy, stir in the melted butter (that 1/4 cup amount) along with the rest of your sugar and your room-temperature egg. Whisk it just until it’s combined.
- In a separate bowl, mix up your 3 1/2 cups of flour and the salt. Now, add the flour mixture to the wet ingredients gradually. Use a wooden spoon or a stand mixer with a dough hook. You want a soft, shaggy dough to form.
- Time to knead! Turn that dough out onto a lightly floured surface. You need to knead this actively for a good 5 to 7 minutes. I always go by feel here: when it passes the poke test—meaning if you gently poke it, the dough springs back slowly—it’s ready. Pop it into a greased bowl, cover it with plastic wrap or a damp towel, and tuck it away in a warm spot. Let it rise for a full hour, or until it’s honestly doubled in size. Don’t peek constantly, just trust the warmth!
Filling, Rolling, and Second Rise for Your Homemade Orange Cinnamon Rolls
Now that the dough has done its hard work, it’s time for the best part—the filling! This is where all that lovely orange zest announces itself.
- Gently punch down the risen dough just to release the air. On your floured surface, roll the dough out into a perfect 12×18 inch rectangle. Try to make the edges as even as you can—this helps your rolls bake uniformly.
- Take that softened butter and spread about 1/2 inch of border clear around the edges, leaving it sparse near the top edge if you can manage it. Then, sprinkle your 2 tablespoons of orange zest and 2 tablespoons of cinnamon evenly over that butter. Don’t overload one side; we want consistency!
- Starting from a long edge, you must roll the dough up TIGHTLY into a log. This is crucial! Roll it firmly, keeping the pressure even so you don’t squish the filling out the sides.
- Use a sharp, un-serrated knife or even dental floss (my trick for clean cuts!) to slice that log into 12 equal rolls. Place them snugly into your greased 9×13 inch baking pan. They should fit nicely but have a little room to touch as they bake.
- Cover the pan again and let them have a final, patient rise for 30 minutes. This second rise happens faster than the main one, but you want them looking puffy before they hit the heat. If you’re looking for inspiration on sticky, gooey rolls, maybe check out these caramel roll techniques for rolling tips!

Baking and Glazing Your Homemade Orange Cinnamon Rolls
The oven needs to be hot and ready for these beauties.
- Preheat your oven to 375 degrees Fahrenheit (190 degrees Celsius). Make sure that rack is centered!
- Bake for 20 to 25 minutes. You’ll know they are done when they look golden brown all over and smell absolutely intoxicatingly orange-cinnamony. Keep an eye on them past the 20-minute mark; oven thermostats run slightly different everywhere!
- While those rolls are baking their best life, mix up your glaze! Just whisk the powdered sugar and the 3 tablespoons of orange juice until it’s smooth. If it’s too thick to drizzle easily, add orange juice just a half teaspoon at a time.
- Once they come out of the oven, don’t wait! Drizzle that glaze generously over the top of the hot rolls. The heat melts the glaze slightly, allowing it to seep down between the swirls—that’s what makes them spectacular.

Tips for Achieving Expertly Soft Homemade Orange Cinnamon Rolls
Listen, even with the best recipe, sometimes yeast dough pulls a fast one on you! These rolls are pretty resilient, but a few little secrets—things I’ve learned through trial and error (mostly error in the beginning!)—can guarantee you that pillowy soft texture every single time. It all comes down to temperature control and knowing when to stop tinkering.
Watch That Dough Temperature During the Rise
I mentioned the milk temperature, but what about the environment for the rise? Yeast loves warmth, but *too* warm is a recipe for disappointing rolls. If your kitchen is chilly, don’t just stick the dough in a slightly warm oven—that oven might overshoot the temp and kill the yeast before they even get going significantly. Instead, try turning your oven light on, closing the door, and leaving the dough in there. It creates a gentle, reliable warmth. If your dough feels sluggish during the first rise, it’s probably too cold. If it explodes in 30 minutes, it was way too warm and might taste slightly boozy later.
Adjusting for Humidity and Flour
This one is for my fellow bakers who live in sticky summer climates or super dry winter homes. Humidity changes how much liquid the flour absorbs. If your dough feels almost tacky during kneading, even after 7 minutes, you might need flour. But add it *slowly*—like one tablespoon at a time!
I actually have a whole tutorial on making your own cake flour substitute, which can sometimes give enriched doughs like this a gentler texture than standard AP flour, though it’s totally optional here.
Don’t Overbake—The Golden Rule of Sweet Rolls
This is the number one way people destroy glorious homemade sweet rolls. Once they hit that golden-brown color, they are done, or even slightly past done! Overbaking evaporates their moisture, and you end up with dense, chewy spirals instead of tender ones.
I always suggest pulling them a minute early. Seriously! Since we glaze them while they’re hot, that slightly looser texture bakes off in the oven, and the glaze keeps them moist as they cool. If you leave them in until they look deeply brown, they’ll be dry by snack time.
The Tight Log is Your Friend
When you roll that dough up, be decisive! If you roll too loosely, you end up with lots of air pockets interspersed with thick layers of filling. When you bake that, the layers separate and collapse during cooling, leaving you with gaping holes instead of a beautifully swirled orange cinnamon roll. Keep the edges square, keep the tension even, and roll it up like you mean it!
Ingredient Notes and Substitutions for Homemade Orange Cinnamon Rolls
I get tons of questions about substitutions, naturally! Sometimes you’re halfway through making these perfect orange rolls and realize you’re out of something specific. Before you panic and shut the oven off, let’s talk about a couple of key areas where you can make small tweaks and still end up with delicious homemade rolls.
The biggest thing I have to stress is that swaps will definitely change the final flavor profile. The recipe as written is dynamite because of the fresh ingredients, but we can work around shortages!
What If I Don’t Have Fresh Orange Zest?
This is the hardest pill to swallow, honestly, because the zest is what makes these *orange* rolls instead of just cinnamon rolls slathered in orange juice. If you absolutely cannot zest an orange, you can try using high-quality orange extract. I would start very small—maybe 1/2 teaspoon—mixed right in with your melted butter for the filling. Why so little? Because extracts are super concentrated, and you risk making the filling taste chemical or bitter rather than fruity.
Another option, flavor-wise, is to use lemon zest for a bright citrus note if you have zero orange juice for the glaze either. It’s a completely different vibe, but still delicious! Just know that you won’t get that signature orange flavor we are hunting for here.
Yeast Talk: Active Dry Versus Instant
I called for active dry yeast because it’s what most people have in their pantry, and frankly, I love watching it foam up—that’s my visual check on freshness! If you only have instant yeast, you can skip Step 1 entirely.
If you use instant yeast, you can mix it dry right in with the rest of your dry ingredients—the flour and the salt. Then, when you add your wet ingredients (milk, melted butter, egg), the yeast will start working immediately. You can often shave about 15 minutes off your total rising time if you use instant yeast because it doesn’t need that initial proofing window.
On Butter Softening Versus Melting
It’s so important that you don’t mix up the butter for the filling with the butter for the dough. The butter you incorporate into the dough (the melted kind) helps keep the bread soft and rich. The butter you use for the filling layer needs to be soft, but not melted.
If you use melted butter in the filling, it will soak right into the dough before you ever roll it up, and you’ll just end up with heavy, dense patches instead of distinct swirls of cinnamon and orange. Remember: soft butter in the center, melted butter in the dough.
Storage and Reheating Instructions for Homemade Orange Cinnamon Rolls
So, you made a dozen perfect orange cinnamon rolls, and miraculously, you have leftovers? Good job, you! These flavorful delights are best eaten the day they come out of the oven, but they store surprisingly well, thanks to that lovely glaze sealing in the moisture. I try to keep them fresh because nobody likes a stale breakfast!
For storing them, the container matters as much as the temperature. You don’t want to trap too much steam, or the glaze will get watery, but you also need to keep the air out so they don’t dry up overnight.
Storing Your Homemade Orange Cinnamon Rolls
If you know you won’t devour these beauties within 24 hours, here’s what I always do:
- Day One (Room Temperature): Leave uneaten rolls in the baking pan, cover the whole thing tightly with foil or plastic wrap, and leave them right on the counter. They should stay soft and delicious for a full day, maybe even two if your house isn’t too warm.
- For Longer Storage: If we are talking three days or more, those glorious orange rolls need the fridge. Place them in an airtight container. They will firm up a bit, but that’s fine because we have a trick to bring them back to life!
- Freezing Success: If you want to save some for a spontaneous brunch next month, freeze them unglazed! Let the rolls cool completely, wrap each individual roll tightly in plastic wrap, and then place them all into a freezer bag. They keep beautifully for up to three months this way.
Bringing Them Back to Life: Reheating Tips
The goal here is warm, gooey, and smelling like you just baked them five minutes ago. Microwaving is fast, but you have to be careful not to cook them into hockey pucks.
For a single roll, wrap it loosely in a slightly damp paper towel and microwave it on Medium (not High!) for about 15 to 20 seconds. That moisture from the towel steams the roll perfectly. If you’re heating up a batch, the oven is your best bet.
Pop the rolls (still in their pan, covered tightly with foil) into a 350°F oven for about 10 minutes. This gently warms them through without drying them out. If you plan on going the oven route, I sometimes whip up a quick little extra splash of glaze just in case the first one absorbed too much while sitting around! You can find inspiration for great companion recipes, like a quick homemade pizza sauce that uses similar pantry staples, to keep your kitchen busy!
Serving Suggestions for Your Homemade Orange Cinnamon Rolls
Honestly, these orange cinnamon rolls are showstoppers all on their own—seriously, they are practically a dessert masquerading as breakfast! But if you are looking to elevate that weekend brunch or create a full-on cozy morning spread, I have a few favorite pairings that just work perfectly alongside that bright citrus and warm spice.
The rich sweetness of the rolls, especially with that thick glaze soaking in, demands something strong to cut through it. That’s where coffee comes in clutch. Forget plain old drip coffee; you need something robust to stand up to the flavor!
The Perfect Beverage Pairings
When I bake these, I always make sure my coffee game is up to snuff. The warm undertones of the cinnamon really sing when paired with vanilla or maple flavors in a coffee drink. If you’re feeling ambitious, you absolutely must try making a homemade cinnamon maple vanilla latte to go with these rolls. It’s like drinking a hug!
If coffee isn’t your thing, a strong black tea or even an Earl Grey works wonderfully. The bergamot note in the tea complements the orange zest in a really unexpected, sophisticated way. We’re talking elevated breakfast here, folks—no sad instant coffee allowed!
Simple Sides to Keep Things Fresh
Since the rolls are rich and sweet, I always suggest serving them with something fresh and slightly tart on the side. It cleanses the palate between those bites of sweet dough.
- Seasonal Berries: A big bowl of fresh raspberries or sliced strawberries is my go-to. Their slight acidity is the perfect foil for the heavy sugar glaze.
- Greek Yogurt Parfait: Layer some plain Greek yogurt with a little honey and perhaps some walnuts. It adds protein to balance out the carb load, and the yogurt’s tanginess is refreshing.
- A Light Fruit Salad: Keep the fruit salad simple—think melon, grapefruit segments, and maybe some kiwi. Avoid adding too much tropical fruit, as the strong flavors can clash a little with the orange and cinnamon essence of the rolls.
When it comes down to it, these orange rolls don’t really *need* anything else. But having a little fresh fruit tray on the side just makes the whole presentation look effortless and delicious. Enjoy every bite!
Frequently Asked Questions About Homemade Orange Cinnamon Rolls
I know you’re probably ready to jump in the kitchen, but sometimes just a quick clarification can be the difference between a perfect batch of homemade orange cinnamon rolls and a sticky situation! I’ve gathered up the most common things people ask me about this recipe so you can bake these beauties with total confidence.
Can I use cold milk instead of warm milk for the yeast?
Oh, please don’t try that! If you use cold milk, your yeast is going to take a nap—a very long nap! Remember, yeast is a living organism, and it needs a nice, warm, cozy environment to wake up and start working its magic. That’s why we aim for that 105°F to 115°F range for the milk. It’s warm enough to activate them quickly into that foamy layer, but cool enough that you won’t shock and kill them immediately. If the milk is too cold, your dough won’t ever double in size, and you’ll end up with dense, hard little hockey pucks instead of fluffy orange rolls. Stick to that warmth!
How do I prevent my orange cinnamon rolls from drying out?
This is the eternal struggle with sweet rolls! Two things are key here, and they both involve the very end of the process. First, you have to watch the oven like a hawk during those last five minutes of baking. Pull them out the second they turn golden brown—don’t wait for them to get dark amber, or they are already overdone. Second, and this is non-negotiable: get that glaze on them the second they come out of the oven! The heat from the rolls melts the glaze and lets it soak deep into those cinnamon layers. That warm, set glaze acts like a little moisture shield locking everything in. If you wait even ten minutes, the rolls will cool too much and the glaze will just sit sadly on top.
Can I make the dough for these orange rolls ahead of time?
Yes, you absolutely can, and I encourage it if you want fresh rolls without waking up at 4 AM! This dough handles a slow, cold fermentation beautifully. After you knead the dough (Step 4 in the instructions) and place it in the greased bowl, cover it tightly and pop it straight into the refrigerator instead of letting it rise on the counter.
It can chill overnight, sometimes up to 24 hours. This slow, cold process actually develops a deeper flavor, which is fantastic for these particular cinnamon rolls. When you pull it out the next morning, let it sit on the counter for about an hour to warm up slightly before punching it down and rolling it out for the filling. If you’re making a batch for a big holiday breakfast, you can even slice them, place them into the baking pan, cover them, and let them sit in a warm spot for that final 30-minute rise (Step 10) right before baking.
If you’re looking for ways to streamline baking bread-like items even further—perhaps you decide to turn this dough into something different—you might enjoy reading about how to make a cinnamon roll cake when you have leftover dough!
Estimated Nutritional Profile for Homemade Orange Cinnamon Rolls
Now, let’s talk nutrition, because while these are decadent treats, knowing what’s in them is just responsible cooking! I always keep my recipe information handy, but remember, these numbers are just baseline estimates. Depending if you use whole milk versus skim, or if you choose organic sugar versus regular, those values shift a tiny bit.
I always advise looking at this section lightly—these are special occasion rolls, not an everyday staple! But for those of you who track things, here’s the best guess based on the ingredients list we used. Everything below generally applies to one glorious roll:
- Serving Size: 1 roll
- Calories: 350
- Sugar: 30g
- Sodium: 250mg
- Fat: 16g
- Saturated Fat: 10g
We’ve got a decent chunk of fat in there because of all that delicious butter we slather on the filling—that’s non-negotiable for great flavor! You’ll also see the carbs are pretty high at 48g, which is expected from the flour and the sugar in the dough and glaze. We do get a little bit of protein (about 6g) and fiber (2g), which is a small win, folks!
So, use this profile as a general guide. If you use less butter in the swirl or go lighter on the glaze, you’ll definitely shave those numbers down some. But honestly, when you bite into that soft, orange-zesty goodness, you’re just focused on how amazing it tastes, right?
Share Your Homemade Orange Cinnamon Rolls Experience
Whew! We made it through the kneading, the rolling, and the glorious glazing process! Now that your kitchen smells like a citrus bakery, I absolutely want to hear about it. Baking is always better when you can share the results, even if it’s just virtually!
Did they turn out perfectly fluffy? Did your family approve of swapping that regular cinnamon kick for bright, vibrant orange? I truly hope you loved making these Homemade Orange Cinnamon Rolls just as much as I love eating them fresh from the oven!
If you tried this recipe, please take a moment to leave a star rating down below! It helps other bakers know this recipe is tested and true, and honestly, I read every single comment you leave.
Did you get stuck on the kneading? Do you have a crazy substitution idea that actually worked? Don’t be shy! Drop your questions, your success stories, or even just rave reviews in the comments section. If you have specific issues or want to share pictures of your beautiful swirls, you can always reach out directly through my contact page, too. Happy baking, and I can’t wait to see your gorgeous orange rolls!
Print
Homemade Orange Cinnamon Rolls
- Total Time: 1 hour 50 min
- Yield: 12 rolls 1x
- Diet: Vegetarian
Description
Recipe for sweet rolls flavored with orange zest and cinnamon.
Ingredients
- 1 cup warm milk
- 2 1/4 teaspoons active dry yeast
- 1/2 cup granulated sugar, divided
- 1/4 cup unsalted butter, melted
- 1 large egg
- 3 1/2 cups all-purpose flour, plus more for dusting
- 1 teaspoon salt
- 1/2 cup unsalted butter, softened
- 2 tablespoons orange zest
- 2 tablespoons ground cinnamon
- 1 cup powdered sugar
- 3 tablespoons orange juice
Instructions
- Combine warm milk, yeast, and 1 teaspoon of sugar in a bowl. Let stand until foamy, about 5 minutes.
- Stir in melted butter, remaining sugar, and egg into the yeast mixture.
- In a separate bowl, whisk together flour and salt. Gradually add flour mixture to the wet ingredients, mixing until a soft dough forms.
- Knead the dough on a lightly floured surface for 5 to 7 minutes until smooth. Place in a greased bowl, cover, and let rise in a warm place for 1 hour, or until doubled in size.
- Punch down the dough. On a lightly floured surface, roll the dough into a 12×18 inch rectangle.
- Spread the softened butter over the dough. Sprinkle evenly with orange zest and cinnamon.
- Roll the dough tightly along the long edge into a log. Cut the log into 12 equal rolls.
- Place rolls in a greased 9×13 inch baking pan. Cover and let rise for 30 minutes.
- Preheat oven to 375 degrees Fahrenheit (190 degrees Celsius). Bake for 20 to 25 minutes, until golden brown.
- While rolls bake, whisk together powdered sugar and orange juice to make the glaze.
- Remove rolls from the oven and immediately drizzle the glaze over the warm rolls.
Notes
- Use fresh orange zest for the best flavor.
- If the dough is too sticky, add flour one tablespoon at a time while kneading.
- Prep Time: 45 min
- Cook Time: 25 min
- Category: Dessert
- Method: Baking
- Cuisine: American
Nutrition
- Serving Size: 1 roll
- Calories: 350
- Sugar: 30
- Sodium: 250
- Fat: 16
- Saturated Fat: 10
- Unsaturated Fat: 6
- Trans Fat: 0
- Carbohydrates: 48
- Fiber: 2
- Protein: 6
- Cholesterol: 50
Keywords: orange rolls, cinnamon rolls, sweet rolls, breakfast pastry, homemade rolls