
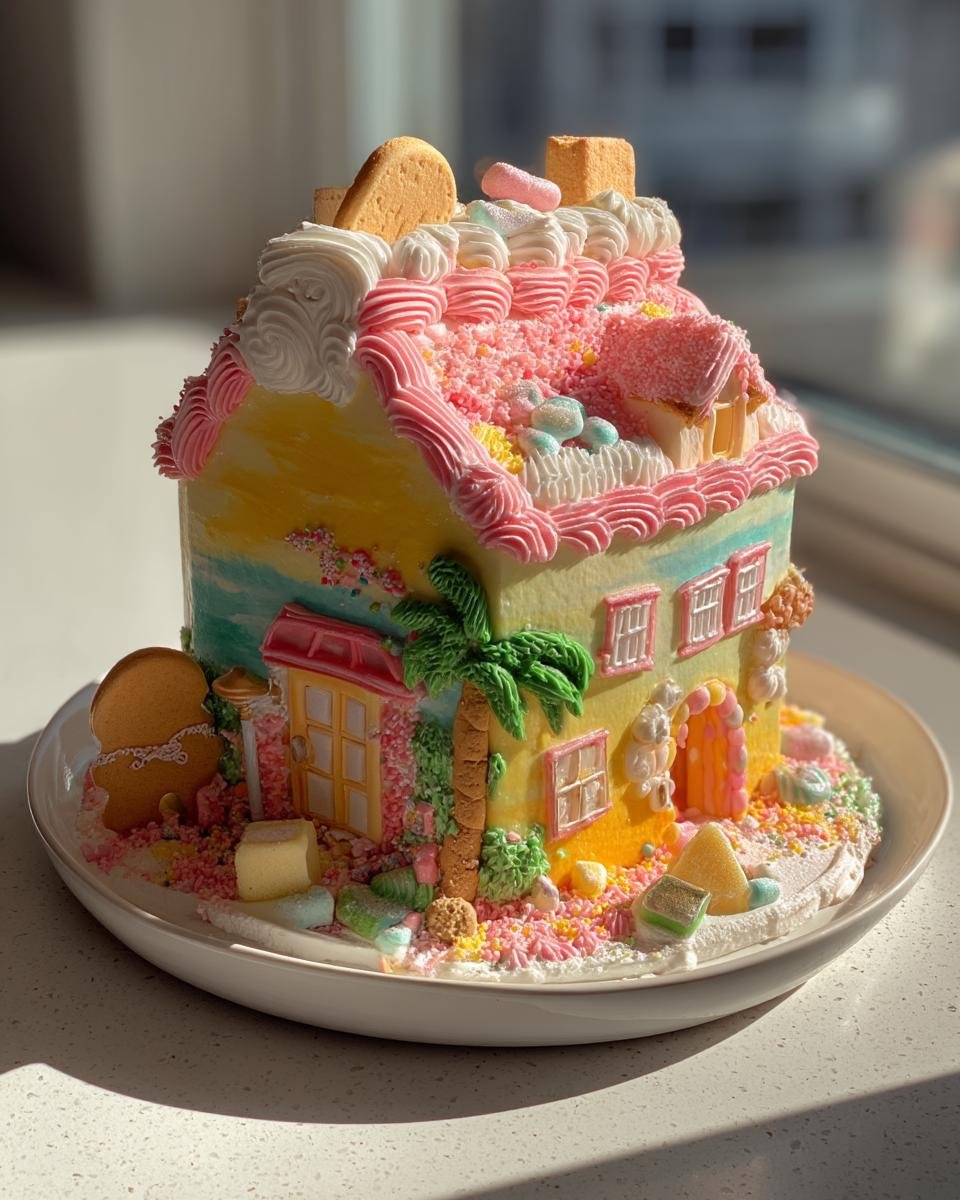
Oh my goodness, have I got a fun one for you today! Forget fancy patisserie techniques for a sec, because we’re about to dive headfirst into pure, unadulterated joy with this **House Garden Cake**! Seriously, this isn’t just a dessert; it’s a whole edible landscape, a little sugary wonderland that brings out the kid in everyone. My absolute favorite thing about making a House Garden Cake is seeing people’s faces light up when they see it. It’s perfect for birthdays, holidays, or just a random Tuesday when you need some serious cheer in your life.
I first made one of these years ago for my niece’s birthday party, and let me tell you, it stole the show! All the kids (and maybe a few adults!) were pointing out the gummy bear flowers and the pretzel fence. It was a little messy, totally imperfect, but bursting with personality. That’s the beauty of this recipe – it’s incredibly forgiving and all about having fun. You don’t need to be a master baker; if you can open a box mix and a can of frosting, you are golden! It’s a project that’s less about precision and more about letting your imagination run wild. Let’s get started on making your own little edible masterpiece!

Why You’ll Love This House Garden Cake
Okay, so you might be thinking, “Is this *really* for me?” And I’m here to shout a resounding YES! This House Garden Cake isn’t just another recipe to add to your list; it’s an experience. Here’s why I absolutely adore making (and eating!) these:
- It’s ridiculously easy! Seriously, we’re talking cake mix and canned frosting here. No need to stress about making everything from scratch unless that’s your jam. It’s designed for maximum fun with minimal fuss.
- The decorating is the best part. This is where you get to unleash your inner artist! Candies become flowers, cookies turn into stepping stones, and a little green frosting transforms into a lush lawn. There are no rules, just pure creative joy.
- It’s a total showstopper. Bring this to any gathering, and watch the smiles appear. It’s visually stunning and instantly makes any occasion feel extra special and whimsical.
- Kids LOVE it. If you have little helpers, this is the perfect project to get them involved. Measuring, stirring, and especially decorating – they can do it all! It’s a fantastic way to make memories in the kitchen.
- It’s completely customizable. Want a chocolate house with a vanilla garden? Go for it! Prefer gummy worms over bears? Absolutely! This recipe is a blank canvas for your sweet dreams.
Honestly, making this House Garden Cake is just plain fun. It’s a reminder that baking doesn’t always have to be serious; sometimes, it’s just about playing with your food and creating something delightful.
Gathering Your Ingredients for the House Garden Cake
Alright, let’s talk ingredients! The beauty of this House Garden Cake is that it uses super simple stuff you probably already have or can grab easily at the store. We’re keeping it low-stress so you can focus on the fun part – the decorating!
Here’s what you’ll need to gather:
- 1 box cake mix (any flavor you love!) – Seriously, pick your favorite. Vanilla, chocolate, funfetti… whatever makes your heart happy! You’ll also need whatever the box calls for – usually eggs, oil, and water or milk.
- 1 can (16 oz) frosting (vanilla or chocolate works best) – Again, pick a flavor you enjoy! Vanilla is great for coloring, but chocolate makes a fantastic “dirt” base for the garden.
- Food coloring (various colors) – Green is a must for the grass, but grab reds, yellows, blues, whatever you need for your decorations!
- Various candies and cookies for decoration – This is where the magic happens! Think small candies like gummy bears (perfect flowers!), pretzel sticks (instant fences!), cookie crumbs (pathways or dirt!), maybe some M&Ms for stepping stones or roof tiles. Get creative with whatever fun sweets you can find!
That’s it! See? Nothing fancy required. Just the basics to build your sweet little scene.
Essential Equipment for Your House Garden Cake Project
Okay, before we start mixing and baking, let’s make sure you have the right tools ready to go. Most of this stuff is probably already in your kitchen, which keeps things nice and easy for our House Garden Cake adventure!
- Mixing bowls: You’ll need one for the cake batter and maybe a smaller one for tinting frosting.
- Measuring cups and spoons: For following those cake mix instructions.
- Electric mixer (hand or stand): Makes whipping up that batter a breeze!
- Cake pans: A loaf pan is perfect for the house, and a round pan works great for the garden base.
- Cooling rack: Essential for letting those cakes cool down completely before frosting.
- Spatulas or offset spatulas: For spreading that frosting smoothly.
- Piping bags and tips (optional): If you want to get fancy with grass or flower details, but a Ziploc bag with the corner snipped works too!
- Butter knife or small offset spatula: Handy for placing and arranging your candy decorations.
See? Nothing too intimidating. Just the basics to help you bring your sweet little House Garden Cake to life!
Crafting Your House Garden Cake: Step-by-Step Guide
Alright, this is where the fun really begins! Making your House Garden Cake is like building a delicious little edible world. We’ll take it step-by-step, and don’t worry, it’s designed to be totally doable, even if you’re new to this kind of decorating. Just relax, put on some good tunes, and let’s get baking and building!
-
Preparing the Cake Bases for Your House Garden Cake
First things first, we need our edible foundation! Grab that box of cake mix and follow the instructions exactly as they’re written on the back. Every mix is a little different, so pay attention to the amount of eggs, oil, and liquid it calls for. Mix it up until it’s nice and smooth – don’t overmix, though, or your cake might get tough!
Now, for the pans. You’ll want to grease and flour your pans really well so your cakes pop out easily. A loaf pan (the standard size is usually best) is perfect for the main body of your house. For the garden base, a round cake pan works wonderfully – an 8 or 9-inch pan is a good size. Pour the batter into your prepared pans, dividing it between the loaf pan and the round pan.
Pop them into the oven according to the cake mix directions. Baking times will vary depending on your oven and the pan sizes, but usually, it’s around 30-35 minutes for a loaf cake and a bit less for a round cake. You’ll know they’re ready when a toothpick inserted into the center comes out clean. Once baked, let them cool in the pans for about 10-15 minutes before carefully flipping them out onto a wire rack to cool completely. This part is crucial! Trying to frost warm cake is a messy business, so be patient.
-
Frosting and Assembling the House Garden Cake
Okay, cakes are cool? Great! Now it’s frosting time. Grab your can of frosting. I usually divide mine up – I’ll reserve about half or a little more for tinting green, and keep the rest white or another color for the house itself. If you want to color your frosting, put the portion you plan to tint into a separate bowl and add food coloring a little at a time, mixing until you get the shade you want. Green is essential for the garden “grass”!
First, let’s frost the round cake. This will be your garden base. Spread a layer of your green frosting all over the top and sides. Don’t worry about making it perfectly smooth; a little texture looks like grass! Set this aside.
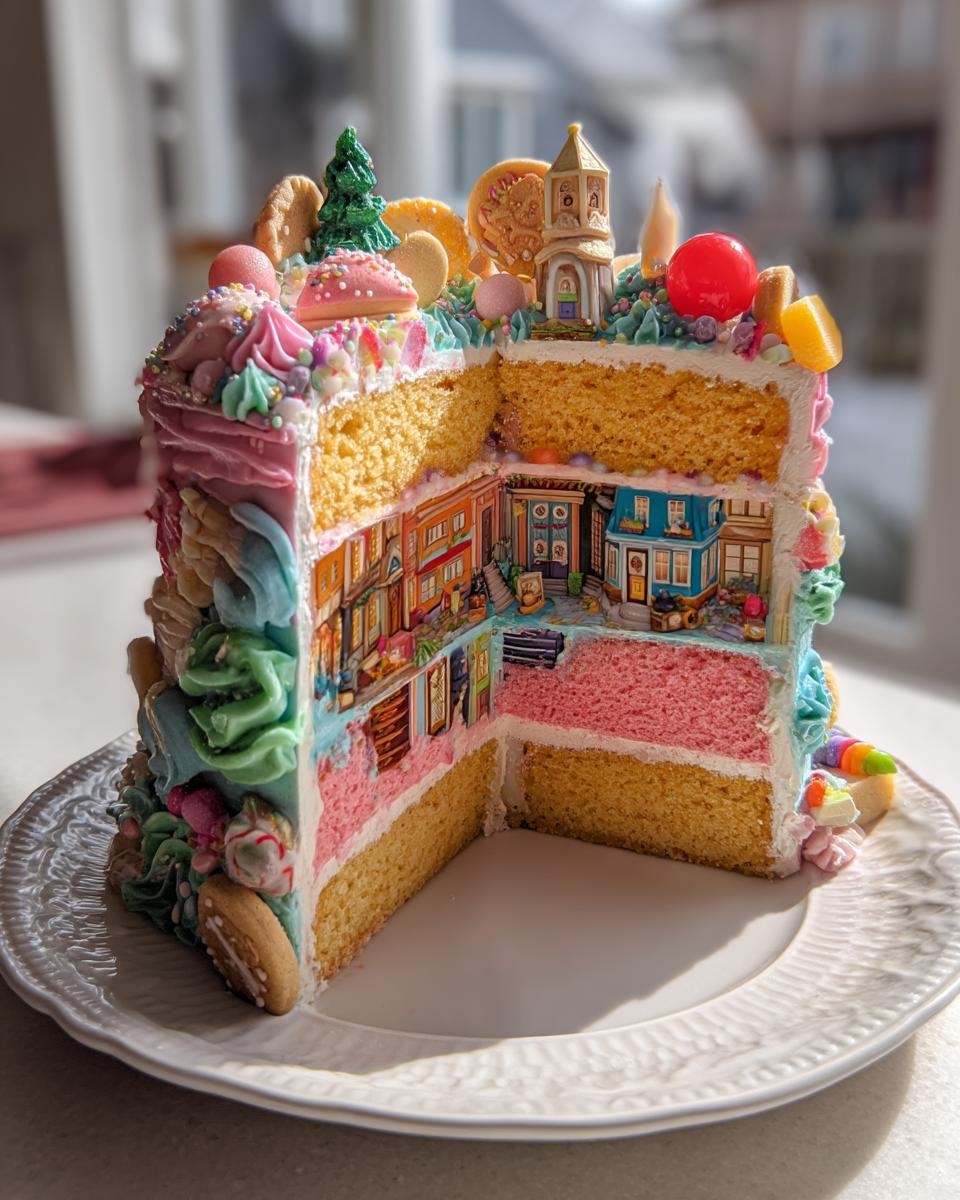
Now for the house (the loaf cake). You can frost this with white, chocolate, or any color you like for the house walls. Frost the top and sides evenly. Once both cakes are frosted, carefully place the loaf cake (the house) on top of the round cake (the garden base). You might need to trim the bottom of the loaf cake slightly so it sits flat on the round cake. Ta-da! You’ve got your basic House Garden Cake structure!
-
Decorating Your House Garden Cake
This is the most exciting part – bringing your House Garden Cake to life! Get out all those fun candies and cookies you gathered. Let your imagination run wild!
Here are some ideas to get you started:
- Roof: Use small cookies (like graham crackers or little chocolate squares) or even colored candies like M&Ms or Skittles to create roof tiles on the top of the loaf cake.
- Windows and Doors: Use square or rectangular candies, or even just draw them on with frosting tinted a different color. Pretzel sticks can make great window panes!
- Pathways: Crushed cookies (like Oreos with the cream removed) or graham cracker crumbs make perfect little dirt paths leading up to the house.
- Fences: Stand pretzel sticks upright around the edge of the garden base or along a pathway to create a fence.
- Flowers: Gummy bears, mini marshmallows, or small round candies are fantastic for making colorful flowers in the green “grass”. You can even add little green dots of frosting for stems.
- Bushes and Trees: Use green gumdrops or piles of green frosting piped with a star tip.
Just start placing your decorations! Don’t be afraid to move things around until you like how it looks. This is where you can really personalize your House Garden Cake and make it unique. Have fun with it!
Expert Tips for a Perfect House Garden Cake
Making this House Garden Cake is already pretty straightforward, but a few little tricks can make it even more awesome! These are things I’ve picked up along the way that just make the whole process smoother and the end result even happier.
- Frosting consistency is key! If your canned frosting feels a little stiff, you can microwave it for just 5-10 seconds (seriously, just a tiny bit!) and stir it to make it easier to spread. If it’s too soft, pop it in the fridge for a few minutes. You want it spreadable, but not so runny that it drips everywhere.
- Plan your decorations a little. Before you start sticking things on, maybe lay out some of your candies and cookies to get an idea of where you want things to go. It helps visualize your little scene!
- Don’t strive for perfection. This cake is all about charm, not flawless lines. Embrace the slightly wobbly fence or the perfectly imperfect gummy bear flowers. That’s what makes it so lovable!
- Get the kids involved! Seriously, this is the best part. Let them place the candies, draw with frosting, or sprinkle the cookie crumbs. It’s a fantastic family activity and they’ll be so proud of their creation.
- Use a crumb coat. If you want a super smooth finish on your frosting (especially for the house), apply a very thin layer of frosting first and chill the cake for about 15-20 minutes before applying the final layer. This traps any loose crumbs!
Just remember to have fun and enjoy the process! Your House Garden Cake is going to be amazing because *you* made it.
House Garden Cake Variations
The beauty of this House Garden Cake is how easily you can make it your own! Don’t feel tied to just one way of doing things. Here are a few ideas to spark your creativity and switch things up:
- Mix up the flavors! Instead of vanilla, how about a chocolate house with a lemon cake garden? Or maybe a spicy gingerbread house for the holidays?
- Different frosting styles. Love cream cheese frosting? Go for it! You could even use colored candy melts to create a smooth, colorful coating for the house.
- Seasonal themes. Think a spooky Halloween house with candy corn decorations, a festive Christmas scene with red and green candies, or a spring garden bursting with bright colors for Easter!
- Beyond candies. Get creative with other edible decorations! Pretzels, marshmallows, even small cookies can become trees, bushes, or little garden creatures.
Really, the only limit is your imagination. Have fun playing around and making your House Garden Cake uniquely yours!
Frequently Asked Questions About the House Garden Cake
Okay, I know you might have a few questions bubbling up as you plan your awesome House Garden Cake project. That’s totally normal! Here are some common things people ask, and my best answers to help you out.
Q1: Can I make the cake from scratch instead of using a mix?
Absolutely! If you have a favorite pound cake or sturdy sheet cake recipe, go for it! Just make sure it yields enough batter to fill your loaf pan and round pan. The beauty of this **decorated cake** is that it works with pretty much any cake base you love.
Q2: How far in advance can I make the House Garden Cake?
You can bake the cakes a day or two in advance and store them, wrapped well, at room temperature. I usually frost and decorate the cake the day I plan to serve it. This keeps the candies and cookies looking their best and prevents things from getting soggy.
Q3: What kind of candies and cookies work best for decorating?
Think small, colorful, and things that hold their shape! Gummy bears, M&Ms, Skittles, small cookies (like mini Oreos or graham crackers), pretzel sticks, and even licorice can be great. Just make sure they’re things you and your eaters enjoy! It’s all about creating that fun **novelty cake** look.
Q4: My frosting is too hard/soft for decorating. What should I do?
This happens! If your canned frosting is too stiff, microwave it for just 5-10 seconds and stir. If it’s too soft and runny, pop the bowl into the fridge for 10-15 minutes to firm up. You want it spreadable but not melting.
Q5: Can I involve my kids in making this?
Please do! This is the ultimate **kids cake** project. Let them help measure, mix the batter (with supervision!), and especially with the decorating. Giving them a bowl of candies and letting them place them on the “garden” or “house” is pure joy!
Estimated Nutritional Information for House Garden Cake
Okay, so while we’re focusing on fun and deliciousness with this House Garden Cake, I know some of you like to have an idea of what you’re serving. Now, because we’re using a mix of ingredients (cake mix, frosting, tons of different candies!), giving exact nutritional info is pretty tricky. It really depends on the specific brands you use and exactly *how* much frosting and candy you pile on!
But generally speaking, for a standard slice of a cake like this, you can expect it to be pretty similar to other decorated cakes made with box mixes and canned frosting. We’re talking estimates for Calories, Fat (including saturated fat from the frosting and butter/oil in the cake), Carbohydrates (mostly sugar!), and maybe a little bit of Protein. Just remember, these are absolutely estimates and will vary wildly based on your choices! Think of it as a treat, and enjoy every tasty bite!
Share Your House Garden Cake Creation
Okay, you’ve done it! You’ve baked and decorated your very own amazing House Garden Cake! I am SO excited to see what you came up with. Seriously, every single one of these is unique and tells its own sweet story.
Please, please, please share a photo of your creation! Tag me on social media if you post it, or even better, leave a comment below with how it went and how you decorated it. Did you use gummy bear flowers? Pretzel fences? I want to hear all about it! And if you loved making it, don’t forget to give the recipe a rating. Happy baking and decorating!
Print
Joyful House Garden Cake: 1 Magical Creation
- Total Time: 1 hour + cooling time
- Yield: 1 cake 1x
- Diet: Vegetarian
Description
A delightful cake resembling a house and garden, perfect for special occasions.
Ingredients
- 1 box cake mix
- 1 can frosting
- Food coloring
- Various candies and cookies for decoration
Instructions
- Prepare cake mix according to package directions.
- Bake cake in desired shapes (e.g., loaf pan for house, round pans for garden).
- Let cakes cool completely.
- Frost cakes.
- Decorate with food coloring, candies, and cookies to create a house and garden scene.
Notes
- Use different cake and frosting flavors for variety.
- Get creative with decorations.
- Involve children in the decorating process.
- Prep Time: 30 minutes
- Cook Time: 30 minutes
- Category: Dessert
- Method: Baking
- Cuisine: American
Nutrition
- Serving Size: 1 slice
- Calories: Varies
- Sugar: Varies
- Sodium: Varies
- Fat: Varies
- Saturated Fat: Varies
- Unsaturated Fat: Varies
- Trans Fat: Varies
- Carbohydrates: Varies
- Fiber: Varies
- Protein: Varies
- Cholesterol: Varies
Keywords: house cake, garden cake, novelty cake, decorated cake, kids cake