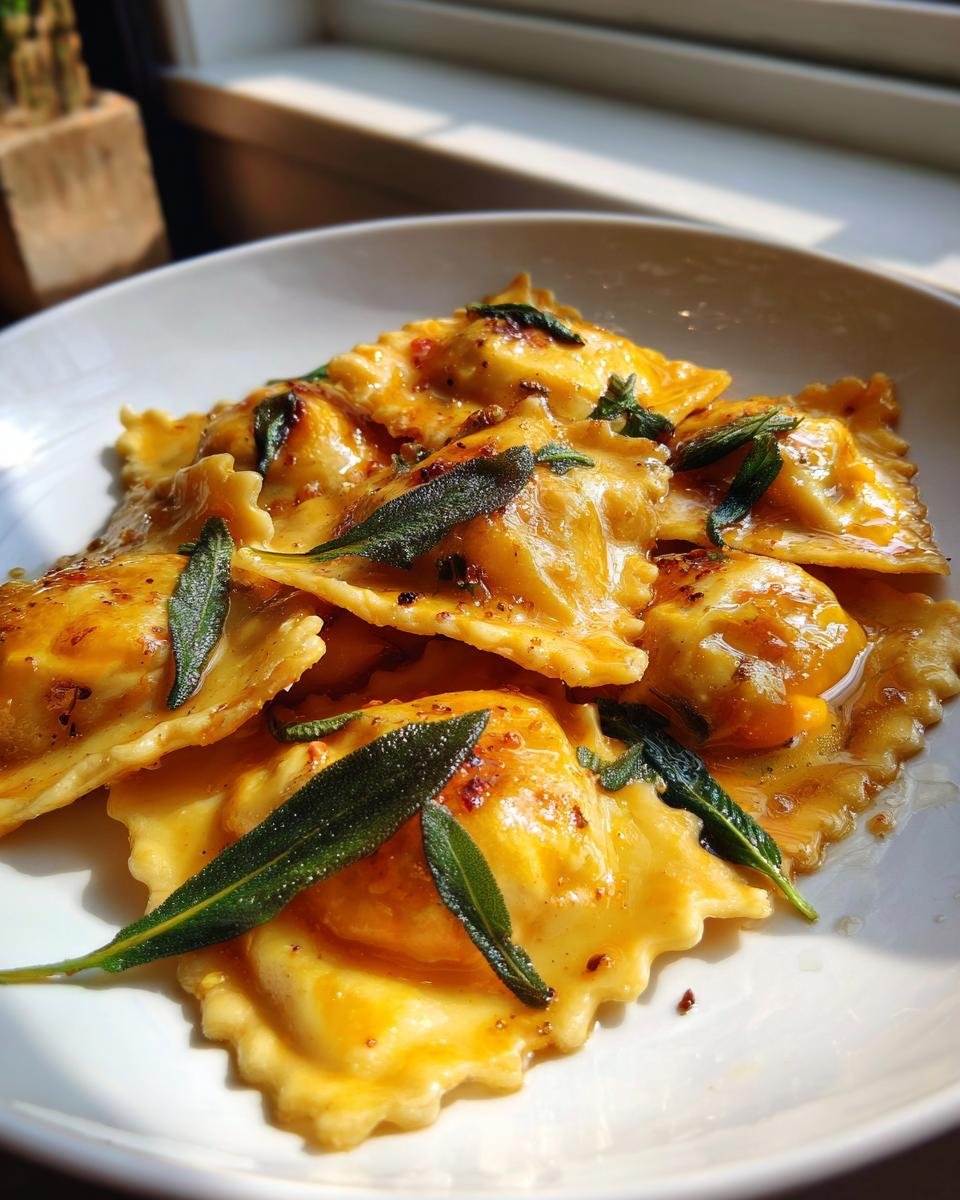
Oh, there is nothing—and I mean *nothing*—that beats the pure comfort of homemade pasta. It just smells like love, doesn’t it? I spent years terrified of even attempting ravioli. I thought I needed some fancy Italian grandmother’s secret training, but wow, was I wrong! Once you get the hang of sealing the edges, it’s actually kind of therapeutic. This **Irresistible Butternut Squash Sage Ravioli Recipe** is my absolute favorite for autumn and winter. The sweet, earthy squash against that sharp, aromatic sage and nutty Parmesan? It’s perfection on a plate. Trust me, once you try this filling, you’ll never look back. We always make a huge batch for movie night; it’s become our cozy staple.

Why This Irresistible Butternut Squash Sage Ravioli Recipe Works (Quick Benefits)
I know what you’re probably thinking when you see “homemade ravioli”: Ugh, too much work! But stick with me here. This recipe is designed to be surprisingly straightforward, especially since we’re letting the oven do most of the heavy lifting for the filling. It’s easy enough for a weeknight if you prep the squash ahead, and the payoff is huge.
Here’s why I always come back to this specific combination:
- The Sweet-Savory Balance: The natural sweetness of the roasted butternut squash is just perfectly cut by that earthy, slightly peppery fresh sage and salty Parmesan. It’s complex but totally harmonious. It beats plain cheese filling every single time, in my opinion!
- Shockingly Easy Filling: Roasting the squash makes the flesh super smooth and sweet—no boiling required, which keeps it from getting watery. Once mashed, you just stir in the cheese and yolk, and you’re done!
- That Incredible Brown Butter Finish: Honestly, the sauce is half the battle. Browning the butter until it smells like toasted hazelnuts and crisping those sage leaves takes about three minutes of active time. It tastes gourmet, but it’s truly beginner-level cooking.
- Perfect Texture with Wonton Wrappers: If you’re nervous about rolling your own dough (which, don’t worry, we can talk about later!), using quality wonton wrappers is a total cheat code. They cook fast and give you those beautiful, defined squares. Pair them with something like my favorite dinner rolls for dipping up the leftover sauce—you won’t want any to go to waste!
- True Taste of Fall: This dish just screams cozy Sunday dinner. Whenever I smell that roasting squash and sage hitting the hot pan, I feel instantly warmer. It makes the kitchen smell amazing!
Ingredients for Your Irresistible Butternut Squash Sage Ravioli Recipe
When you’re making something this special, ingredient quality truly matters, especially for the squash. I always look for one that feels heavy for its size—that means it’s full of water and flavor, not woody and dry. Since we’re using store-bought wrappers, we get to splurge on the fresh sage, and trust me, that makes all the difference in the sauce!
Here is everything you’ll need to gather before you start roasting that beautiful squash:
For the Butternut Squash Filling
- One medium butternut squash—and I mean *medium*, we’re aiming for about 2 pounds before roasting.
- Two tablespoons of olive oil, just your regular cooking kind.
- Half a teaspoon of salt. Don’t skimp here; it really brings out the sweetness!
- A quarter teaspoon of freshly cracked black pepper.
- A quarter cup of grated Parmesan cheese. Get the good stuff if you can; the pre-grated stuff doesn’t melt quite right.
- One large egg yolk. This is what helps bind it all together so the filling stays nicely contained.
Remember, the squash must be roasted, scooped out, and then mashed until it is absolutely baby-food smooth. Lumps in the filling mean trouble when you try to seal the edges!
For Assembly and Sage Brown Butter Sauce
- One package of wonton wrappers, or if you’re feeling ambitious, enough fresh pasta dough to cover your filling.
- A quarter cup of water. This is just for brushing the edges to make them stick—make sure you have a little bowl ready.
- One tablespoon of unsalted butter. This is strictly for the sauce, so make sure it’s good butter, not that stuff in a tub!
- Ten fresh sage leaves. They need to be whole and beautiful so they can crisp up nicely in that melted butter. Honestly, dried sage just doesn’t give you that intense perfume we’re looking for here.
Expert Tips for the Perfect Butternut Squash Sage Ravioli Filling
Okay, let’s talk filling consistency because this is where most people accidentally end up with watery ravioli that burst open the second they hit the hot water. The filling is the heart of these little parcels, and we want it firm, flavorful, and totally secure inside that wrapper.
My biggest piece of advice, and please write this down, is the cooling step. You MUST let that beautiful roasted squash mixture cool down completely before you even think about mixing in the Parmesan or the egg yolk. If you mix the binder (yolk and cheese) into hot squash, you start cooking it prematurely, and you end up with a loose, mushy texture that just slips right out of the pasta when it boils. Let it cool enough that you can comfortably stick your hand in it!
Another thing I learned the hard way? Don’t be shy with the initial seasoning! When you mash that squash, it needs a good dose of salt and pepper. Remember, you’re mixing it with creamy Parmesan later, and the pasta dough itself is quite plain. If the filling tastes a little *too* salty or *too* flavorful when it’s warm, I promise you, it will taste absolutely perfect once it’s sealed inside the pasta wrap and boiled. I always taste-test my filling against a tiny bit of raw wrapper (or even just eat a spoonful!) to make sure it sings.
And speaking of texture, really put some effort into getting that squash as smooth as silk. If you have a stick blender or a food processor, give it a quick whiz after mashing. Nobody wants a big chunk of squash getting in the way of a perfectly sealed edge. We want smooth sailing toward dinner!
Step-by-Step Instructions for the Irresistible Butternut Squash Sage Ravioli Recipe
Alright, time to get our hands dirty! This is where the magic happens, but take a deep breath. We’re breaking this down into totally manageable chunks. If you can roast a vegetable and boil water, you can make these incredible ravioli. We’re going to go through the squash prep, the tricky sealing part, and then finish it off with that amazing, simple butter sauce. It tastes like you spent hours working, but it’s honestly pretty quick!
If you ever want to try a different filling after mastering this one, check out my creamy broccoli alfredo ravioli recipe for some other fun twists.
Roasting and Preparing the Squash Filling
First things first, we need that squash sweet and soft. Preheat your oven to a nice hot 400°F (200°C). You want this squash to roast, not steam itself to death. Cut your butternut squash right in half lengthwise, scoop out those stringy seeds—I usually save the seeds to roast separately, but you can toss them if you’re in a hurry. Place them cut-side down on a baking sheet.
Drizzle the cut side with about 1 tablespoon of olive oil, and then season it with half of your salt and pepper. Roast those babies until they are totally tender. You’re looking at 40 to 50 minutes, depending on the thickness of your squash. You should be able to easily pierce the skin with a fork—it should feel almost squishy when you poke it!
Once they’re cool enough to handle (remember what I said about cooling!), scoop all that beautiful flesh into a bowl. Mash it up until it is seriously smooth. Then, let it cool down completely before moving on. Seriously, if you rush this, your wrappers will weep!
Assembling Your Irresistible Butternut Squash Sage Ravioli
This is the sealing part, so go slow and don’t try to rush! Lay out one wonton wrapper—or a sheet of your fresh dough if you made it. We are brushing those edges lightly with water. Think damp, not soaking wet! Takes about a teaspoon of filling, and place it right in the center.
Now, place your second wrapper right over the top, lining up those edges perfectly. This next step is the most important for success: press down FIRMLY all the way around the filling. You are squeezing out every single pocket of air! Air pockets are what cause blowouts in the boiling water. Use your fingers or a fork to seal those edges tight. If you’re using a pastry wheel or knife, give them a nice square cut. Keep going until all your filling is tucked safely inside.
If you’re using fresh dough instead of wrappers, make sure you roll it thin—thin enough that you can almost see your hand through it, but not so thin that it tears when you pick it up. Consistency is key!
Cooking the Ravioli and Finishing with Sage Butter
Get a big pot of water boiling and add a good pinch of salt. Drop your little ravioli in gently—don’t crowd the pot too much, or the water temperature will drop too fast. You want them to float to the top, which usually takes about 3 to 5 minutes depending on how thick your pasta is. When they float, they’re tender and ready! Scoop them out gently with a slotted spoon to drain off the excess moisture.
While they boil, get your finishing sauce ready! Melt that tablespoon of butter in a skillet over medium heat. Once it starts foaming, toss in those ten fresh sage leaves. Watch them closely! They will sizzle, and after about 1 or 2 minutes, they’ll start turning crispy and the butter will start smelling nutty and golden brown—that’s brown butter perfection!
Quickly transfer your drained ravioli right into that skillet. Toss them just enough to coat them in the sage butter. Serve them immediately while they are hot and the sage is crisp!
Ingredient Notes and Substitutions for Your Irresistible Butternut Squash Sage Ravioli Recipe
One of the best things about cooking from scratch is getting to tweak things to fit exactly what you have on hand or what you’re craving! While I gave you specific instructions using wonton wrappers because they are super fast and reliable, don’t feel locked into them. If you’ve got a great pasta dough recipe of your own, please use it!
If you go the fresh dough route, you absolutely must roll it thin. We used that lovely, slightly dense squash filling, and if the dough is too thick, all you’re going to taste is flour! Use your pasta machine if you have one and aim for a setting that’s nearly transparent, or roll it out by hand until you can almost read the newspaper through it. It makes a difference in the final bite!
Dealing with Dough vs. Wrappers
If you’re rolling your own dough, you’ll probably need a little more water to seal the edges, or you might even use a fork edge to really crimp it shut. The wonton wrappers are already perfectly thin, which is why they cook so quickly, often in just three minutes flat. If you overcook them, they can get a little gummy, so watch them closely as soon as they float!
Another thing to keep in mind is that if you decide to use those lovely fresh pasta sheets, you’ll need to use a pasta roller or a rolling pin to get them thin before you start dropping your teaspoon of filling onto them. This takes a little extra time, but it’s so satisfying when you see the sheets come out perfectly uniform.
Swapping Out the Cheese
The Parmesan in the filling is important because it adds that salty, nutty dryness that helps hold that moisture from the squash in place. But maybe you have a different cheese lying around or you want a slightly creamier texture, right? Go for it!
You can definitely substitute some of that Parmesan with high-quality ricotta cheese. I usually suggest swapping out about half of the Parmesan for the ricotta. Make sure you drain the ricotta really well first, though—I just put it in a fine-mesh sieve over the sink while I’m roasting the squash. We want creamy, not runny cheese!
Just taste the mixture afterward. If you swap out too much Parmesan, you might need to add just a tiny pinch more salt, because ricotta doesn’t pack the same salty punch. It’s all about balancing that sweet squash!
Serving Suggestions for Irresistible Butternut Squash Sage Ravioli
After all that hard work creating these little flavor bombs, you want to serve them right, don’t you? The beauty of a rich, savory-sweet filling like this, paired with that fragrant sage brown butter, is that it really doesn’t need much dressing up. You want accompaniments that complement, not compete with, that incredible flavor.
Honestly, my favorite way to serve these is exactly as described: tossed in the sage butter, maybe with an extra grate of Parmesan right at the table. But if you want to make it a full meal, here are a couple of quick ideas that work every time.
First, you absolutely need something to sop up every last drop of that brown butter sauce. I’m talking crusty bread. If you have time, nothing beats dipping fresh, warm bread right into the bowl. You can check out my favorite recipe for homemade bread if you need the perfect vehicle for the sauce!
Second, because the ravioli is rich, you want a side that brings a little brightness and crunch. Skip heavy sauces! A super simple side salad dressed with just lemon juice, good olive oil, salt, and pepper is perfect. Something light, maybe with some thinly sliced radish or baby greens, cleanses the palate beautifully between bites of that comforting squash.
If you aren’t into salad, a very light vegetable side works too—think blanched green beans tossed quickly with a tiny squeeze of lemon, or perhaps some lightly sautéed spinach with just garlic. Keep the preparation simple! We want the ravioli to be the shining star here, not the backup singers!
Storage and Make-Ahead Tips for Homemade Ravioli
This is one of my favorite revelations about making ravioli: they are fantastic make-ahead food! Seriously, if you can get past the assembly part, your future self will thank you big time. Making a huge batch and freezing them means you have individual, gourmet dinners ready to go whenever you want!
The key here is preventing them from sticking together before they freeze solid. Do not, under any circumstances, just dump raw ravioli into a plastic bag. They will fuse into one giant, delicious, and utterly unusable pasta brick. We have a couple of methods for success, whether you plan to cook them tomorrow or next month!
Storing the Uncooked Ravioli (Short Term)
If you plan on cooking your ravioli within 24 hours, refrigeration is fine, but you have to use a barrier. Lay your assembled, unboiled ravioli out on a baking sheet that is well-dusted with semolina flour or regular flour. You want a nice, thick coating so they don’t adhere to the metal or to each other.
Make sure the ravioli aren’t touching! Give them a little breathing room on that tray. Cover the whole tray loosely with plastic wrap—again, don’t let the wrap touch the pasta itself if you can help it—and pop it in the fridge. This keeps the moisture in check until you’re ready to boil them the next day. They handle fridge time beautifully this way.
Freezing Ravioli for Later (The Best Way!)
If you’re a planner like me, freezing is the way to go. This is where that initial flour dusting on the sheet pan becomes super important. Freeze the single layer of ravioli on that tray until they feel rock hard—usually about two hours in the standard freezer—this is called flash freezing. Once they are frozen solid, you can move them!
Transfer the frozen ravioli into a heavy-duty freezer bag or an airtight container. Try to press out as much air as possible before sealing. Label the bag with the date and what’s inside (though I bet you’ll recognize the scent of squash and sage!). Frozen ravioli will keep perfectly for up to three months. I’m serious, they taste just as amazing straight from the freezer!
Cooking Frozen Ravioli
Here’s a great bonus tip that makes this recipe totally weeknight-friendly: you cook them directly from frozen! Do not thaw them first. If you thaw them, they get really soft, and you’ll have squishy, sad ravioli.
Just bring your big pot of salted water to a boil and drop the frozen ravioli right in. You need to add a few extra minutes to the cooking time, maybe 6 to 7 minutes total, or until they float and the pasta feels perfectly tender when you test one. Then, quickly drain them and toss them right into your hot sage butter sauce. They come out wonderfully!
Storing Cooked Ravioli
Okay, leftovers happen, right? If you have cooked ravioli, you need to be quick about storing them because the sage butter sauce will start soaking in and making the pasta soggy if left too long. Drain the ravioli really well, but don’t toss them in the butter yet.
Toss the cooked ravioli with just a tiny drizzle of olive oil—enough to coat every piece lightly so they won’t stick together in the fridge. Spread them out on a plate or tray, cover them, and chill them right away. They are best eaten within two days, but honestly, they rarely last that long at my house!
Frequently Asked Questions About This Irresistible Butternut Squash Sage Ravioli Recipe
You guys always ask the best questions about this recipe, and honestly, when you’re making something homemade, it’s smart to have these little troubleshooting notes ready! I’ve gathered up the things I hear most often about the roasting, filling, and assembly process. Let’s clear up any last-minute confusion so your ravioli turn out perfectly!
Can I make the butternut squash filling ahead of time?
Oh, absolutely, and I totally recommend it! Getting the filling done ahead of time is my secret weapon for a stress-free weeknight dinner. The roasted squash filling, once mashed and combined with the cheese and yolk, keeps beautifully in an airtight container in the fridge for up to three days. Remember my huge warning, though: it has to be completely cool before you mix in the egg yolk and cheese!
The only thing I highly suggest waiting until the last minute is assembling the actual ravioli with the wrappers themselves. The moisture from the filling can start to soften the wonton wrappers if they sit assembled for too long before cooking. If you assemble them the morning of, that’s fine, but filling and sealing them the night before can sometimes lead to slight sticking or minor tears.
What if my ravioli fall apart when I drop them in the water?
Ugh, the dreaded ravioli blowout! This is almost always due to one of two things, and we can fix it easily next time. First, often the edges weren’t sealed well enough, and air was trapped inside. When that air hits the boiling water, it expands rapidly and bursts the pasta like a little water balloon.
Second situation: the filling was too wet! If you forgot to let the squash cool, or you didn’t mash it smooth enough, the excess moisture turns the wrapper thin and weak during boiling. Next time, make sure your filling is cool and firm, and press those edges with real conviction—use your fingers to squeeze out all the air before you seal.
Can I use dried sage instead of fresh sage for the sauce?
You *can*, but I really have to talk you out of it for the sauce! Dried sage just doesn’t have the same perfume or texture. When we use fresh sage in the brown butter, it crisps up beautifully, and the flavor infuses into that nutty butter. Dried sage tends to just turn greenish-brown and often tastes a little dusty or bitter when fried like that.
If you absolutely, positively cannot find fresh sage, skip the frying step for the sauce. Just gently melt the butter and stir in about half a teaspoon of dried sage with a tiny pinch of salt and a swirl of black pepper right at the end. It won’t have that incredible crispy texture—which is a huge loss—but at least the flavor will still be there. While you’re thinking about other warming flavors, you might want to check out my recipe for the ultimate fall spice latte to sip on while you cook!
Can I skip roasting the squash and use canned puree?
You can use canned puree in a pinch, yes, certainly! Canned puree saves you about 45 minutes of roasting time. However, you need to be much more careful with moisture content. Canned pumpkin or squash tends to hold more water than the baked flesh, even after you drain it a bit.
If you use canned puree, you might need to thicken it up slightly before mixing in the cheese and yolk. You could try stirring in an extra tablespoon of Parmesan or maybe half a teaspoon of breadcrumbs to help absorb excess moisture. If you don’t thicken it, get ready for potentially soggy ravioli due to the high water content in canned products. Roasting is always my #1 preferred method for the flavor boost alone!
Estimated Nutritional Snapshot for Irresistible Butternut Squash Sage Ravioli
While this dish is all about comfort and flavor—not counting calories, usually—I know some of you are curious about what exactly you’re eating when you devour three or four of these amazing little parcels! Since we’re dealing with homemade pasta and a butter sauce, it’s definitely a satisfying main course, not a light salad, that’s for sure!
Here is a rough estimate for one serving size, based on the recipe quantities. Please keep in mind that these numbers can change wildly depending on how thick you roll your dough or the specific brand of Parmesan cheese you choose to use. This is just a general guide!
- Serving Size: 1 serving (about 6-8 ravioli)
- Calories: Around 350
- Fat: Approximately 15 grams (a good chunk from that lovely brown butter!)
- Saturated Fat: About 6 grams
- Carbohydrates: Roughly 45 grams
- Fiber: About 6 grams (Thank you, squash!)
- Protein: Around 12 grams
- Sodium: Typically close to 350mg
It’s a really balanced meal overall, right? You get complex carbs from the pasta, healthy fiber and Vitamin A from the squash, and just enough fat from the butter to carry all that wonderful sage flavor. Enjoy every bite guilt-free!
Print
Butternut Squash Sage Ravioli
- Total Time: 85 min
- Yield: 4 servings 1x
- Diet: Vegetarian
Description
A recipe for homemade ravioli filled with sweet butternut squash and aromatic sage.
Ingredients
- 1 medium butternut squash (about 2 lbs)
- 2 tablespoons olive oil
- 1/2 teaspoon salt
- 1/4 teaspoon black pepper
- 1/4 cup grated Parmesan cheese
- 1 large egg yolk
- 1 tablespoon unsalted butter
- 10 fresh sage leaves
- 1 package wonton wrappers or fresh pasta dough
- 1/4 cup water for sealing
Instructions
- Preheat your oven to 400°F (200°C). Cut the butternut squash in half, scoop out the seeds, and place cut-side down on a baking sheet. Drizzle with 1 tablespoon of olive oil, salt, and pepper.
- Roast for 40 to 50 minutes, or until the squash is tender. Scoop the flesh into a bowl and mash until smooth. Let cool slightly.
- Mix the mashed squash with Parmesan cheese and egg yolk. This is your filling.
- If using wonton wrappers, lay out one wrapper. Brush the edges lightly with water. Place about 1 teaspoon of filling in the center.
- Place a second wrapper on top, aligning the edges. Press firmly around the filling to seal, removing any air pockets. Cut into squares using a pastry wheel or knife. Repeat with remaining filling and wrappers.
- Bring a large pot of salted water to a boil. Gently drop the ravioli into the boiling water. Cook for 3 to 5 minutes, or until they float to the top and the pasta is tender.
- While the ravioli cooks, melt the butter in a skillet over medium heat. Add the sage leaves and cook until crisp (about 1-2 minutes).
- Drain the cooked ravioli and toss gently with the sage butter sauce. Serve immediately.
Notes
- If you use fresh pasta dough, you will need a pasta machine or rolling pin to roll it thin before filling.
- You can substitute ricotta cheese for some of the Parmesan if you prefer a creamier filling.
- Save the reserved squash skin and seeds for composting or discard them.
- Prep Time: 30 min
- Cook Time: 55 min
- Category: Main Course
- Method: Baking and Boiling
- Cuisine: Italian-American
Nutrition
- Serving Size: 1 serving
- Calories: 350
- Sugar: 10
- Sodium: 350
- Fat: 15
- Saturated Fat: 6
- Unsaturated Fat: 9
- Trans Fat: 0
- Carbohydrates: 45
- Fiber: 6
- Protein: 12
- Cholesterol: 60
Keywords: butternut squash, ravioli, sage, pasta, vegetarian, homemade pasta, squash filling