If there is one universal truth in the kitchen, it’s this: anything tastes better when you can eat it while standing up. Seriously! Who wants to fuss with forks and plates when you have amazing flavors right there in your hand? That’s why I am absolutely obsessed with making these portable little pockets of joy. These are the easiest, flakiest, perfectly portioned handheld desserts you will ever meet. I whipped up a batch last weekend just because it rained unexpectedly, and honestly, the smell filled the whole house in the best way possible. Forget fussy tarts; these flaky pastries are my new weakness. Trust me when I say you need the recipe for these Irresistible Cherry Hand Pies A Sweet Treat Delight in your life right now!
Why You Will Crave These Irresistible Cherry Hand Pies A Sweet Treat Delight
I know there are a million dessert recipes out there, but these little guys just hit different. They are the perfect handheld snack for picnics or just sneaking one straight from the cooling rack. Here’s why you need to stop what you are doing and make these right now:
- They are perfectly portable—no plates required!
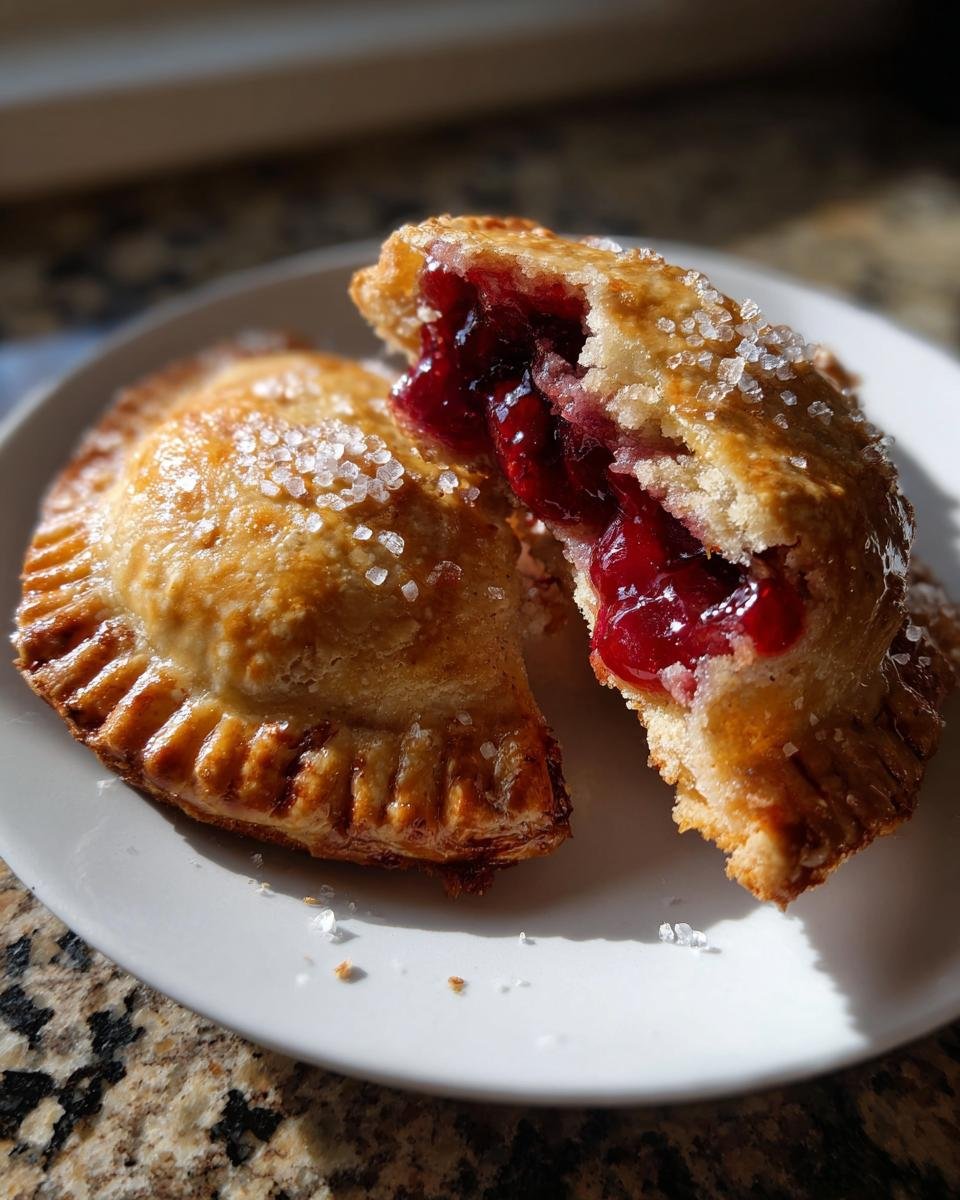
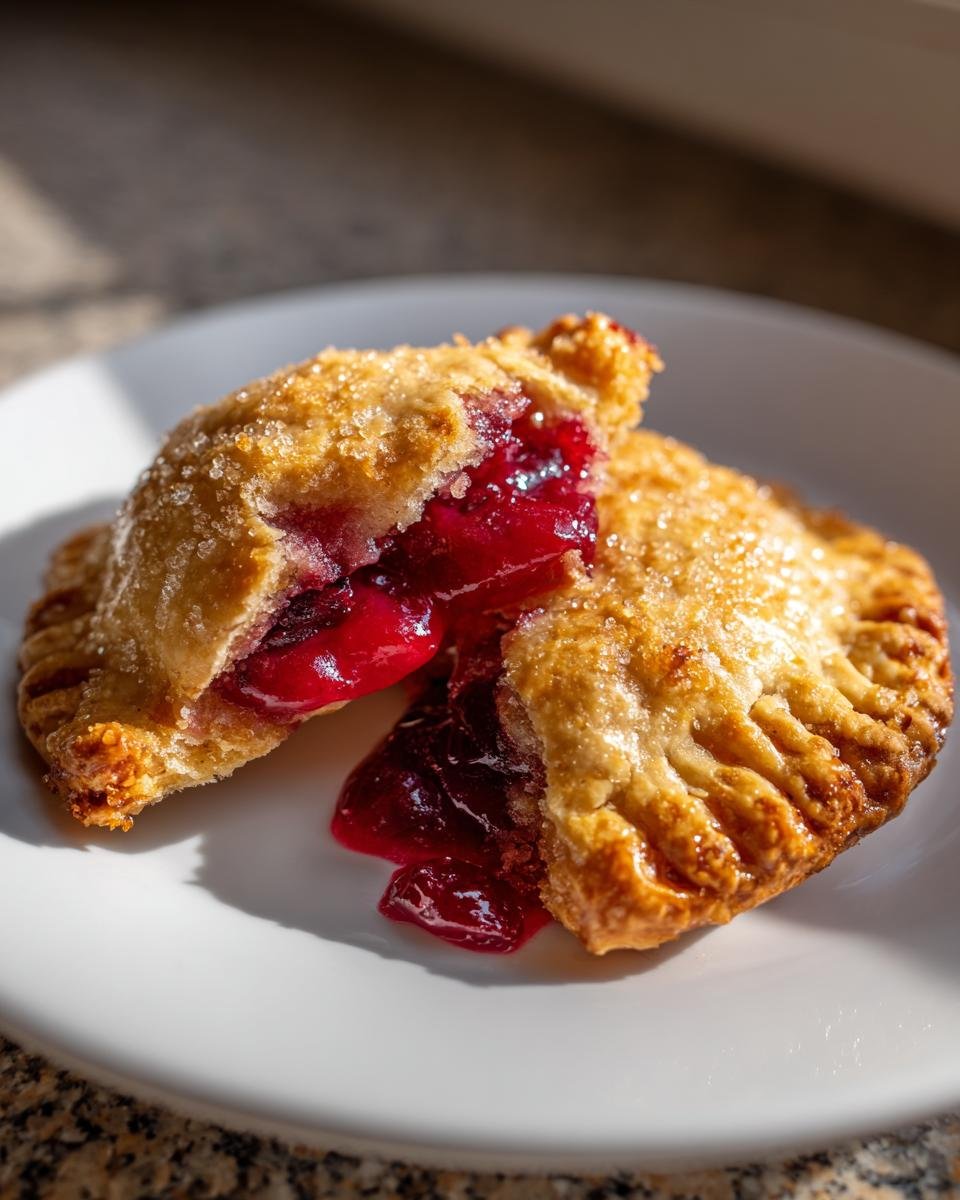
- That incredible balance of tart cherries against the sweet, flaky crust.
- The pastry comes together faster than you think!
- They look so beautiful drizzled with glaze or just sprinkled with sugar.
- They pass the official “eat three pieces before admitting they are ready” test.
Gathering Ingredients for Irresistible Cherry Hand Pies A Sweet Treat Delight
Okay, let’s talk supplies! Getting the right things ready is half the battle, especially for pastry where temperature is everything. We need two main groups of items: the crust stuff and the juicy cherry stuff. Just trust me on this: using really high-quality, ice-cold butter for the dough makes a world of difference in that flaky texture. You’ll get those crispy layers that just melt in your mouth! If you’re wondering how pastry gets that amazing lift, it’s the cold fat doing the work!
For the Flaky Pastry Dough
You’ll need 2 cups of flour and just a teaspoon of salt to start. Then comes the magic: 1 cup of unsalted butter that you must cube up and KEEP ICY COLD. Honestly, if the butter gets soft, stop and pop it back in the freezer! We finish the dough with about 1/2 cup of actual ice water. Don’t use tap water; it has to be frigid.
For the Sweet Cherry Filling
For the filling, grab 2 cups of fresh or frozen cherries—no need to thaw those frozen ones, by the way! We mix in 1/2 cup of granulated sugar and 2 tablespoons of cornstarch. That cornstarch is essential; it’s what thickens everything up so it doesn’t spill out everywhere. A tiny splash, 1 teaspoon, of lemon juice brightens up that cherry flavor beautifully.
For the Finishing Touches
To make them shine, we just need one egg, lightly beaten for the egg wash. And for that satisfying crunch when you bite in, pick up some coarse sugar for sprinkling on top. That’s it! Simple, right?
Making the Pastry for Your Irresistible Cherry Hand Pies A Sweet Treat Delight
Alright, this is where we earn those flaky layers! You absolutely cannot rush the pastry, but honestly, it doesn’t take up a ton of active time. First, take your flour and salt and just whisk them together. Now, here’s the part you have to focus on: cutting in that COLD butter. I use a pastry blender, but two knives or even my fingertips work in a pinch. You want to smash that butter into the flour until it looks like coarse crumbs, maybe some pieces the size of little peas. Don’t overwork it until it’s smooth, or the pies will be tough! Oops!
Once you have those beautiful crumbs, you slowly drizzle in the ice water, adding just enough until the dough grabs itself. Seriously, stop adding water the second you can form a shaggy ball. Over-mixing activates the gluten, and we want tender, not tough, pastry! Don’t knead it at all. Just divide that shaggy mass in half, flatten each half into a nice, neat disc—that surface area helps it chill faster—wrap them tight, and pop them into the fridge for at least 30 minutes. That chill time is crucial for the butter to firm up again before baking!
Preparing the Flavorful Cherry Filling
While your dough is chilling and getting all happy in the cold, we can whip up the most important part: that sweet, tangy cherry center! Get out a small saucepan and toss in your 2 cups of cherries—remember, frozen or fresh works fine here. Add your sugar and that tiny measure of lemon juice to wake everything up. Now, you need to sprinkle in those 2 tablespoons of cornstarch. Do a quick stir before you even turn on the heat, or you’ll get nasty cornstarch lumps, and nobody wants that!
Turn the heat to medium and start stirring. You have to keep things moving constantly! As it heats up, the cornstarch activates and the whole mixture will start to go from watery to thick and glossy. It only takes about five to seven minutes until it looks like the perfect jam consistency. This is where you get that beautiful sheen. Once it’s thick, pull it off the burner right away!

Here’s the biggest secret to keeping your crust flaky: you MUST let this filling cool completely before you try to assemble the pies. If you rush this and put warm filling on the cold dough, the butter melts instantly, and you end up with soggy bottoms. I usually make the filling first so it has time to chill down on the counter while I mess around with the pastry!
Assembling Your Irresistible Cherry Hand Pies A Sweet Treat Delight
Okay, the dough is chilled and the filling is totally cold—that means it’s glory time! Preheat your oven right now to 400 degrees Fahrenheit, or 200 Celsius if you’re using the metric system. We want a nice, hot oven to puff up that butter fast. Grab one of those chilled dough discs and set it on a surface dusted lightly with flour. Don’t go crazy with flour, or your pies will taste dry!
Roll that dough out gently until it’s thin, probably about an eighth of an inch thick. Then, you need to cut out your circles. I use a 4-inch round cutter, but you can honestly just trace a coffee mug if you need to—just make sure they are roughly the same size. You should get about four circles per dough disc.
Now, scoop your cooled cherry filling. You only need about one tablespoon right in the center of each circle. This next bit is important: brush the edges of the dough circle lightly with that beaten egg wash we made. This acts like glue! Fold the dough over to make that perfect half-moon shape. Then, take a fork and really press down firmly around the curved edge to seal it up tight. Press hard so those juices don’t try to escape later! Finally, cut one little slit right in the top of each pie to let the steam out. That vent keeps them from exploding when they bake!
Baking Tips for Perfect Irresistible Cherry Hand Pies A Sweet Treat Delight
Once those little beauties are sealed up and sitting on the parchment-lined sheet, it’s time for the final touches before they meet the heat. Make sure you fully brush the tops with any leftover egg wash. This gives them that gorgeous, professional-looking shine we all want! Then, sprinkle them generously with that coarse sugar. Baking those Irresistible Cherry Hand Pies A Sweet Treat Delight takes about 20 to 25 minutes total.
You’re looking for a deep, golden brown crust—that’s the visual cue that the pastry is done and flakiness has been achieved. Don’t pull them out too early! Once they look perfect, carefully move them to a wire rack to cool. Resist the urge to eat them immediately; they need just a few minutes so that filling sets up just right!

Ingredient Notes and Substitutions for Your Sweet Treat Delight
I love that this recipe is so flexible. Sometimes you just don’t have an hour to make everything from scratch, and that’s totally okay! If you’re short on time, don’t even sweat making the pastry. Just grab a package of refrigerated store-bought pie dough, unroll it, and use it exactly as you would my homemade version. It still turns out great!
Remember I mentioned that if you use frozen cherries you don’t need to thaw them? That’s because we cook them down anyway! Just toss them right into the saucepan when preparing the filling. If cherries just aren’t available, this recipe works wonderfully with almost any sturdy fruit. Think about blueberries or even chopped apples if you want something a little tarter. You can see some other fun pie variations here!
Storing and Reheating Irresistible Cherry Hand Pies A Sweet Treat Delight
Now, if you somehow manage to have leftovers—which is honestly impressive—storing them is super easy. Let them cool completely first, then pop them into an airtight container. They are perfectly happy sitting on the counter at room temperature for about two days. Trust me, they won’t last that long!
If you need to save them longer, the fridge is fine, but for reheating, skip the microwave! Microwaving makes that beautiful crust go soft fast. Instead, put them back in a 350-degree oven for about five to seven minutes. That quick blast of heat crisps the pastry right back up, and they taste like they just came out of the oven!
Frequently Asked Questions About These Hand Pies
Can I use dried cherries instead of fresh or frozen ones?
Oh, using dried cherries is tricky with this particular recipe! Since the filling doesn’t boil for very long, dried cherries won’t have enough time to plump up and get juicy. If you really want to use dried cherries, you should soak them in hot water or even some cherry juice for about 30 minutes before draining them really well and adding them to the sugar mixture. You might even need a little less cornstarch since they are already drier.
How long do these sweet treat delights last at room temperature?
Because we don’t have a ton of moisture or added preservatives in the pastry, the hand pies are best eaten within two days if you keep them stored airtight on the counter. If you need them to last longer than that, pop them in the fridge, but always warm them up before eating for the best taste and texture!
Can I freeze the assembled, unbaked hand pies?
Yes, you absolutely can! This is great for busy days. Assemble the pies completely—seal them tight—and lay them flat on a baking sheet. Pop that sheet in the freezer until the pies are rock solid. Then, transfer the frozen little pies to a freezer bag. When you are ready to bake, just put them straight from the freezer onto a baking sheet (no need to thaw!) and add about 10 to 15 extra minutes to your baking time. You can check out some other fun, easy mini-pie ideas here!
Do I have to use lemon juice in the filling?
Honestly, you don’t *have* to, but I highly recommend it! The recipe calls for just one teaspoon, and that tiny bit doesn’t make the pie taste like lemon at all. What it does is bring out the bright, natural tartness of the cherries. Without it, the filling can sometimes taste a little flat or too sweet, so trust me, keep that little splash in!
Print
Irresistible Cherry Hand Pies
- Total Time: 55 min
- Yield: 8 hand pies 1x
- Diet: Vegetarian
Description
Simple recipe for sweet cherry hand pies.
Ingredients
- 2 cups all-purpose flour
- 1 teaspoon salt
- 1 cup cold unsalted butter, cubed
- 1/2 cup ice water
- 2 cups fresh or frozen pitted cherries
- 1/2 cup granulated sugar
- 2 tablespoons cornstarch
- 1 teaspoon lemon juice
- 1 egg, beaten (for egg wash)
- 1 tablespoon coarse sugar (for topping)
Instructions
- Make the pastry: Combine flour and salt in a bowl. Cut in the cold butter until the mixture resembles coarse crumbs. Gradually add ice water until the dough just comes together. Divide the dough in half, form into discs, wrap, and chill for 30 minutes.
- Prepare the filling: In a saucepan, combine cherries, granulated sugar, cornstarch, and lemon juice. Cook over medium heat, stirring constantly, until the mixture thickens, about 5-7 minutes. Remove from heat and let cool completely.
- Assemble the pies: Preheat your oven to 400 degrees Fahrenheit (200 degrees Celsius). Roll out one dough disc on a lightly floured surface. Cut into 4-inch circles.
- Place one tablespoon of cooled cherry filling onto the center of each circle. Brush the edges with the beaten egg. Fold the dough over to form a half-moon shape and crimp the edges with a fork to seal. Cut a small slit in the top of each pie for venting.
- Place pies on a baking sheet lined with parchment paper. Brush the tops with the remaining egg wash and sprinkle with coarse sugar.
- Bake for 20-25 minutes, or until the crust is golden brown. Cool on a wire rack before serving.
Notes
- For a quicker crust, you can use store-bought refrigerated pie dough.
- If using frozen cherries, do not thaw them before cooking the filling.
- You can substitute other fruits like blueberries or apples for the cherries.
- Prep Time: 30 min
- Cook Time: 25 min
- Category: Dessert
- Method: Baking
- Cuisine: American
Nutrition
- Serving Size: 1 pie
- Calories: 350
- Sugar: 20
- Sodium: 150
- Fat: 18
- Saturated Fat: 11
- Unsaturated Fat: 7
- Trans Fat: 0
- Carbohydrates: 45
- Fiber: 2
- Protein: 5
- Cholesterol: 55
Keywords: cherry pies, hand pies, sweet treat, pastry, dessert, baked fruit