Oh, you know those nights? You’re staring into the fridge at 5:30 PM and you just *can’t* face another pot on the stove? That used to be me, constantly battling dirty dishes after a quick dinner. But I finally cracked the code for true weeknight magic, and seriously, this recipe saved my sanity. We’re talking about the Irresistible Sheet Pan Chicken Pitas With Herby Ranch. It’s everything you crave—tender, savory chicken, bright fresh herbs, and creamy sauce—all baked on one single pan. After years of searching for quick dinners that my family actually loves, this recipe became my go-to. It’s packed with flavor, and cleanup? Forget about it!
Why This Irresistible Sheet Pan Chicken Pitas With Herby Ranch Recipe Works
Listen, the beauty of this recipe isn’t just that it tastes unbelievable—it’s how little work the whole thing takes. I mean, a full, hearty dinner on the table in under 40 minutes? Yes, please! If you are tired of washing a million little bowls, you are going to want to see the magic of the sheet pan in action. This recipe is proof that simple doesn’t mean boring. We get maximum flavor payoff with minimum effort, which is exactly what I need after a long day.
We rely on a few key factors to make these pitas winners every single time:
- Our secret weapon for making this a true weeknight wonder is that we basically throw everything on one piece of parchment paper. Check out some of my other favorite everyday oven dinners that use this cleanup trick!
- The chicken gets perfectly roasted and slightly caramelized while you whip up that incredible herby ranch.
Quick Prep and Minimal Cleanup
Seriously, the prep time is a breezy 15 minutes. We toss the chicken, lay it out, and the oven does the heavy lifting. Because we use parchment paper lining the sheet pan, cleanup is reduced to just one bowl for the chicken seasoning and one bowl for that killer ranch. It’s a dinner miracle, I tell you!
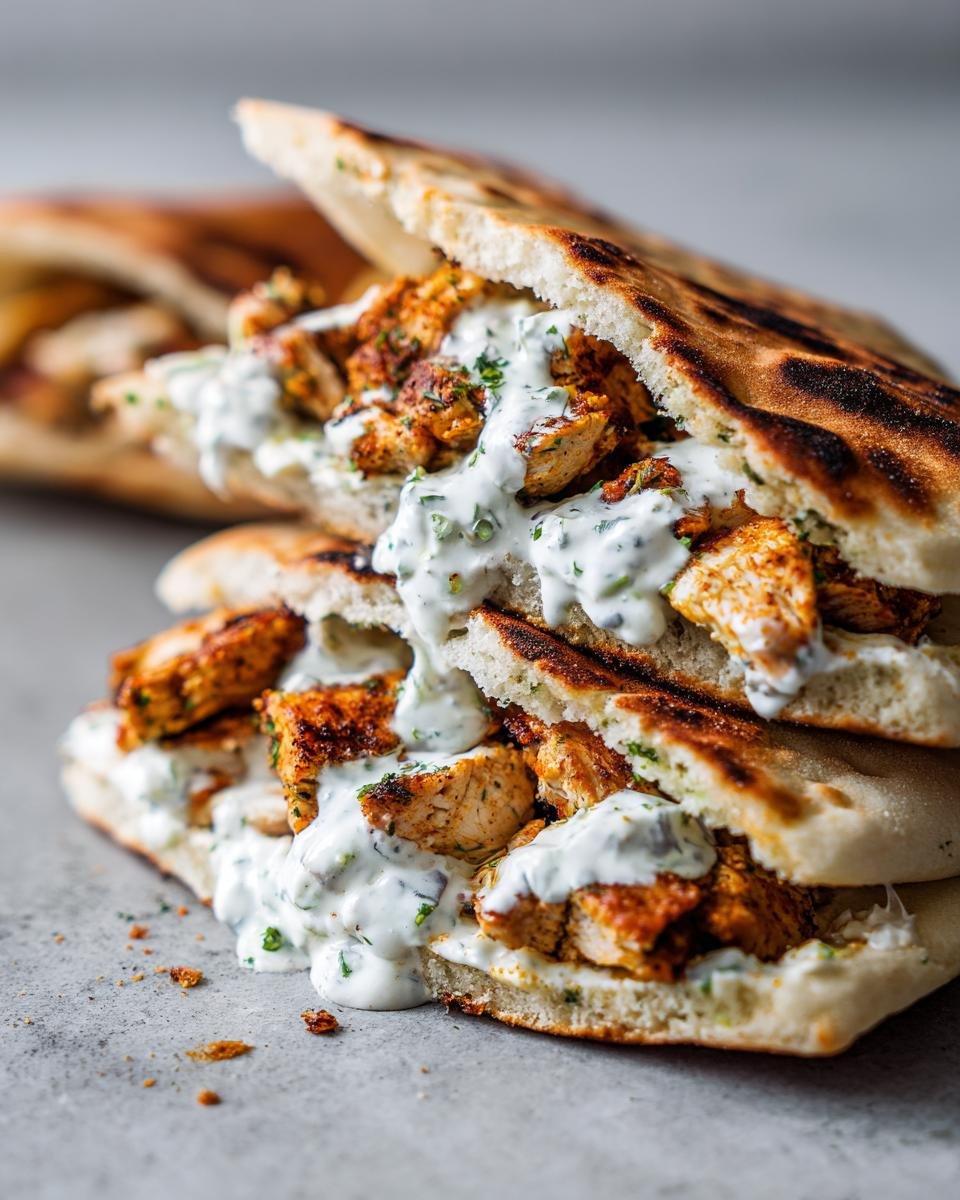
Here is a look at the finished product—just look at that beautiful char on the chicken!

Flavorful Seasoning for the Chicken
I keep the chicken seasonings super straightforward—paprika, oregano, garlic powder. That’s it! It sounds simple, but when those spices hit the hot oven, they toast up and create this savory coating on the chicken. It’s the perfect earthy, slightly smoky flavor base that lets the bright fresh herbs in the ranch really shine through. You get that bold taste without needing a complicated marinade.
Ingredients for Irresistible Sheet Pan Chicken Pitas With Herby Ranch
Getting the measurements right here is half the battle, and trust me, I’ve tried cutting corners, and it just doesn’t taste the same! Follow these amounts exactly, especially for the ranch, and you won’t be disappointed. If you’re looking for other ways to use simple spices, I have a great guide to making your own homemade taco seasoning that you should check out once you master this!
For the Sheet Pan Chicken
We need about 1.5 pounds of boneless, skinless chicken breasts, and the crucial part is cutting them into uniform 1-inch pieces. This ensures they all cook evenly in that short bake time! You’ll toss them with 1 tablespoon of olive oil, 1 teaspoon of paprika, 1 teaspoon of garlic powder, 1/2 teaspoon of dried oregano, 1/2 teaspoon of salt, and 1/4 teaspoon of black pepper.
For the Homemade Herby Ranch
This is where the real flavor bomb hides! We use 1 cup of plain Greek yogurt—this keeps it nice and light, which is a big plus! Mix that with 1/4 cup of mayonnaise. Then, load it up with the fresh stuff: 2 tablespoons of fresh dill, chopped, 1 tablespoon of fresh chives, chopped, and 1 tablespoon of fresh parsley, chopped. Finish it off with 1 teaspoon of lemon juice and a quick 1/4 teaspoon of salt and 1/4 teaspoon of pepper. Whisk it well!
Here is the beautiful, creamy Herby Ranch ready to go!
For Assembly and Toppings
Grab 6 medium pita breads—you’ll warm these up just before serving. For toppings, I always suggest having some shredded lettuce, a couple of sliced tomatoes, and thinly sliced red onion on hand. They add that perfect crunch and coolness against the hot chicken!
Mastering the Herby Ranch: Tips for the Best Herby Ranch
If the chicken is the workhorse of this meal, the Herby Ranch is absolutely the superstar. Honestly, you can use any plain yogurt for the base, but make sure you whisk everything until it’s gloriously smooth. I hate when you bite into a sauce and you get a big chunk of unmixed yogurt or a clumpy bit of seasoning—we are aiming for creamy dreaminess here. That Greek yogurt mixed with the mayo creates the perfect texture that holds up beautifully when draped over the hot chicken.
Here’s my little trick: Make the sauce the night before! I usually whip up a double batch because everyone wants extra for dipping veggies later. Keep it tightly covered in the fridge. It lets those fresh dill, chives, and parsley flavors really mingle and deepen overnight. It seriously tastes even better the next day. If you’re dreaming about dips and spreads, you might even want to check out some of my other obsession-worthy recipes, like how to make homemade Nutella, just for fun!
Herb Substitution Guidance for Your Herby Ranch
Now, I preach fresh herbs until I’m blue in the face, because that vibrant pop is what makes this ranch truly special. But hey, life happens! If you have a sudden craving on a Tuesday and your dill plant decided to quit on you, don’t panic.
You can definitely use the dried versions, you just need less of them. If you’re out of fresh dill, switch to 1 teaspoon of dried dill. For the chives, use 1/2 teaspoon of dried chives instead. And finally, use 1/2 teaspoon of dried parsley. Mix those dried guys in right at the beginning with the yogurt and mayo. It won’t have that sharp, fresh bite of the fresh stuff, but it will still be perfectly tasty, which is always the goal!
Step-by-Step Guide to Irresistible Sheet Pan Chicken Pitas With Herby Ranch
Now that we’ve got all our delicious components ready to go—the seasoning blend and that beautiful herby ranch waiting in the fridge—it’s time to make dinner! Keep your eye on the clock because this part flies by. Preheat your oven right now to 400 degrees Fahrenheit. Remember to line that baking sheet with parchment paper; nobody wants to scrub baked-on chicken bits, trust me! If you are looking for other hands-off dinners that cook right alongside your chicken, you should check out my guide on one-pot ranch chicken and rice recipes.
Preparing and Baking the Chicken
In a bowl, toss those 1-inch chicken pieces with the olive oil first until they get a little slick. Then sprinkle over your paprika, oregano, garlic powder, salt, and pepper. Make sure everything is coated—you want flavor on every side! Next, spread the chicken out onto your prepared sheet pan. This is important: they need to be in a single layer. If they are piled up, they steam instead of roast, and we want those nice caramelized edges!
Pop that pan into the preheated 400°F oven. They usually take between 18 and 20 minutes, but *you* must use a meat thermometer to check. Safety first, always! Pull them out when the internal temperature hits 165 degrees Fahrenheit. While they are cooking, go ahead and whisk up your ranch sauce if you haven’t already!
Warming Pitas and Final Assembly of Irresistible Sheet Pan Chicken Pitas With Herby Ranch
About five minutes before the chicken is done, it’s pita warming time. You can generally toss them right on the rack alongside the chicken for the last few minutes, or just give them a quick 15-second blast in the microwave if you’re in a huge rush. The goal is soft and pliable, not crunchy!
Once the chicken is rested for just a minute, it’s time to build your pitas. Gently open up each warm pita bread. Divide that gorgeous, seasoned chicken evenly among the six pitas. Then comes the best part: take a spoon and drizzle a generous amount of that homemade herby ranch right over the top. Don’t be shy with the sauce! Toss on your lettuce, tomatoes, and onions if you have them. Honestly, eating these fresh out of the oven is pure joy.
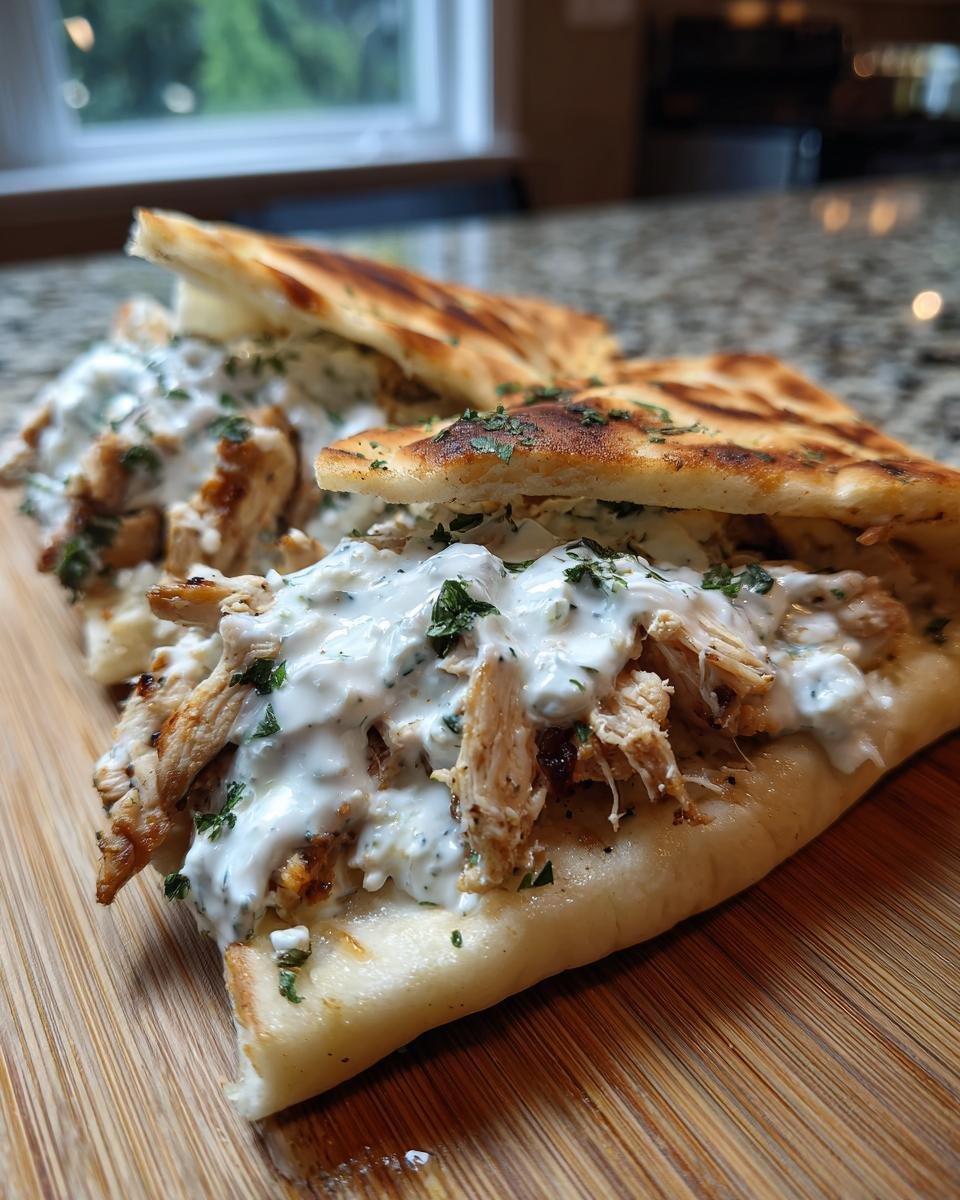
Here is a beautiful shot of the chicken and ranch coming together inside the pita.
Tips for Perfect Irresistible Sheet Pan Chicken Pitas With Herby Ranch Every Time
We’ve got the basic steps down, but I want to share a few little tricks I’ve picked up over the years that take these pitas from “good” to “Wait, can I have another one?” These aren’t in the main instructions because they are just little boosts of expertise to make sure you get restaurant-quality results at home. It’s all about the small details, you know? Also, I wanted to touch on an ingredient swap that makes a huge difference if you prefer a richer taste.
If you aren’t a huge fan of chicken breast, or if you just want something juicier, try swapping in chicken thighs! They have more fat, so they stay incredibly tender, even when roasted hard on a sheet pan. They might take an extra minute or two to fully cook through compared to the breasts, so always check the temperature! You can find some amazing ideas for using them in my guide to irresistible chicken thighs recipes if you want inspiration for another night!
Chicken Doneness Check
Look, I trust my instincts as much as the next home cook, but when it comes to chicken, we have to be safe. You absolutely must use a meat thermometer. Seriously, toss that flimsy little pop-up thing away! You need to check the thickest piece of chicken in the middle of the pan. It has to read 165°F internal temperature. If you don’t hit that mark, those few extra minutes will make the difference between safe chicken and dry, sad chicken. It’s the only surefire way to know you’ve cooked it perfectly without overdoing it.
Pita Warming Technique
You cannot serve these pitas straight out of the bag! They crack, they tear, and they just don’t wrap right. While you *can* warm them up quickly, my personal favorite way to get them perfectly soft and pliable—the kind that feels like it was just baked—is to wrap the whole stack of 6 pitas tightly in aluminum foil. Toss that foil packet onto the corner of the sheet pan for the last five minutes of the chicken’s cooking time. When you pull everything out, let it sit for just a minute or two, still wrapped. The retained steam makes them unbelievably soft and easy to open for filling!
Frequently Asked Questions About Irresistible Sheet Pan Chicken Pitas With Herby Ranch
I get so many questions about this recipe, which tells me I’m not the only one making it three times a week! These little pitas are so versatile, and people always want to know how to tailor them to their schedule or pantry. Don’t worry, I’ve got answers for all your burning kitchen queries right here. For those of you who need gluten-free options, always check out the wonderful easy gluten-free dinners I have posted, though usually substituting pitas for GF wraps works great here too!
Can I use pre-made ranch dressing instead of making the herby ranch?
Yes, you absolutely *can* use store-bought ranch if you’re in a major pinch, but here’s the thing: you’ll lose about 70% of the magic! The whole point of these Irresistible Sheet Pan Chicken Pitas With Herby Ranch is that incredible, bright, fresh flavor from the dill, parsley, and chives mixed into that creamy Greek yogurt base. Store-bought ranch is fine for dipping french fries, but for this dish, the homemade Herby Ranch really elevates the baked chicken. Take the extra five minutes; it’s worth every whisk!
What is the best way to store leftover baked chicken?
If you manage to have any leftover baked chicken—which is rare in my house—you need to treat it right. Make sure you let the chicken cool down completely before storing it. Then, place it in an airtight container. Because it’s already cut into small pieces, it dries out faster than a whole cut of meat, so try to use that leftover chicken within three days. When you reheat it, toss it in a non-stick skillet with just a tiny splash of water or broth and heat it up gently over medium-low heat. Microwaving it works too, but cover it loosely with a damp paper towel to keep it from getting tough!
Can I make this Irresistible Sheet Pan Chicken Pitas With Herby Ranch ahead of time?
Oh yes, this is one of my favorite make-ahead strategies! Don’t assemble the pitas until right before you eat—warm pitas get soggy fast when filled! But you can absolutely prep the main components in advance. First, the Herby Ranch? Make it up to a day ahead; it only improves! Second, season your chicken cubes, but wait to put them on the sheet pan. Store the seasoned chicken in a sealed bag in the fridge. Then, when dinner time rolls around, just preheat the oven, spread the pre-seasoned chicken out, and bake as directed. It turns a 35-minute meal into a 20-minute assembly job!
Storage and Reheating Instructions
Okay, so if you were lucky enough not to devour every single chicken pita in one sitting—which I find extremely hard to believe, but I’ll take your word for it—you need to know how to keep those leftovers tasting just as good tomorrow. The key here is separating the components. Don’t assemble the full pita sandwich and store it; the lettuce and ranch will turn everything into a soggy mess overnight, and nobody wants that tragedy!
For the cooked chicken, toss it into an airtight container right after it cools down a touch. You can keep this baked chicken safely in the refrigerator for up to three or maybe four days comfortably. It does dry out eventually because it’s cut small, so try to use it up within that window.
The Herby Ranch sauce? That’s a trooper! Because it’s yogurt-based and full of acid from the lemon juice, it lasts great in the fridge for at least five days. Just keep it sealed tight. The raw veggies like lettuce and tomato should be stored separately, uncovered, in the crisper drawer if you don’t plan on eating them in a day or two.
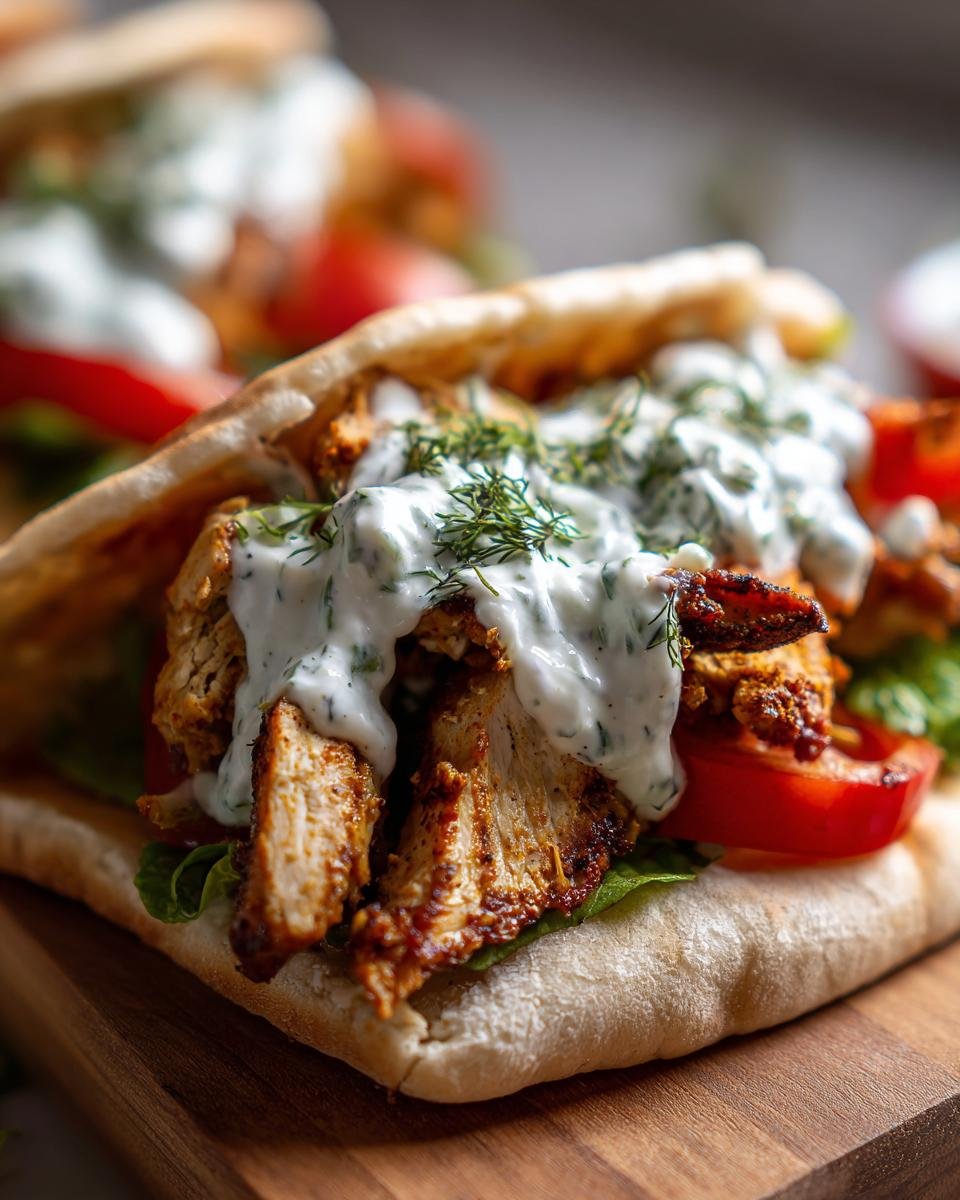
Here is a fully assembled pita, ready for that final bite!
Reheating the Baked Chicken
Reheating the chicken is where you have to be gentle. If you microwave it on high power, it’s going to get chewy instantly. I always use the stovetop method for this! Grab a small skillet over medium-low heat. Add just a teaspoon of water or a splash of chicken broth—this creates just enough steam to warm the chicken without blasting it with dry heat. Stir it gently for just a couple of minutes until it’s warm all the way through. That little bit of liquid keeps the edges soft, just like the day you baked it!
Getting the Pita Breads Right Again
The pita bread is tricky because you want it bendy, not crispy like a cracker, and definitely not soggy like stale bread. Do NOT microwave the pita bread alone! It gets hard and rubbery when it cools down post-microwave.
For the best texture, wrap the stack of pitas loosely in a damp paper towel—and I mean damp, not dripping wet! Microwave those wrapped pitas for about 20 seconds. They will steam up nicely and become flexible again. If you need to reheat just one, use a dry skillet over medium heat for about 15 seconds per side until it’s warm and pliable enough to fold around your reheated chicken and fresh ranch.
Nutritional Estimates for Sheet Pan Chicken Pitas
I always get asked about the nutrition breakdown for this recipe because it feels so satisfying, yet it clocks in surprisingly light! I pulled together the estimated numbers based on standard measurements of the chicken, yogurt, and whole wheat pitas. Knowing what you’re eating is important, especially when you find a recipe you want to make all the time. If you’re looking for other light options, you definitely need to look into my guide on low-calorie recipes for weight loss.
Remember, these figures are based strictly on the ingredients list, using just the chicken, spices, yogurt-based ranch, and an average pita. If you start loading up on extra cheese or fattier mayonnaise, those numbers will shift! But for a hefty, flavorful dinner, I think you’ll find these figures pretty excellent.
- Serving Size: 1 pita
- Calories: Around 450 per serving
- Protein: A whopping 45 grams (that’s all that lean chicken!)
- Total Fat: Approximately 15 grams (mostly healthy fats from the yogurt and a little mayo)
- Carbohydrates: Roughly 35 grams
- Fiber: About 3 grams
- Sodium: Around 550 mg
- Saturated Fat: Very low, only about 3 grams
We kept the sugars low by relying on the savory spices instead of sweet marinades. This recipe is truly a powerhouse meal that keeps you feeling full without weighing you down. Enjoy!
Share Your Irresistible Sheet Pan Chicken Pitas With Herby Ranch Creations
I’m so excited for you to try these pitas! Honestly, when you make these beauties, I want to know what you think. That’s the best part of sharing recipes, right? Telling me how it turned out for you and your family!
If you loved the speed and the flavor of that Herby Ranch and the baked chicken, please do head over and leave a quick rating on the recipe card. It helps other busy cooks find this life-saver of a dinner! And if you snap a picture of your final creation—maybe you went wild with the red onions, or you tried swapping in those chicken thighs I mentioned—please tag me! I absolutely adore seeing your kitchen creations come to life.
If you have any last-minute thoughts or questions after making them, don’t hesitate to reach out through my contact page. Happy cooking, and I hope these pitas make your weeknights just a little bit easier and a whole lot more delicious!
Print
Sheet Pan Chicken Pitas With Herby Ranch
- Total Time: 35 min
- Yield: 6 servings 1x
- Diet: Low Fat
Description
A simple recipe for baked chicken pieces served in pita bread with a homemade herby ranch sauce.
Ingredients
- 1.5 lb boneless, skinless chicken breasts, cut into 1-inch pieces
- 1 tablespoon olive oil
- 1 teaspoon paprika
- 1 teaspoon garlic powder
- 1/2 teaspoon dried oregano
- 1/2 teaspoon salt
- 1/4 teaspoon black pepper
- 6 medium pita breads
- 1 cup plain Greek yogurt
- 1/4 cup mayonnaise
- 2 tablespoons fresh dill, chopped
- 1 tablespoon fresh chives, chopped
- 1 tablespoon fresh parsley, chopped
- 1 teaspoon lemon juice
- 1/4 teaspoon salt
- 1/4 teaspoon black pepper
- Optional toppings: shredded lettuce, sliced tomatoes, sliced red onion
Instructions
- Preheat your oven to 400 degrees Fahrenheit (200 degrees Celsius). Line a baking sheet with parchment paper.
- In a medium bowl, toss the chicken pieces with olive oil, paprika, garlic powder, oregano, salt, and pepper until evenly coated.
- Spread the seasoned chicken in a single layer on the prepared baking sheet.
- Bake for 18 to 20 minutes, or until the chicken is cooked through and reaches an internal temperature of 165 degrees Fahrenheit (74 degrees Celsius).
- While the chicken bakes, prepare the herby ranch. In a small bowl, whisk together the Greek yogurt, mayonnaise, dill, chives, parsley, lemon juice, salt, and pepper until smooth.
- Warm the pita breads according to package directions (you can warm them in the oven during the last few minutes of chicken cooking or briefly microwave them).
- Assemble the pitas: Open each pita bread. Fill with a portion of the baked chicken. Top with a generous drizzle of the herby ranch sauce and your desired optional toppings.
Notes
- You can substitute chicken thighs for breasts if you prefer a richer flavor.
- Make the herby ranch sauce up to one day ahead and store it covered in the refrigerator.
- If you do not have fresh herbs, you can use 1 teaspoon of dried dill, 1/2 teaspoon of dried chives, and 1/2 teaspoon of dried parsley.
- Prep Time: 15 min
- Cook Time: 20 min
- Category: Dinner
- Method: Baking
- Cuisine: American
Nutrition
- Serving Size: 1 pita
- Calories: 450
- Sugar: 6
- Sodium: 550
- Fat: 15
- Saturated Fat: 3
- Unsaturated Fat: 12
- Trans Fat: 0
- Carbohydrates: 35
- Fiber: 3
- Protein: 45
- Cholesterol: 110
Keywords: sheet pan chicken, pita bread, herby ranch, easy dinner, baked chicken