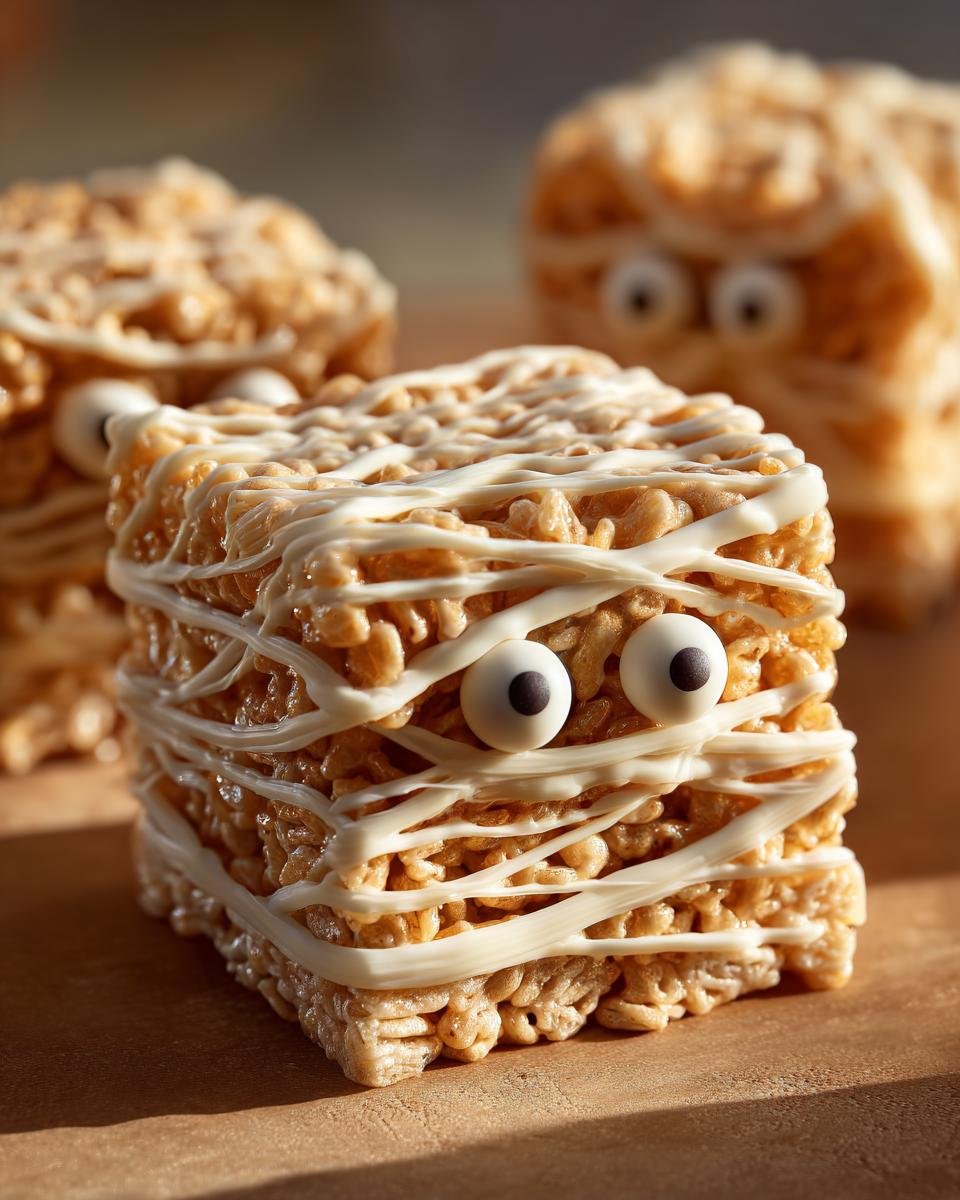
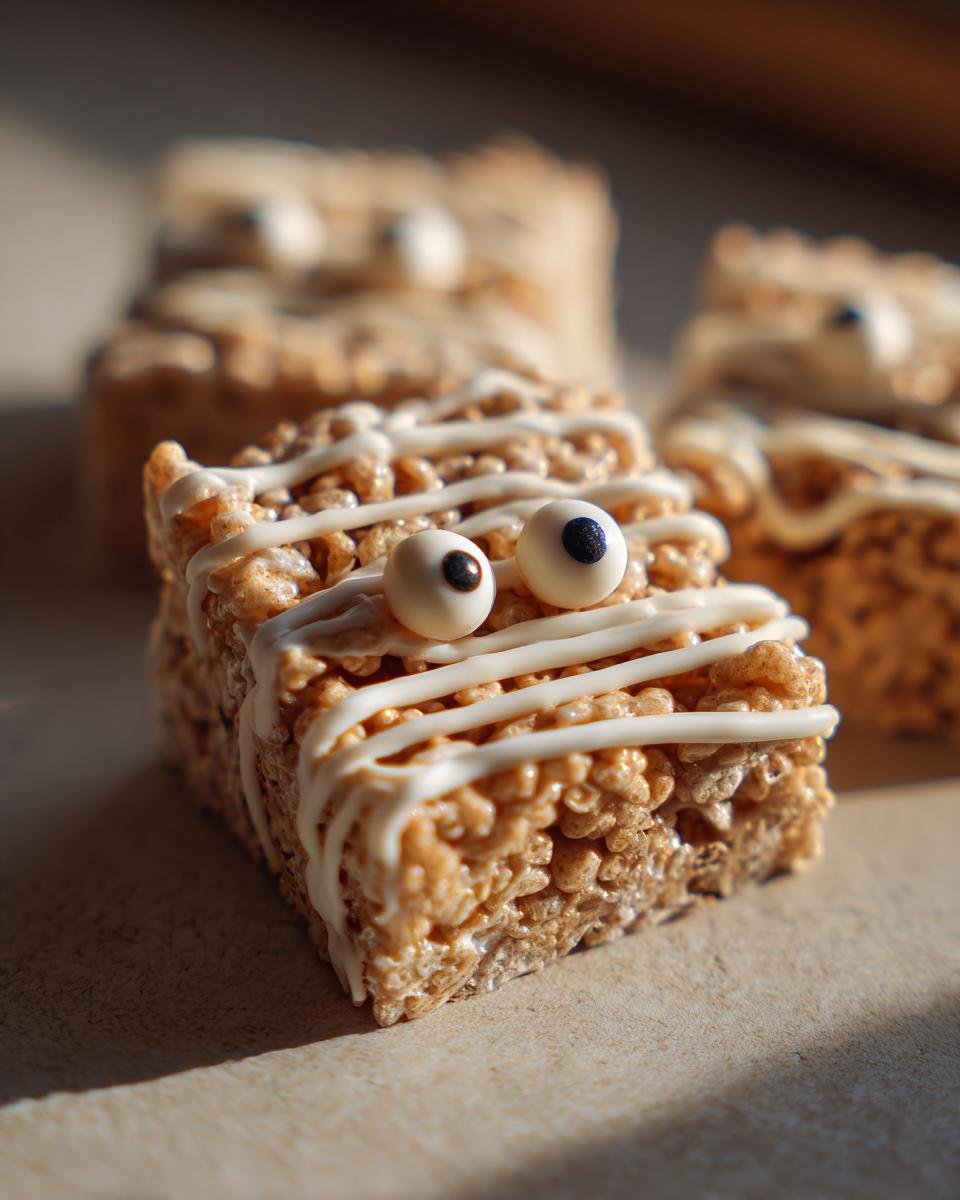
Okay, listen up! When Halloween rolls around, my house turns into a frenzy of spooky crafts and, naturally, treats. But who has time for complicated baking when there are costumes to finish? That’s why I rely on my ultimate easy-win recipe: the Spooktacular Halloween Mummy Rice Krispie Treats Recipe. They are no-bake, take like 15 minutes of *active* work, and the kids absolutely lose it when they see them.
I’m telling you, these little edible monsters are the perfect way to make fun, messy, spooky memories in the kitchen without needing your oven to be on all evening. They’re simple enough for a first-timer, but they look impressive enough to pass off as the star of the snack table. Trust me, you need these in your spooky rotation this year!

Why You Will Love This Spooktacular Halloween Mummy Rice Krispie Treats Recipe
I know you’re busy planning the perfect haunted house, so I designed these treats for maximum impact with zero fuss. This Spooktacular Halloween Mummy Rice Krispie Treats Recipe is going to save your busy holiday schedule, I promise!
- They are lightning fast! Seriously, active time is under twenty minutes, and they are completely no-bake, which is perfect for a hot kitchen night.
- The assembly is ridiculously fun. My kids fight over who gets to pipe the white chocolate mummy wrapping—it’s so simple, anyone can do it. Check out how I make fun, brightly colored versions here when you need a break from the spooky vibe.
- They look fantastic! They’re instantly recognizable as creepy, cute mummies, making them a guaranteed hit at any party.
- There are absolutely no weird ingredients needed, just pantry staples transformed into Halloween magic.
Essential Ingredients for Your Spooktacular Halloween Mummy Rice Krispie Treats Recipe
The beauty of the Spooktacular Halloween Mummy Rice Krispie Treats Recipe is that it uses ingredients you probably already have kicking around. We need the basics for that chewy, gooey base, and then just a few simple things to dress them up like tiny, edible pharaohs. Getting these amounts right ensures they hold their shape when you cut them, unlike those flat sheet versions that crumble everywhere.
If you wanted to try another amazing no-bake treat sometime soon, be sure to check out my recipe for Funfetti Oreo Icebox Cake—it’s totally different but just as easy!
For the Rice Krispie Base
- 6 cups Rice Krispies cereal (Don’t substitute this; the texture needs the classic crunch!)
- 1 package (10 oz) marshmallows (Use the full bag, please!)
- 3 tablespoons butter (I like salted, but unsalted works in a pinch)
For the White Chocolate Mummy Decoration
- 1/2 cup white chocolate chips (These melt down perfectly for the wraps)
- 1 teaspoon vegetable oil (This little bit of oil keeps the chocolate smooth and drizzle-able)
- Candy eyes (You need two per mummy, so make sure you have enough!)
Step-by-Step Instructions for the Spooktacular Halloween Mummy Rice Krispie Treats Recipe
Alright, let’s get down to the fun part! This whole process moves fast—the prep time is only about 15 minutes, and the actual melting/combining takes maybe five. So, have everything ready to go before you start stirring, because once those marshmallows melt, you gotta move! We’re locking in flavor and texture for this Spooktacular Halloween Mummy Rice Krispie Treats Recipe.
If you’re looking for another incredibly fast dessert, check out my 15-Minute Chocolate Marshmallow Pie. It’s just as quick!
Preparing the Cereal Base
- First thing, lightly grease a 9×13 inch pan. I usually use a smear of butter or even non-stick spray. You don’t want these sticking!
- Next, you’ll grab a large saucepan and melt your 3 tablespoons of butter over low heat. Keep that heat low; burnt butter smells terrible.
- Toss in the entire package of marshmallows and stir constantly until they are totally melted and super smooth. No lumps allowed!
- Take the entire pan right off the heat source—this is important so they don’t get tough. Quickly stir in your 6 cups of Rice Krispies cereal until everything is evenly coated.
- Press that sticky goodness firmly and evenly into your prepared pan. Here’s my tip: lightly grease your hands with butter or spray before you press them in. It makes handling the mixture so much easier and keeps your mummy treats from tearing! Let this set completely before you move on—patience here ensures clean squares later.
Creating the Mummy Wraps and Eyes
- Once cooled, cut the big slab into squares. You should get about 24 little mummy rectangles.
- Now for the topping! Put your white chocolate chips and that teaspoon of vegetable oil into a microwave-safe bowl. Microwave it in short bursts—like 30 seconds at a time—stirring well between each burst until it’s perfectly smooth and glossy.
- Transfer that melted chocolate into a piping bag. If you don’t have one, just snip a *very* tiny corner off a sturdy zip-top bag.
- Pipe those thin, back-and-forth lines across the top of each square. You are weaving a little mummy blanket over the treat!
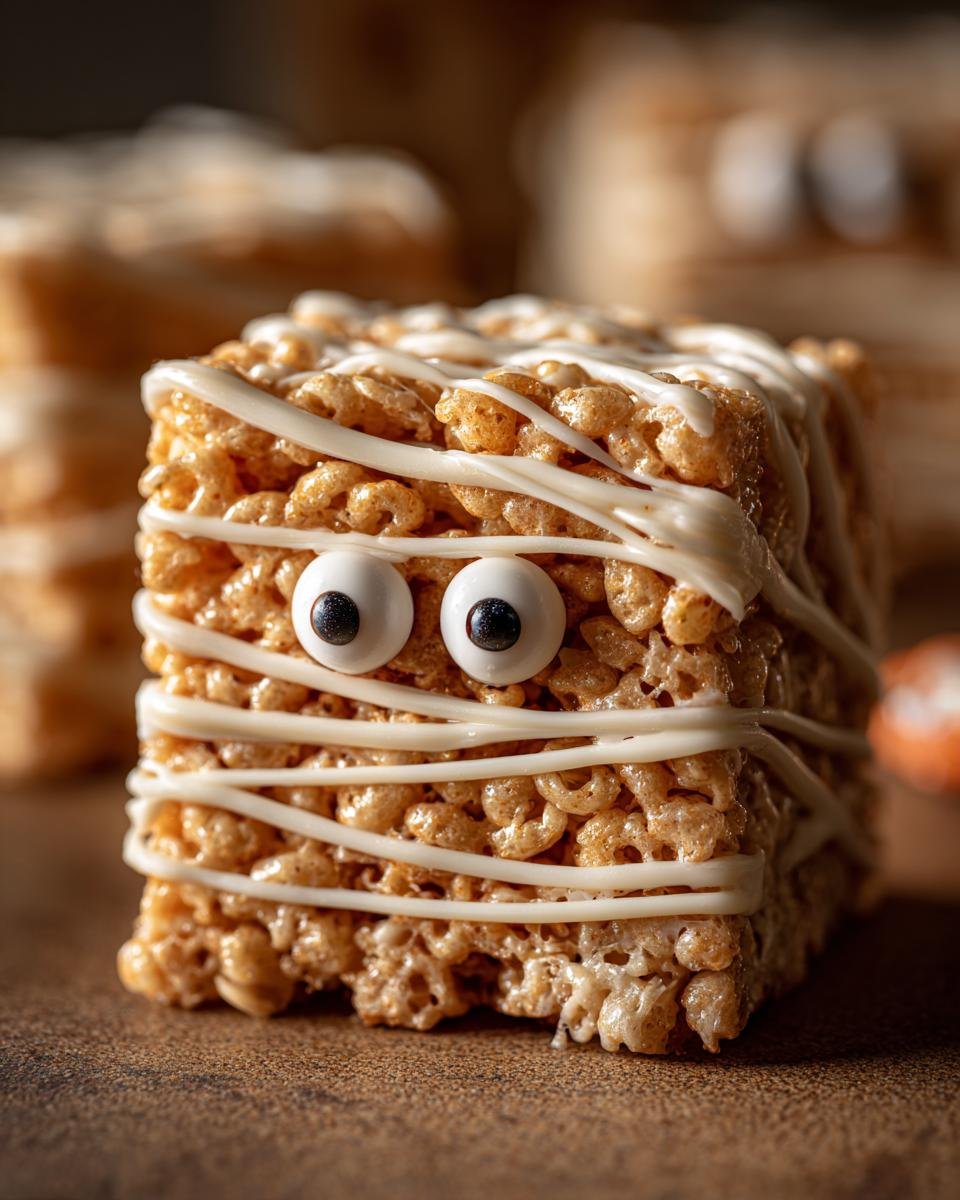
- While that chocolate is still wet—and this is critical—gently place two candy eyes onto each treat. If the chocolate hardens, the eyes won’t stick!
- Let everything sit until that white chocolate chocolate sets up. They are ready to spook everyone once the wraps are firm!
Expert Tips for Perfect Spooktacular Halloween Mummy Rice Krispie Treats Recipe Results
Listen, even for a no-bake treat, there are tricks to making these Spooktacular Halloween Mummy Rice Krispie Treats Recipe look professional instead of just messy. The biggest trouble spot is usually the chocolate, so let’s talk about that first.
When melting your white chocolate chips, go slow! White chocolate burns faster than you can say “Boo!” I never heat mine for more than 30 seconds at a time in the microwave, even after the first melt. If you stir and it looks stiff, add just another 10 seconds, not a full minute. That added vegetable oil really helps keep it flowing nicely, but too much will make it greasy and it won’t set hard.
To get those super clean cuts everyone admires, make sure your base is completely cool and firm before you even look at a knife. I often chill mine in the fridge for about 20 minutes to help it firm up just a touch more. When you press the chocolate mummy wrapping on, try not to press all the way through to the cereal base; just let it sit on top. For even better flavor next time, you might want to try adding a touch of peppermint extract to your white chocolate—it’s amazing! For more no-bake inspiration that truly delights, I always refer back to these four homemade truffle recipes for flavor pairing ideas.
Ingredient Notes and Substitutions for Your Mummy Treats
I get so many questions about tweaking recipes, and while I’m usually a stickler for the original, sometimes you just have to work with what you have! For the base, you can use salted or unsalted butter, but if you use unsalted, maybe add a tiny pinch of salt to that marshmallow mixture just to balance the sweetness. Don’t mess with the cereal though; Rice Krispies are necessary for the right density. If you use a crisper cereal, your treats will be too crunchy!
When it comes to the white chocolate, you can definitely swap it for milk chocolate if you prefer, but you’ll need to adjust the oil slightly. Milk chocolate tends to be a bit softer when it sets. If you can’t find the little candy eyes at your local craft store, don’t panic! You can make DIY eyes using a dab of dark chocolate or even black decorating gel—it looks spooky either way.
If you’re cleaning up after all this sticky fun, I swear by my homemade cleaning sprays to cut through the marshmallow residue quickly!
Storage and Make-Ahead for Your Spooktacular Halloween Mummy Rice Krispie Treats Recipe
You know I always tell you to make treats ahead if you can, and yes, you absolutely can prep these little guys early! The wonderful thing about the Spooktacular Halloween Mummy Rice Krispie Treats Recipe is that no baking means very little risk of things drying out quickly. I usually make mine the day before the party. They hold up beautifully at room temperature for about three days, no problem.
The key is keeping them sealed up tight. Once the white chocolate mummy wrapping is fully hard, stack them in a single layer if you can, or put parchment paper between the layers. An airtight container is your best friend here. If they start to look a *little* soft, pop them in the fridge for 15 minutes before serving—they firm right back up. For more no-bake storage tips, check out how I keep my No-Bake S’mores Bars fresh!
Variations on the Spooktacular Halloween Mummy Rice Krispie Treats Recipe Theme
Once you master the basic Spooktacular Halloween Mummy Rice Krispie Treats Recipe, you can totally play around with the decorations! I love switching things up to keep the kids guessing year after year. The base is so fantastic that all you really need to change is the chocolate drizzle.
For a spooky color pop, try adding a few drops of gel food coloring to your melted white chocolate before you pipe it! Orange or bright green chocolate makes these look extra eerie. You could even stripe the chocolate with a thin line of melted dark chocolate for a deeper mummy look.
Another fun idea is to swap out the standard Rice Krispies for a different cereal, just for fun! Using something like Cheerios or even a chocolatey cereal will change the texture slightly, but it still works well. If you want something truly wild for a different Halloween dessert, check out my recipe for Spooky Dirt Cake Cups—it’s layered and different!
And don’t forget the sprinkles! Before the white chocolate is completely dry, sprinkle on a few little black or purple nonpareils for an extra bit of flair. They look like tiny bits of cobweb dust, and honestly, everything is better with sprinkles, right?
Frequently Asked Questions About This Recipe
I always get questions when I post these, because let’s be honest, Rice Krispie treats look simple but need a little nudge to be perfect! Here are a few things people always ask me about making these fun Halloween snacks.
Can I make these Spooktacular Halloween Mummy Rice Krispie Treats ahead of time?
Yes, you really can! They are one of my favorite make-ahead snacks for parties. Once the white chocolate mummy wraps are totally firm—give them at least an hour at room temperature—store them in an airtight container. They stay completely fresh and chewy for a good two to three days. If your kitchen is super warm, sometimes a quick 15 minutes in the fridge helps everything stay firm, especially the eyes!
What is the best way to get the mummy wrapping lines thin?
You need a tiny hole for a thin line. If you are using a piping bag, use the absolute smallest tip you have, or better yet, just snip the corner off a heavy-duty plastic zip-top bag with tiny, tiny scissors—I mean just a pinprick at first! If you don’t have a bag at all (which happens to us all!), take a regular fork, dip the two center tines into the melted chocolate, and gently flick the chocolate back and forth over the top of the treat. It creates a messy-but-authentic bandage look!
Are these treats safe for people with gluten sensitivities?
This is a super important question! The original Rice Krispies cereal, the standard kind you buy in the box, *does* contain malt, which comes from barley, so they are not gluten-free for many people. If you need to make these safe for gluten-sensitive friends, you absolutely must swap out the cereal for a certified gluten-free puffed rice cereal. They work exactly the same way, so no need to change the butter or marshmallow steps at all. They turn out just as chewy! For other quick fixes and treats, you should definitely look at my 15-Minute No-Bake Cookies recipe!
Estimated Nutritional Snapshot for Spooktacular Halloween Mummy Rice Krispie Treats Recipe
When you are making fun holiday snacks like our Spooktacular Halloween Mummy Rice Krispie Treats Recipe, the nutrition isn’t usually the first thing you look at, but it’s good to have an idea!
Keep in mind these are just estimates based on standard ingredients like butter and brand-name cereal. Sugar content is what you’d expect from a marshmallow and white chocolate treat, so enjoy them as the occasional spooky indulgence!
- Serving Size: 1 treat
- Calories: 150
- Sugar: 15g
- Total Fat: 5g
- Carbohydrates: 25g
- Protein: 2g

Spooktacular Halloween Mummy Rice Krispie Treats
- Total Time: 20 min
- Yield: 24 treats 1x
- Diet: Vegetarian
Description
Simple, fun Rice Krispie treats decorated like mummies for Halloween.
Ingredients
- 6 cups Rice Krispies cereal
- 1 package (10 oz) marshmallows
- 3 tablespoons butter
- 1/2 cup white chocolate chips
- 1 teaspoon vegetable oil
- Candy eyes
Instructions
- Lightly grease a 9×13 inch pan.
- In a large saucepan over low heat, melt the butter.
- Add the marshmallows and stir until completely melted and smooth.
- Remove the pan from the heat. Stir in the Rice Krispies cereal until evenly coated.
- Press the mixture evenly into the prepared pan. Let cool completely.
- Cut the cooled mixture into squares.
- Melt the white chocolate chips with the vegetable oil in a microwave-safe bowl in 30-second intervals, stirring until smooth.
- Transfer the melted white chocolate to a piping bag or a zip-top bag with a very small corner snipped off.
- Pipe thin, back-and-forth lines across the top of each square to resemble mummy wrappings.
- Before the chocolate sets, place two candy eyes onto each treat.
- Allow the chocolate to set before serving.
Notes
- For easier handling, lightly grease your hands when pressing the mixture into the pan.
- If you do not have a piping bag, use a fork to drizzle the melted chocolate.
- Prep Time: 15 min
- Cook Time: 5 min
- Category: Dessert
- Method: No Bake
- Cuisine: American
Nutrition
- Serving Size: 1 treat
- Calories: 150
- Sugar: 15
- Sodium: 120
- Fat: 5
- Saturated Fat: 3
- Unsaturated Fat: 2
- Trans Fat: 0
- Carbohydrates: 25
- Fiber: 0
- Protein: 2
- Cholesterol: 5
Keywords: Halloween, Rice Krispie Treats, Mummy Treats, No Bake Dessert, Kids Snack