
Things Sure Have Changed with Deviled Eggs!
Okay, so let’s talk about deviled eggs for a minute. Remember those platters at every single potluck and holiday gathering when we were kids? They were *everywhere*! And honestly? Sometimes they were… a little sad. Dry yolks, weird textures, just not super exciting. But let me tell you, things sure have changed! Deviled eggs have had a serious glow-up over the years, and I’ve been right there with them, experimenting and tweaking until I found the absolute best, most reliable, and ridiculously simple recipe.
I’ve been making deviled eggs for what feels like forever. My grandma had her way, my mom had hers, and I’ve borrowed bits and pieces from both, plus added my own little touches. It’s funny how something so simple can bring back so many memories, isn’t it? Picnics, backyard BBQs, baby showers… deviled eggs were always there. This recipe is my go-to now. It takes those humble eggs and turns them into something truly craveable. It’s not fancy, it’s just *good*. The kind of good that disappears from the plate before you even get a chance to grab a second one!

Why You’ll Love How Things Sure Have Changed
So, why is *this* the deviled egg recipe you need in your life? Well, besides the fact that things sure have changed for the better, this recipe is just plain fantastic. It’s:
- Seriously Quick: We’re talking minimal hands-on time here. You can whip up a batch while the rest of dinner is cooking or before guests arrive.
- Foolproof Steps: I’ve ironed out all the kinks. No weird peeling disasters (mostly!), no lumpy filling. Just straightforward goodness.
- Pure Classic Flavor: This isn’t some fancy-pants version with weird add-ins (unless you want to!). It’s that timeless, perfectly balanced deviled egg taste we all know and love.
- Party Perfection: Need an appetizer that everyone devours? This is it. They’re always the first to go, I promise!
It’s just a solid recipe that delivers every single time. Easy, delicious, and always a crowd-pleaser. What’s not to love?
Ingredients for How Things Sure Have Changed
Alright, let’s gather our goodies! The beauty of this recipe is that you probably have most of these things hanging out in your fridge or pantry already. We’re not getting fancy here, just sticking to the absolute essentials that make these little bites so darn good. Here’s what you’ll need:
- 12 large eggs (gotta start with the basics!)
- 1/2 cup mayonnaise (your favorite kind is fine!)
- 1 tablespoon Dijon mustard (that little bit of tang is key)
- 1 teaspoon white vinegar (just a splash helps balance everything)
- Salt and black pepper to taste (don’t be shy, season it up!)
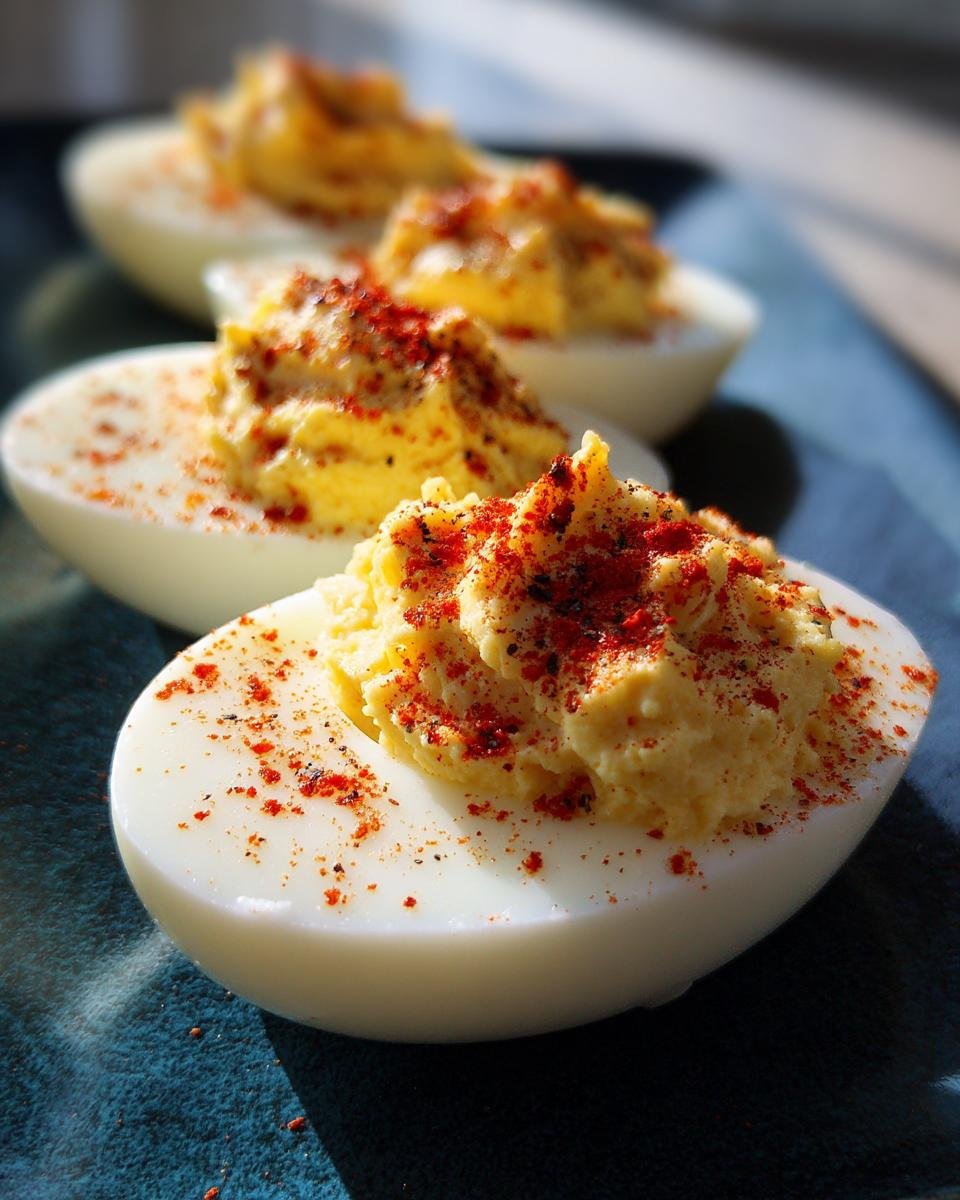
- Paprika for garnish (for that classic sprinkle on top)
That’s it! Simple, right? These basic ingredients, when treated right, turn into pure deviled egg magic. Trust me on this one!
Equipment for Making How Things Sure Have Changed
You don’t need a ton of fancy gadgets for these deviled eggs, which is another reason why I love this recipe! Just grab a few basics from your kitchen.
- A large saucepan for boiling those eggs.
- A medium bowl to mix up that creamy filling.
- A fork or a potato masher works perfectly for mashing the yolks.
- And either a piping bag (if you want them to look super pretty!) or just a regular spoon for filling the egg white halves.
See? Nothing complicated. You’re probably already set!
How to Prepare How Things Sure Have Changed
Okay, this is where the magic happens! Making these deviled eggs is super straightforward, but following these steps will make sure you get perfect results every single time. We’re going from humble egg to delicious appetizer with just a few simple actions. Don’t overthink it – just follow along, and you’ll be a deviled egg pro in no time!
It starts with the eggs, of course. Getting them cooked just right is key to easy peeling and that lovely, bright yellow yolk we’re aiming for. Then we whip up the filling, which is where you can really make it your own (though I highly recommend sticking to the classic for the first go!). Finally, we assemble these little beauties and let them chill out for a bit so all those flavors can meld together. Ready? Let’s do this!
Step 1: Perfecting the Eggs
First things first, let’s get those eggs boiled. Place your dozen large eggs carefully in your large saucepan. Now, cover them with cold water – make sure it’s about an inch above the tops of the eggs. Bring that water to a rolling boil, and as soon as it hits that point, turn off the heat immediately! Pop a lid on the pan and just let them hang out there for about 10 to 12 minutes. This gentle cooking helps prevent that green ring around the yolk, which nobody wants!
Once the time is up, carefully drain all that hot water away. This next part is crucial for easy peeling: dump those eggs into an ice bath right away! A bowl full of ice water shocks the eggs and helps the shell separate from the egg white. Let them cool completely in there, which usually takes about 10-15 minutes. Trust me, this step is a game-changer for avoiding frustrating peeling struggles!
Step 2: Crafting the Creamy Filling
Now that your eggs are cool, it’s time to peel them. Do this gently! Once peeled, grab a sharp knife and cut each egg in half lengthwise. You’ll end up with two perfect little boats. Carefully scoop out those beautiful yellow yolks and put them into your medium bowl. The egg white halves? Set those aside on your serving platter or a plate for now.
Add your mayonnaise, Dijon mustard, and white vinegar to the bowl with the yolks. Now, grab your fork (or potato masher!) and start mashing. Really get in there and break up those yolks. Mix everything together until it’s super smooth and creamy. This is where you’ll add your salt and black pepper. Start with about 1/4 teaspoon of each and taste it! You might need a little more depending on your taste and the mayo you used. Make it taste *good* right now, because this is the flavor of your deviled eggs!
Step 3: Assembling and Finishing
Alright, we’ve got our perfectly cooked whites and our delicious, creamy filling. It’s assembly time! You can keep it simple and just spoon the yolk mixture back into each egg white half. If you want to get a little fancy, scoop the filling into a piping bag fitted with a star tip and pipe it in – it looks really pretty! Just make sure you get a generous dollop in each one.
Once they’re all filled, grab your paprika and give each deviled egg a little sprinkle on top. This adds a pop of color and that classic deviled egg look. The hardest part is waiting! These need to chill in the refrigerator for at least 30 minutes. This lets everything firm up and all those lovely flavors really come together. Pop them in an airtight container if you’re not serving them right away. And that’s it! You’ve made delicious, classic deviled eggs!
Tips for Success with How Things Sure Have Changed
Okay, you’ve got the basic steps down, but here are a few little tricks I’ve picked up over the years to make sure your deviled eggs are absolutely perfect every single time. These aren’t complicated, just helpful hints to get you the best results!
First off, believe it or not, slightly older eggs (like, a week or two old) actually peel way easier than super fresh ones. Something about the pH changes as they age makes the membrane less likely to stick to the shell. So, if you can plan ahead, grab your eggs a little early! Also, when you’re mixing that filling, don’t go crazy. You want it smooth, but overmixing can make it a little gummy. Just mash and stir until it’s combined and creamy. And seriously, don’t skip the chilling! That time in the fridge lets the flavors really develop and makes the filling nice and firm. It’s worth the wait!
Frequently Asked Questions About How Things Sure Have Changed
Got questions about making these amazing deviled eggs? Totally normal! Here are a few things people often ask, and my best answers to help you out.
Q: Can I make these deviled eggs ahead of time for a party?
A: Absolutely! You can boil and peel the eggs the day before, and even make the filling. Just store the egg white halves and the filling separately in airtight containers in the fridge. Fill them right before serving for the freshest look and taste. It makes party prep so much easier!
Q: How long do these deviled eggs last in the refrigerator?
A: If stored properly in an airtight container, they’re best eaten within 2 days. After that, the texture can start to change a bit, and you want them to be at their prime!
Q: Can I use a different type of mustard instead of Dijon?
A: You definitely can, but it will change the flavor profile. Dijon gives that specific tangy kick that works so well in classic deviled eggs. Yellow mustard will give you a more traditional picnic flavor, and spicy brown mustard will add some heat. Experiment if you like, but for this specific recipe, Dijon is my go-to!
Estimated Nutritional Information for How Things Sure Have Changed
Okay, so while we’re mostly focused on deliciousness here, sometimes folks like to know what they’re getting into! Based on the ingredients in this recipe, here’s a rough idea of the nutritional breakdown for about two of these delicious deviled eggs. Keep in mind, this is just an estimate! The exact numbers can totally change depending on the specific brands of mayo, mustard, and even the size of your eggs. But it gives you a ballpark!
- Serving Size: 2 deviled eggs
- Calories: Around 150
- Fat: About 12g
- Protein: Roughly 8g
- Carbohydrates: About 2g
See? They pack a little punch of protein and healthy fats. Not too shabby for such a tasty little bite! Just remember these are estimates, not exact science.
Share Your Experience with How Things Sure Have Changed
Alright, you’ve read the recipe, you’ve seen the steps… now it’s your turn! Are you going to give these classic deviled eggs a try? I’d absolutely LOVE to hear how they turn out for you! Did you make them for a party? Just for yourself (no judgment here!)? Leave a comment below and let me know! And hey, if you snapped a pic, tag me on social media so I can see your beautiful creations!
Print
Things Sure Have Changed: Amazing Deviled Eggs
- Total Time: 45 minutes
- Yield: 24 deviled eggs 1x
- Diet: Vegetarian
Description
A simple and tasty recipe for deviled eggs.
Ingredients
- 12 large eggs
- 1/2 cup mayonnaise
- 1 tablespoon Dijon mustard
- 1 teaspoon white vinegar
- Salt and black pepper to taste
- Paprika for garnish
Instructions
- Place eggs in a large saucepan. Cover with cold water by 1 inch. Bring to a boil. Turn off heat, cover, and let stand for 10-12 minutes.
- Drain water and immediately transfer eggs to an ice bath. Let cool completely.
- Peel eggs and cut in half lengthwise.
- Carefully remove yolks and place in a medium bowl.
- Add mayonnaise, mustard, vinegar, salt, and pepper to the yolks. Mash with a fork until smooth and creamy.
- Spoon or pipe the yolk mixture back into the egg white halves.
- Garnish with paprika.
- Chill for at least 30 minutes before serving.
Notes
- For a smoother filling, use a food processor to blend the yolk mixture.
- You can add other seasonings like garlic powder, onion powder, or hot sauce to the filling.
- Store deviled eggs in an airtight container in the refrigerator for up to 2 days.
- Prep Time: 20 minutes
- Cook Time: 15 minutes
- Category: Appetizer
- Method: Boiling and Mixing
- Cuisine: American
Nutrition
- Serving Size: 2 deviled eggs
- Calories: 150
- Sugar: 1g
- Sodium: 180mg
- Fat: 12g
- Saturated Fat: 3g
- Unsaturated Fat: 8g
- Trans Fat: 0g
- Carbohydrates: 2g
- Fiber: 0g
- Protein: 8g
- Cholesterol: 190mg
Keywords: deviled eggs, appetizer, egg recipe, party food